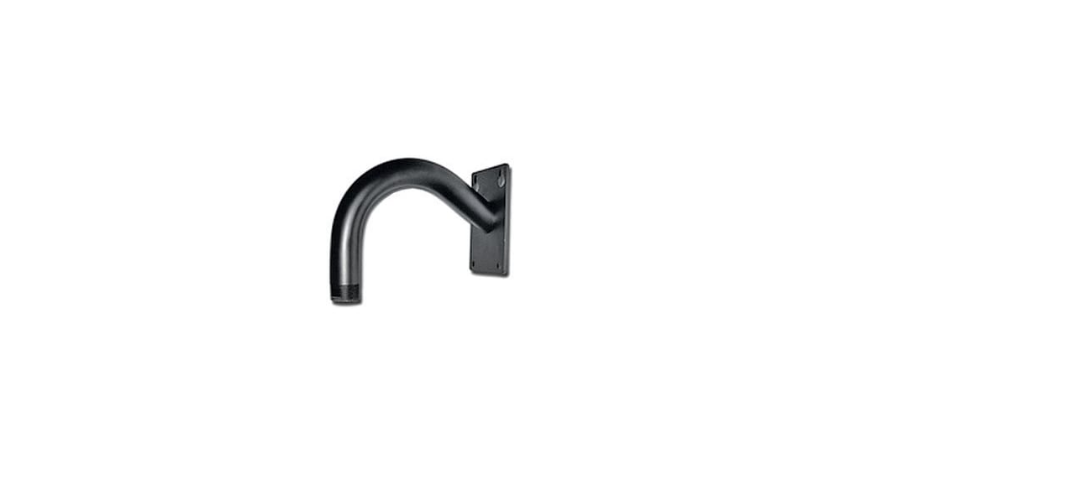
Vaddio 998-9300-000 Wall Mounting Kit User Guide

Installation (Curved Wall Mount 998-9300-000 Only)
- Carefully unpack the box, inspect the contents for damage, and verify that all components are included.
- Attach the mount to the wall, using the appropriate fasteners (not included) for the mounting surface.
- Route power and video leads through the mount by pulling enough length to reach the housing.
- Attach the dome 1-½” NPT fitting to the wall mount and lock it into place with the provided 1-½” NPT lock nut.
- Refer to the housing instruction sheet to complete the installation (see Figure 1)

Figure 1:
Curved Wall Mount for Indoor and Outdoor Pendant Domes Vaddio Part # 998-9300-000 Curved Wall Mount comes with: One (1) Curved Wall Mount (No other screws or accessories are included) Dimensions: Mounting Plate (H x W) – 7.5” (19.05cm) x 4.5” (11.43cm) Distance from Wall – 10.5” (26.67cm) to center of pipe Height – 9.5” (24.13cm)
Installation (Curved Wall Mount and Pole Mount Kit – 998-9300-001)
- Carefully unpack box, inspect contents for damage and verify that all components are included.
- Feed the stainless bands through the slots and attach the mount to the pole firmly by tightening the bands with a screwdriver (see Figure 2).
- Install the Curved Wall Mount by attaching the wall mount to the Pole Mount with the bolts provided. Make sure that the mount is level and tighten all four (4) bolts firmly. Run the cabling, pulling enough length through to reach into the housing without strain.
- Seal the wire passage with silicone sealant (not included). Provide a drip loop if the cable entry is from the top.
- Attach the dome 1-½” NPT fitting to the wall mount and lock into place with the provided 1-½” NPT lock nut.
- Refer to the housing instruction sheet to complete the installation.

Figure 2:
Curved Wall Mount and Pole Mount Adapter for Indoor and Outdoor Pendant Domes Vaddio Part # 998-9300-001 Pole Mount Kit comes with: One (1) Pole Mount Adapter Plate Four (4) Stainless Steel Bolts Two (2) Steel bands with clamps Dimensions: Mounting Plate (H x W) – 7.5” (19.05cm) x 5.25” (13.34cm) Back Flange – 2” (5.08cm) Deep.
SAVE THESE INSTRUCTIONS:
The information contained in this manual will help you install your Vaddio DomeVIEW product. If these instructions are misplaced, Vaddio keeps copies of Specifications, Installation and User Guides, and most pertinent product drawings for the Vaddio product line on the website. These documents can be downloaded from www.vaddio.com free of charge.
WARRANTY INFORMATION:
Hardware* Warranty
One-year limited warranty on all parts. Vaddio warrants this product against defects in materials and workmanship for two years from the day of purchase if Vaddio receives notice of such defects during the warranty. They will, at its option, repair or replace products that prove to be defective.
Exclusions
The above warranty shall not apply to defects resulting from improper or inadequate maintenance by the customer, customers applied software or interfacing, unauthorized modifications or misuse, operation outside the normal environmental specifications for the product, use of the incorrect power supply, or improper site operation and maintenance.
Vaddio Customer service
Vaddio will test, repair, or replace the product or products without charge if the unit is under warranty. If the product is out of warranty, Vaddio will test and then repair the product or products. The cost of parts and labor charges will be estimated by a technician and confirmed by the customer before repair. All components must be returned for testing as a complete unit. Vaddio will not accept responsibility for shipment after it has left the premises.
Vaddio Technical support
Vaddio technicians will determine and discuss with the customer the criteria for repair costs and/or replacement. Vaddio Technical Support can be contacted through one of the following resources: e-mail support at support@vaddio.com or online at www.vaddio.com.
Return Material Authorization (RMA) number
Before returning a product for repair or replacement request an RMA from Vaddio’s technical support. Provide a technician with a return phone number, e-mail address, shipping address, and product serial numbers. Describe the reason for repairs or returns as well as the date of purchase. Include your assigned RMA number in all correspondence with Vaddio. Write your assigned RMA number on the outside of the box when returning the product.
Voided warranty
The warranty does not apply if the original serial number has been removed or if the product has been disassembled or damaged through misuse, accident, modifications, or unauthorized repair.
Shipping and handling
Vaddio will not pay for inbound shipping transportation or insurance charges or accept any responsibility for laws and ordinances from inbound transit. Vaddio will pay for outbound shipping, transportation, and insurance charges for all items under warranty but will not assume responsibility for loss and/or damage by the outbound freight carrier. If the return shipment appears damaged, retain the original boxes and packing material for inspection by the carrier. Contact your carrier immediately.
Products not under warranty
Payment arrangements are required before outbound shipment for all out-of-warranty products.
*Vaddio manufactures its hardware products from parts and components that are new or equivalent to new following industry-standard practices.


