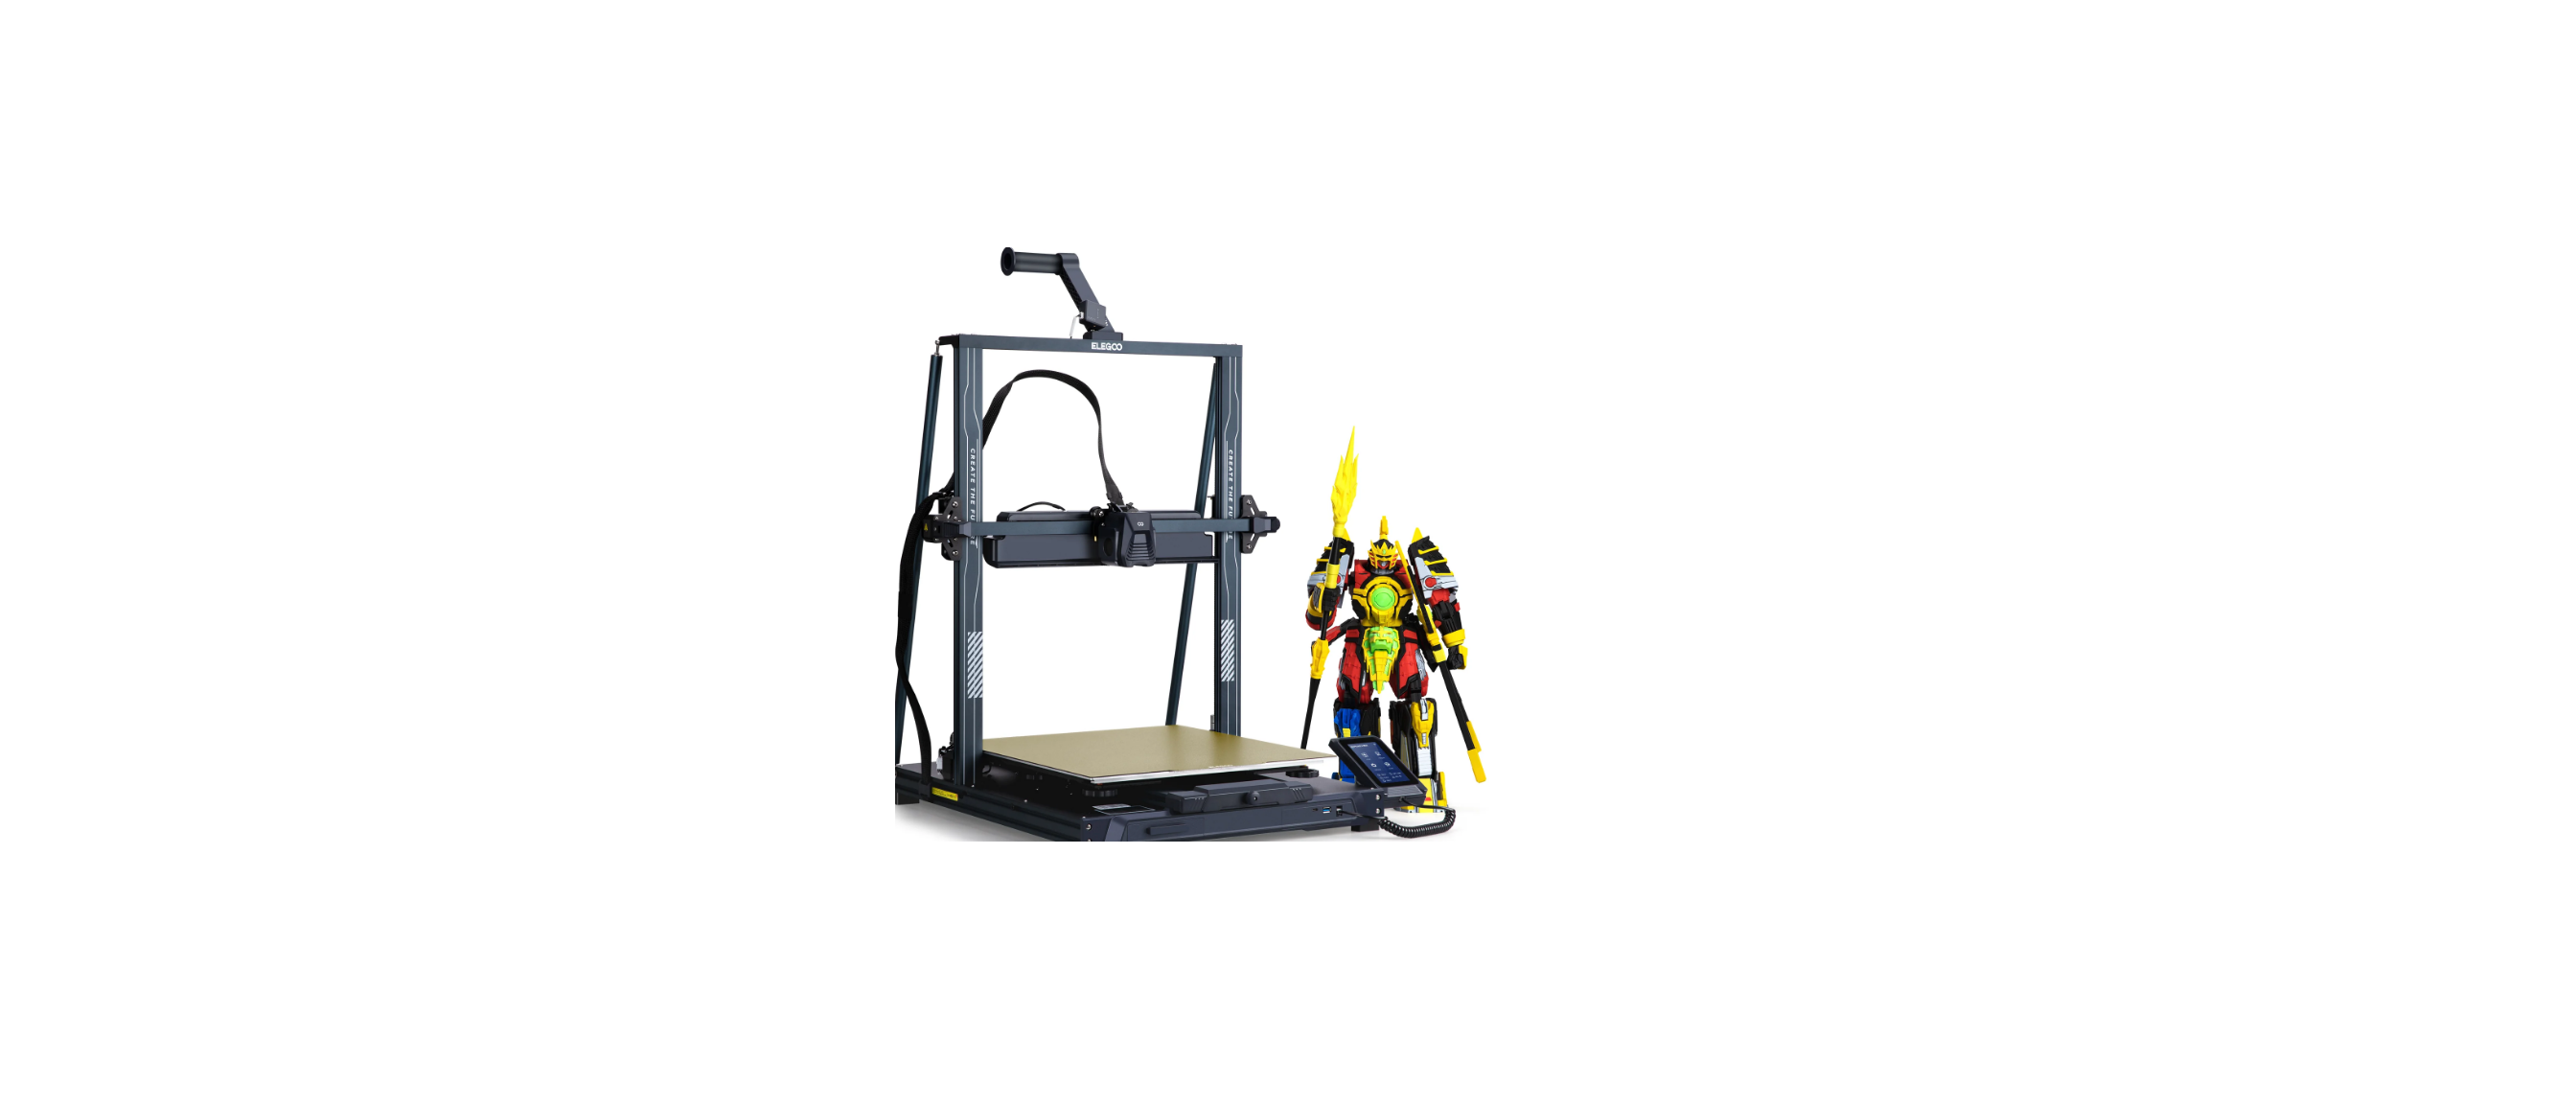
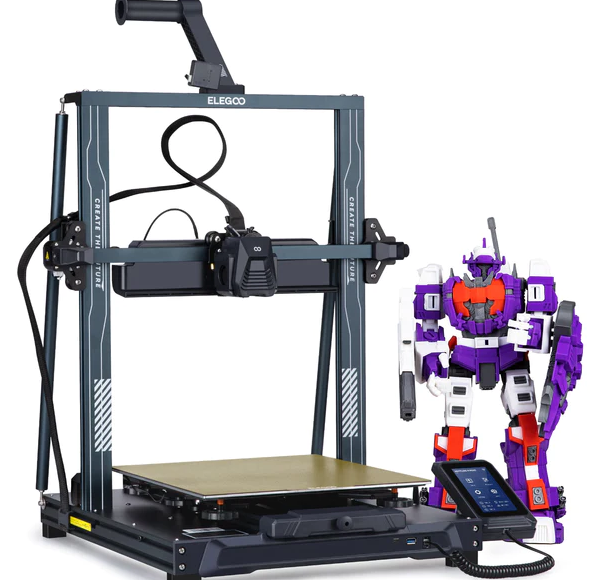
ELEGOO NEPTUNE 4 Plus 3D Printer User Manual
Thank you for choosing ELEGOO
product! For your convenience, please read this instruction manual carefully before use, the cautions and tips in this manual can help you better avoid incorrect installation and use. For questions or problems not covered in this manual, please contact us at this email address: 3dp@elegoo.com ELEGOO team is always ready to provide you with quality service. To give you a better experience of our products, you can also gain knowledge of the operation of the equipment in the following ways: 1. The instruction manual: You can find related instructions and videos in the U disk 2.ELEGOO official website: www.elegoo.com You can go to our official website to find the relevant operating instructions for the machine and contact information.
Cautions
- Do not place the printer in vibrating or other unstable environments, as the shaking of the machine will affect the print quality.
- Do not touch the nozzle and heat it when the printer is working to prevent high-temperature scald and personal injury.
- After printing, please take advantage of the residual temperature of the nozzle and clean the filaments on the nozzle with the help of tools. Do not touch the nozzle directly with your hands during cleaning to avoid scald.
- Please do product maintenance frequently, and regularly clean the printer body with a dry cloth to wipe away dust and sticky print material under the situation of power off.
- 3D printers contain high-speed moving parts, so be careful not to get your hands caught.
- Children must be supervised by adults when using the machine to avoid personal injury.
- In case of emergency, please cut off the power directly.
Machine Parameters
Print Parameters
- Print Principle: FDM (Fused Deposition Modeling)
- Build Size: 320X320X385(mm”)
- Print Precision: +0.1mm
- Nozzle Diameter: 0.4mm
- Maximum speed: 500mm/S
- Regular printing speed: 250mm/s
- Maximum acceleration: 7000mm/s?
Temperature Parameters
- Ambient Environment Temperature: 5°C~40°C
- Maximum Temperature of Nozzl: 300°C
- Maximum Temperature of Hotbed: 100°C
Software Parameters
- Slicer Software: Cura
- Input Format: STL, OBJ
- Output Format: Gcode
- Connection Type: U Disk, LAN, WiFI
Power Supply Parameters
- Power Input: 100-120V/220-240V;50/60Hz
- Power Output: 24V
Physical Parameters
- Machine Size: 578*533*640mm
- Net Weight: 14.4kg
Machine Structure Diagram

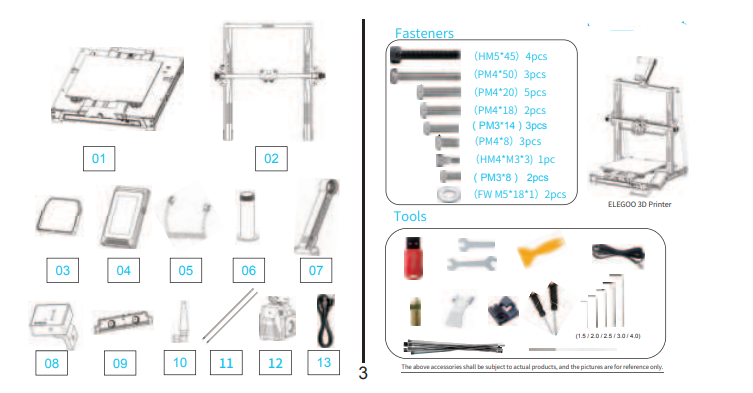
Packing List
Machine Installation
Attached U disk with an installation instruction video. Print head installation: Use 3pcs (PM3*14) screws to fix the print head through the holes of the metal plate from the rear 2pcs (PMM3*8) screws to fix the front of the print head.


Supplementary Introduction
Special Case:
The bottom slide block has been adjusted before leaving the factory, but the pulley of the machine may become loose due to this transportation. If the build platform of the machine is shaky and loose, an open spanner can be used to slowly twist the eccentric isolation column under the platform until the slide block slides smoothly and does not shake. Similarly, if the print head is shaky or loose, the corresponding eccentric isolation column can also be adjusted until the print head slides smoothly without shaking, and the pulleys on both sides of the gantry also have corresponding eccentric isolation columns that can be adjusted.

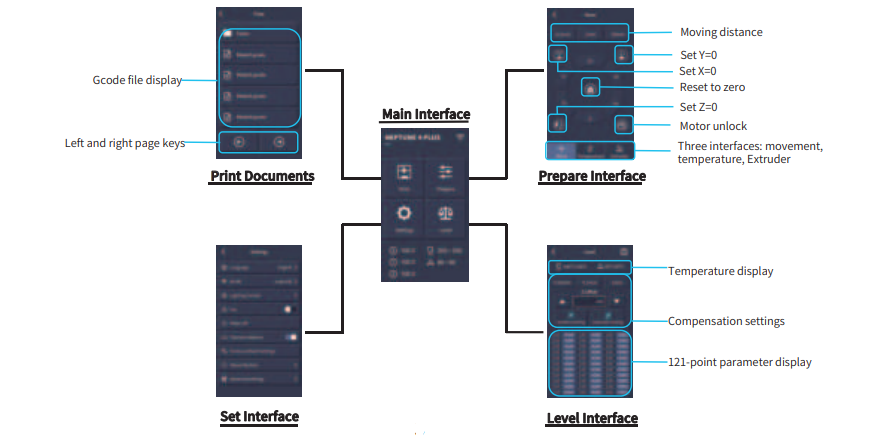
Operation Screen Introduction
Auxiliary cooling module instructions:
Users can click the fan icon to adjust the air outlet status of the rear cooling fan during the printing process. The fan has three modes: silent/normal / sport, please adjust according to the printing situation, as shown in the picture below.
Model Test

Print Head Feeding Check
- First, push the filaments to the bottom of the print head.
- Click [Prepare] – [Extrudert], click [Load] , and the temperature of the nozzle will be automatically heated to 200°C.
- After the nozzle is preheated to 200°C, click the feed to extrude the filament from the nozzle.
- Clean the melted filament of the nozzle before printing.
‘ Notice: Consumables with different hardness have different requirements for the spring strength. The spring strength of the extruder can be adjusted! with an Allen wrench. When turning counterclockwise, the spring strength ‘is increased, and the spring strength is decreased clockwise.
Start printing
- Insert the U disk into the printer’s USB port.
- Click [Print on the main menu and select the model file.
- When the nozzle and the heat reach the preset temperature, the X, Y, and Z axis will return to zero, and then start printing. Notice: When printing the test model, please observe the first layer printing. In cases A and C, the compensation settings are not properly adjusted. compensation adjustments can be made during printing to adjust the distance between the nozzle and the platform In case B, the nozzle and the platform have reached a proper printing distance and can continue printing.
Resume Printing Description
Power Loss Recovery: If you want to continue printing because of a sudden power outage or accidentally turn off the power of the machine, this function does not need to be set manually. When the printer is reconnected to the power supply and turned on, just click resume to continue.
(Please note that the PEI platform has a better adhesion effect when it is heated, but it will cool down if the power is turned off for too long, causing the model fall off easily, and the resume printing cannot be completed.) Filaments Detection: This function is to remind the user to replace the filaments before continuing printing when the model is half-printed, which effectively prevents the model from being scrapped due to insufficient consumables.
Software Installation
Tip: Copy the data in the U disk to the computer for saving. Our slice software is modified from Cura open source slice software, in order to better match with our company’s machines for printing and meet the needs of our customers. The software installation steps are as follows: Open the attached U disk file and select the path \ Software and Software Drivers folder \ ELEGOO Software folder \ Double-click the ELEGOO-Cura application to install it. Follow the prompts in the installation process to the next step. Finally, select the corresponding model of our company as shown below to complete the settings.
Online Print
The device supports WiFi and network cable connection. After the connection is successful, check the IP address on the screen, and enter the IP address through the browser to access the machine.
- Note that the machine and the computer can only be connected to the LAN of the same network segment, and make sure that the circuit wiring port on the machine has already connected, otherwise, the access will fail.
- Use Google Chrome to enter the IP address of the device, e.g. 192.168.211.164, and enter it via the Enter key to access the page.
- After successful access, you will enter the control interface below the picture

- Movement Control: control the movement of each axis, and can set compensation after leveling.
- Fan and Output: control to turn on the printhead fan and lighting.
Printer Limit: the maximum acceleration control of the printer, normally no need to change the settings. - Temperature Display: display the machine temperature heating condition, and the preheating printhead temperature and hot bed temperature can be set in advance.
- Console: G-code commands can be sent to run the machine.
- Task List: drag the G-code file of the Elegoo Cura slice to the task list here for printing.

Troubleshooting Guide
A stepper of the X/Y/Z axis is not moving or making a noise when zeroed
- The stepper cable is loose. Please recheck the wiring connection.
- The corresponding limit switch does not trigger properly, please check whether there is any interference in the movement of the corresponding shaft and whether the limit switch wire is loose.
The nozzle kit extrudes anomaly
Check that the extruder stepper cable is not loose. ( Check whether the set screw of the extruder gear is locked to the motor shaft.
- The heat dissipation of the nozzle kit is not enough, make sure that the nozzle kit’s cooling fan is working properly.
- For clogged nozzles, try briefly heating the nozzle to 230°C and squeezing the filaments by hand to remove the clog, or use a fine needle to unclog the nozzle while it is warming up.
Model does not stick to the platform or Warpage
- The key to whether the model can stick to the platform is the filaments are attached to the platform when printing the first layer. When printing the first layer, if the distance between the nozzle and the platform is more than 0.2mm, it will seriously reduce the model’s attachment to the platform, so it needs to be adjusted.
- Set up the build platform attachment in Cura, and select the attachment type [Brim], which will help to enlarge the attachment surface and prevent warping and other problems.
Model misalignment
- The travel speed or print speed is too fast. Please try to reduce the speed.
- The belt of the X/Y axis is too loose or the synchronizer pulley is not securely tight.
- The drive current is too low.
Severe wire drawing
- Insufficient retraction distance, set the retraction distance larger when slicing If the retraction speed is too slow, set the retraction speed higher when slicing.
- When slicing, tick the box “Z Hop When Retracted” and set the “Z Hop height” to about 0.25mm.
- The print temperature is too high, which causes the filaments to become sticky.
Circuit wiring

- Hotend thermosensitive (TH1)
- Heatbed thermosensitive (TBO)
- X-:X axis limit switch
- Y-:Y axis limit switch
- Filament detector (DET1)
- Rear cooling fan/Model fan(FAN2)
- Mainboard fan/print head fan(FAN1)
- X/Y accelerometer interface(AC)
FCC Warning
This device complies with part 15 of the FCC Rules. Operation is subject to the following two conditions: (1) This device may not cause harmful interference, and (2) this device must accept any interference received, including interference that may cause undesired operation. Any Changes or modifications not expressly approved by the party responsible for compliance could void the user’s authority to operate the equipment.
Note: This equipment has been tested and found to comply with the limits for a Class B digital device, pursuant to part 15 of the FCC Rules. These limits are designed to provide reasonable protection against harmful interference in a residential installation. This equipment generates uses and can radiate radio frequency energy and, if not installed and used in accordance with the instructions, may cause harmful interference to radio communications.
However, there is no guarantee that interference will not occur in a particular installation. If this equipment does cause harmful interference to radio or television reception, which can be determined by turning the equipment off and on, the user is encouraged to try to correct the interference by one or more of the following measures: –
- Reorient or relocate the receiving antenna.
- Increase the separation between the equipment and the receiver.
- Connect the equipment to an outlet on a circuit different from that to which the receiver is connected. -Consult the dealer or an experienced radio/TV technician for help.
This equipment complies with FCC radiation exposure limits set forth for an uncontrolled environment. This equipment should be installed and operated with a minimum distance of 20cm between the radiator & your body.