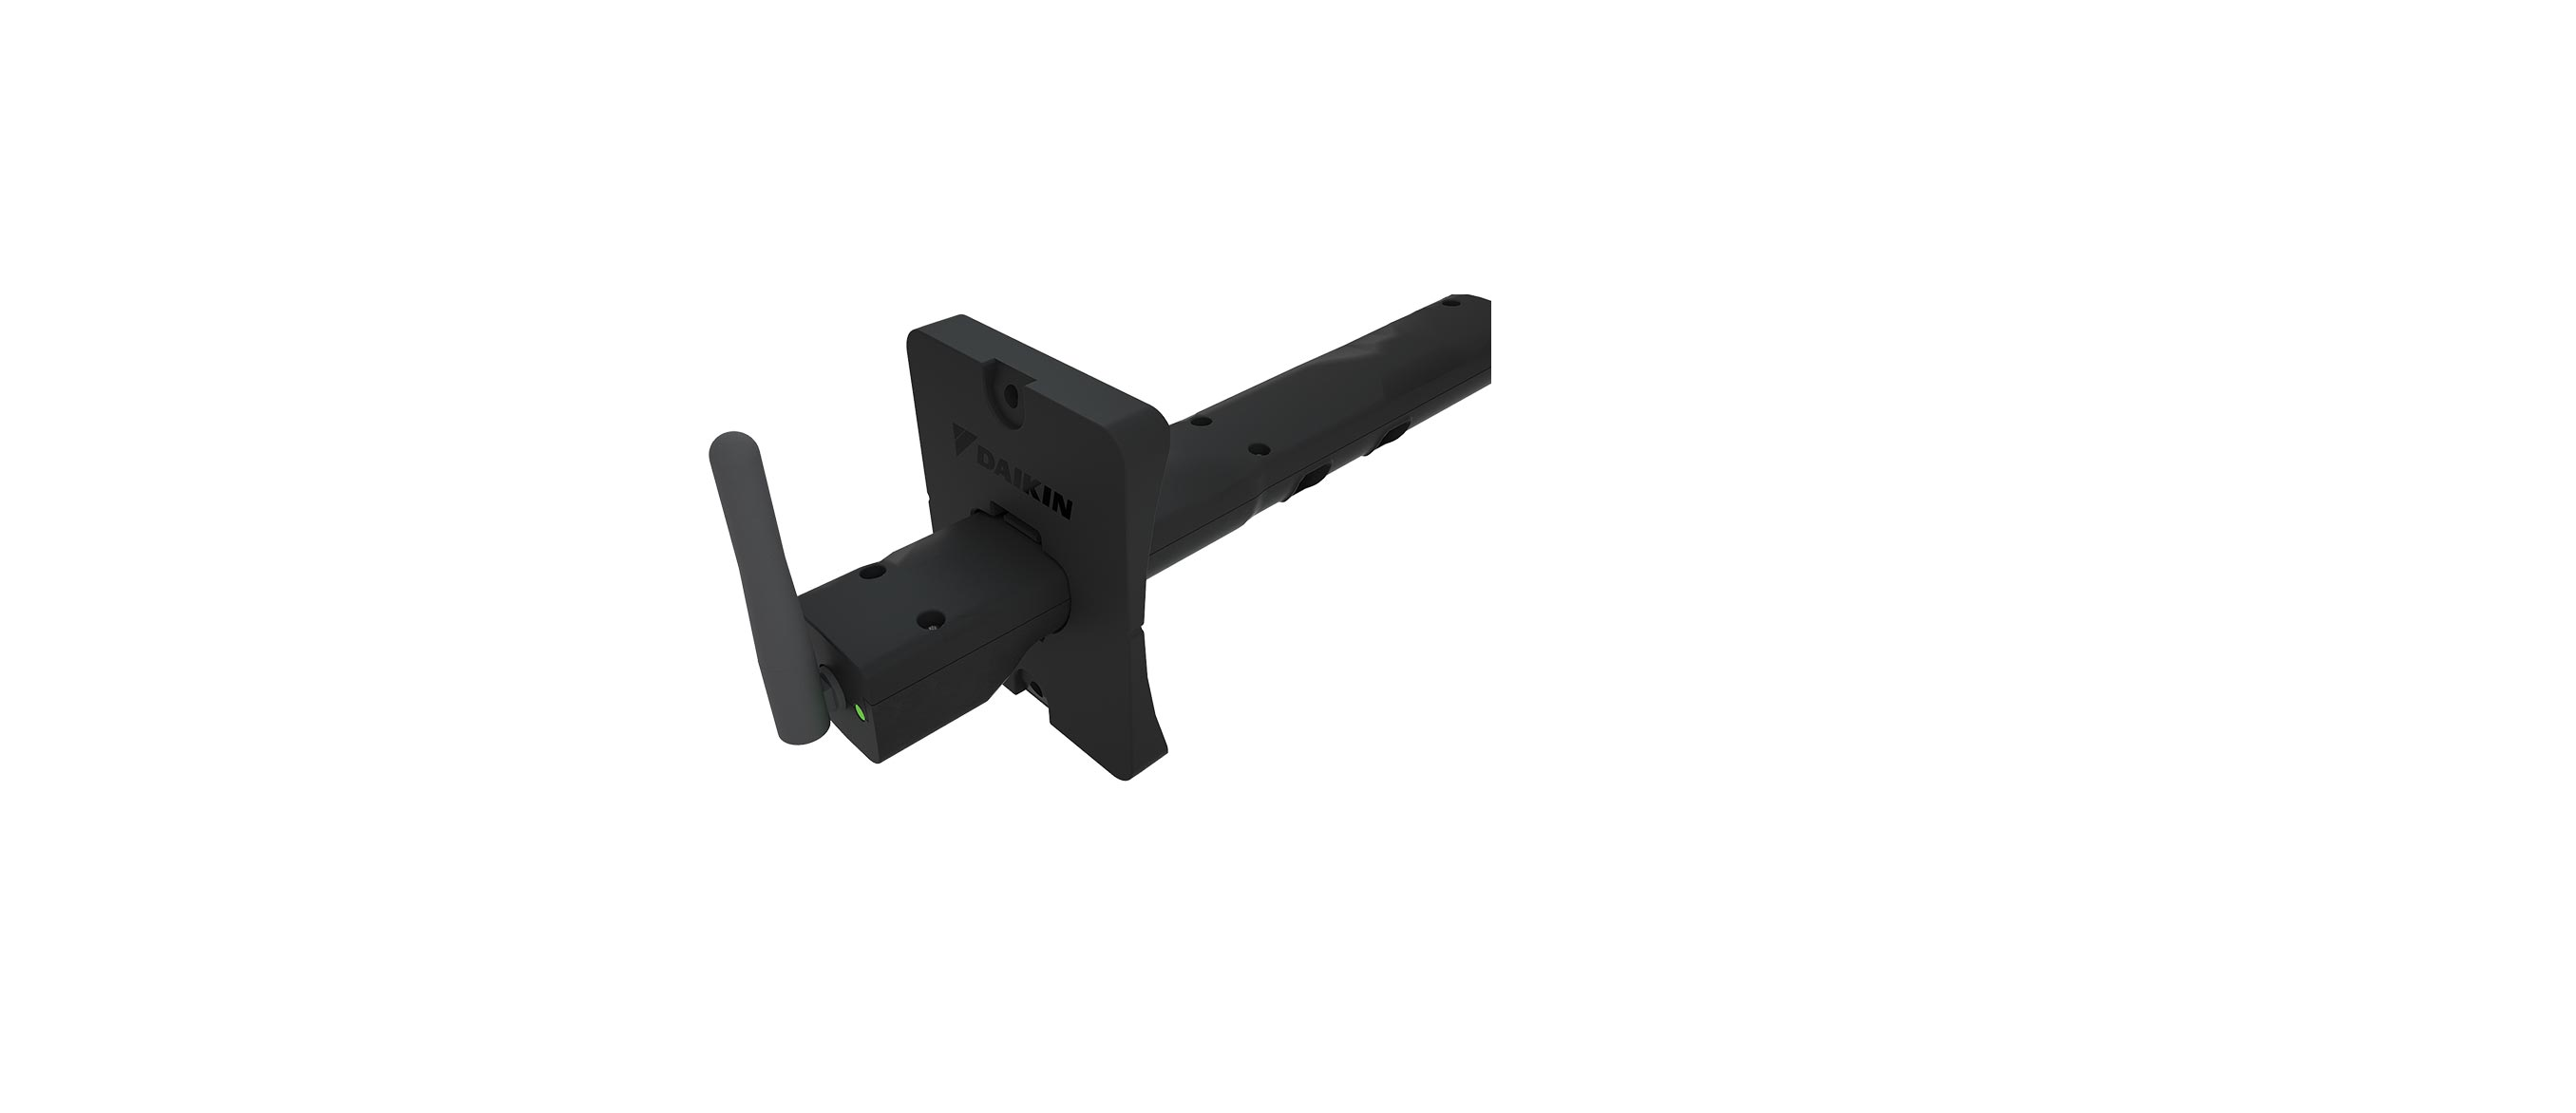
Daikin DSEN-HAQA One Home Air Monitor User Manual
WARNING
Only personnel that have been trained to install, adjust, service, or repair (hereinafter, “service”) the equipment specified in this manual should service the equipment. Daikin will not be responsible for any injury or property damage arising from improper service or service procedures. If you service this unit, you assume responsibility for any injury or property damage that may result.
In addition, in jurisdictions that require one or more licenses to service the equipment specified in this manual, only licensed personnel should service the equipment. Improper installation, adjustment, servicing, or repair of the equipment specified in this manual, or attempting to install, adjust, service, or repair the equipment specified in this manual without proper training may result in product damage, property damage, personal injury, or death.
Description
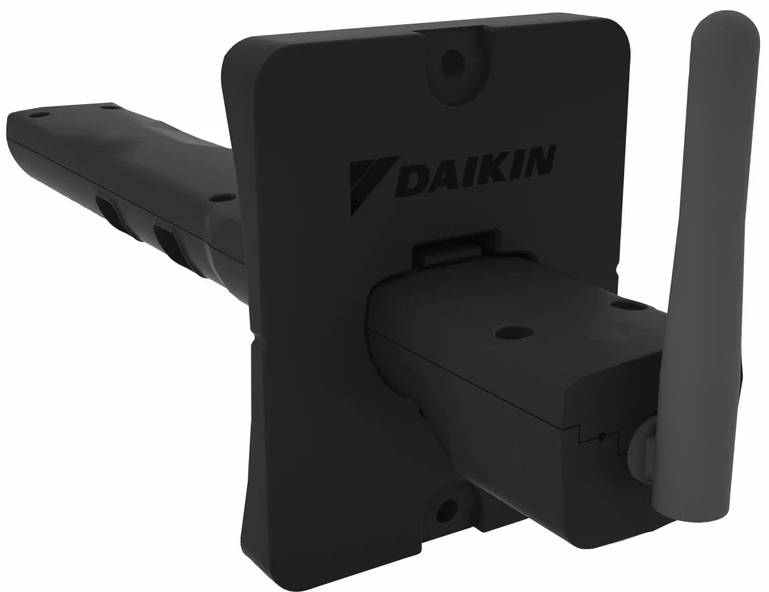
The Daikin One Home Air Monitor is part of the Daikin One Ecosystem. Used in conjunction with Daikin heating and cooling equipment and air filters, the Home Air Monitor provides information about air quality levels, via the Daikin One Smart Thermostat and its companion mobile application. The Daikin One Home Air Monitor is meant to be installed by trusted HVAC service technicians. The following information will outline the 6-step installation process for the Home Air Monitor.
Proprietary Notice
This document and the information disclosed herein are proprietary data of Daikin North America LLC. Neither this document nor the information contained herein shall be reproduced to others without the written authorization of Daikin North America LLC, except to the extent required for installation or maintenance of the recipient’s equipment.
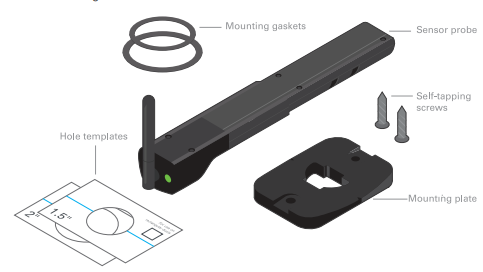
Assemble materials and tools
- Daikin One Home Air Monitor
- Mounting Plate
- Mounting gaskets
- Hole templates
- Mounting screws
Required for installation (not included)
Materials
- Dedicated Class II 24V AC transformer
- Solid core wire, 20 gauge or heavier
- Toggle bolts (for duct board installation only)
Tools
- Marking pen
- Hole saw (1½” for rectangular duct, 2″ for round duct)
- 14″ nut driver
- Small flat-blade screwdriver
- iPhone (iOS 10 or higher) or Android (4.1 Jelly Bean or higher) phone that can connect to WiFi
- Daikin Installer App (download)
Choose the HVAC duct location
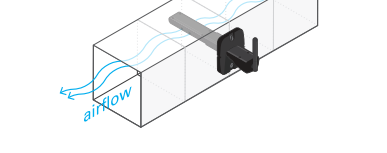
Find an ideal location to install the sensor probe. This probe should be:
- Positioned on an HVAC return duct (in contact with the greatest amount of return air)
- Perpendicular to the airflow
- In a minimum 8″ wide duct
- At least 24′ downstream from flow restrictions
- Within a range of the home’s WiFi signal
- Close to a power source
Attach mounting plate to duct
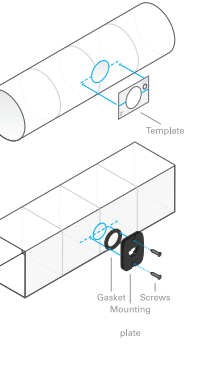
- Use the provided templates to create a hole in either a round duct or a rectangular duct.
- Draw a line on the duct where the sensor probe will be installed.
- Cut a hole in the duct with a hole saw using a template. (2 for round duct, 1½” for rectangular duct).
- Attach the appropriate size gasket to the mounting plate.
- Hold the mounting plate against the duct so that the notches on either side of the mounting plate line up with the line you drew.
- Attach the mounting plate to the duct with the self-tapping screws provided.
Connect sensor prober to power
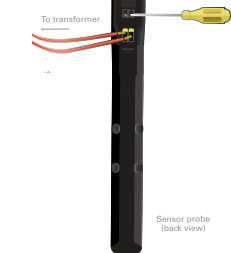
A dedicated Class II 24V AC transformer must be attached to the power source to power the sensor probe.
- Disconnect power to the furnace or air handler.
- Wire a Class II transformer to the 115V power source on the furnace or air handler.
- Connect the 24V wires from the transformer’s secondary winding leads to the sensor probe: secure wires by tightening the terminal screws
Use the Daikin Installer App to connect to WiFi

- Scan the QR code on the back of the box to identify the Home Air Monitor,
- Follow the instructions in the Daikin Installer application to connect to WiFi,
Insert the sensor probe into the mounting plate
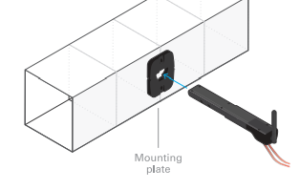
- Insert the sensor probe into the mounting plate until it clicks into place.
- Reapply power to the furnace or air handler and confirm that the LED on the sensor probe is illuminated and solid blue.
Product Description
The Daikin One Home Air Monitor is a whole-house indoor air quality monitoring device designed to be used in conjunction with a Daikin One+ Smart Thermostat. It measures the physical properties and composition of the air stream using particulate and gas phase sensors including an optical partical counter, temperature, humidity, pressure and VOC sensors. This device contains a certified third party wireless module for WiFi and Bluetooth communications to transmit data to an access point such as a consumer router. The Daikin One Home Air Monitor uses its sensors to monitor the air in order to detect different types of air pollution. It connects to a WiFi network to allow this data to be pushed to a cloud and report results, For information on how to install and operate the Daikin One Home Air Monitor as a component in an HVAC system, please contact Daikin.
Wireless description
This device contains a U-Blox NINA-W101 module based on the ESP32 WiFi 802.11 b/g/n and Bluetooth v4.2 chipset operating in the 2,4GHz frequency spectrum with throughput of up to 54MBps OFDM, The device contains a 2 dBi whip antenna with a U.FL. connector terminated coaxial cable which is used to connect to the module. The Bluetooth® word mark and logos are registered trademarks owned by Bluetooth SIG, Inc., and any use of such marks are under license.
Regulatory compliance
This device complies with part 15 of the FCC rules. Operation is subject to the following two conditions: (1) this device may not cause harmful interference, and (2) this device must accept any interference received, including interference that may cause undesired operation. This equipment generates, uses, and can radiate radio frequency energy and, if not installed and used in accordance with the instructions, may cause harmful interference to radio communications.
However, there is no guarantee that interference will not occur in a particular installation. If this equipment does cause harmful interference to radio or television reception, which can be determined by turning the equipment off and on, the user is encouraged to try to correct the interference by one or more of the following measures:
- Reorient or relocate the receiving antenna.
- Increase the separation between the equipment and the receiver.
- Connect the equipment to an outlet on a circuit different from that to which the receiver is connected.
- Consult the dealer or an experienced radio/TV technician for further assistance.
This device has been tested and found to comply with FCC and ISED requirements for RF Exposure when operated with at least 20cm separation from the antenna. Daikin is not responsible for any changes or modifications not expressly approved by the party responsible for compliance.
Such modifications could void the user’s authority to operate the equipment. This device complies with Industry Canada’s license-exempt RSSs. Operation is subject to the following two conditions: (1) This device may not cause interference; and (2) This device must accept any interference, including interference that may cause undesired operation of the device.
Maintenance
The Daikin One Home Air Monitor requires very little maintenance. However, periodic inspection and cleaning of the air passageways in the sensor probe will help to keep the detection sensors and surfaces free of particles which, if left to build up, could cause inaccurate reporting of the airborne particulates in the home’s air.
CAUTION:
If you are not a qualified electrician or HVAC technician, or are not comfortable and/or familiar with electrical power supplies, contact your HVAC dealer to service this monitor. To clean the Daikin One Home Air Monitor, first remove power from the sensor probe by disconnecting the 24V supply wire from its transformer. Carefully pull the sensor probe out of ductwork, but leave the mounting plate in place. Once the sensor probe is free of the ductwork, carefully inspect the two passageways in the probe for any visible particulate buildup on the internal surfaces.
If there is nothing visible, carefully reinsert the sensor probe into the hole in the mounting plate just until you hear a slight “click”. Do not push the sensor probe in further than this “click” position. Reattach the supply of 24V power to the sensor probe. When the sensor probe’s LED light turns solid blue (not flashing), the device is back online and operating. If there is visible debris collected on the internal surfaces, take a cotton swab that has been wet slightly with isopropyl or rubbing alcohol and very gently wipe over the internal surfaces of the sensor probe to remove the debris.
Carefully reinsert the sensor probe into the hole in the mounting plate just until you hear a slight “click”. Do not push the sensor probe in further than this “click” position. Reattach the supply of 24V power to the sensor probe. When the sensor probe’s LED light turns solid blue (not flashing), the device is back online and operating. If you have any questions or concerns about this device’s maintenance, please call 1-855-DAIKIN1 for assistance.

