Honeywell Home Wifi Smart Scale User Manual

In the box, you will find
- Thermostat
- Wallplate
- Screws and anchors
- Quick Start Guide
- Wire labels
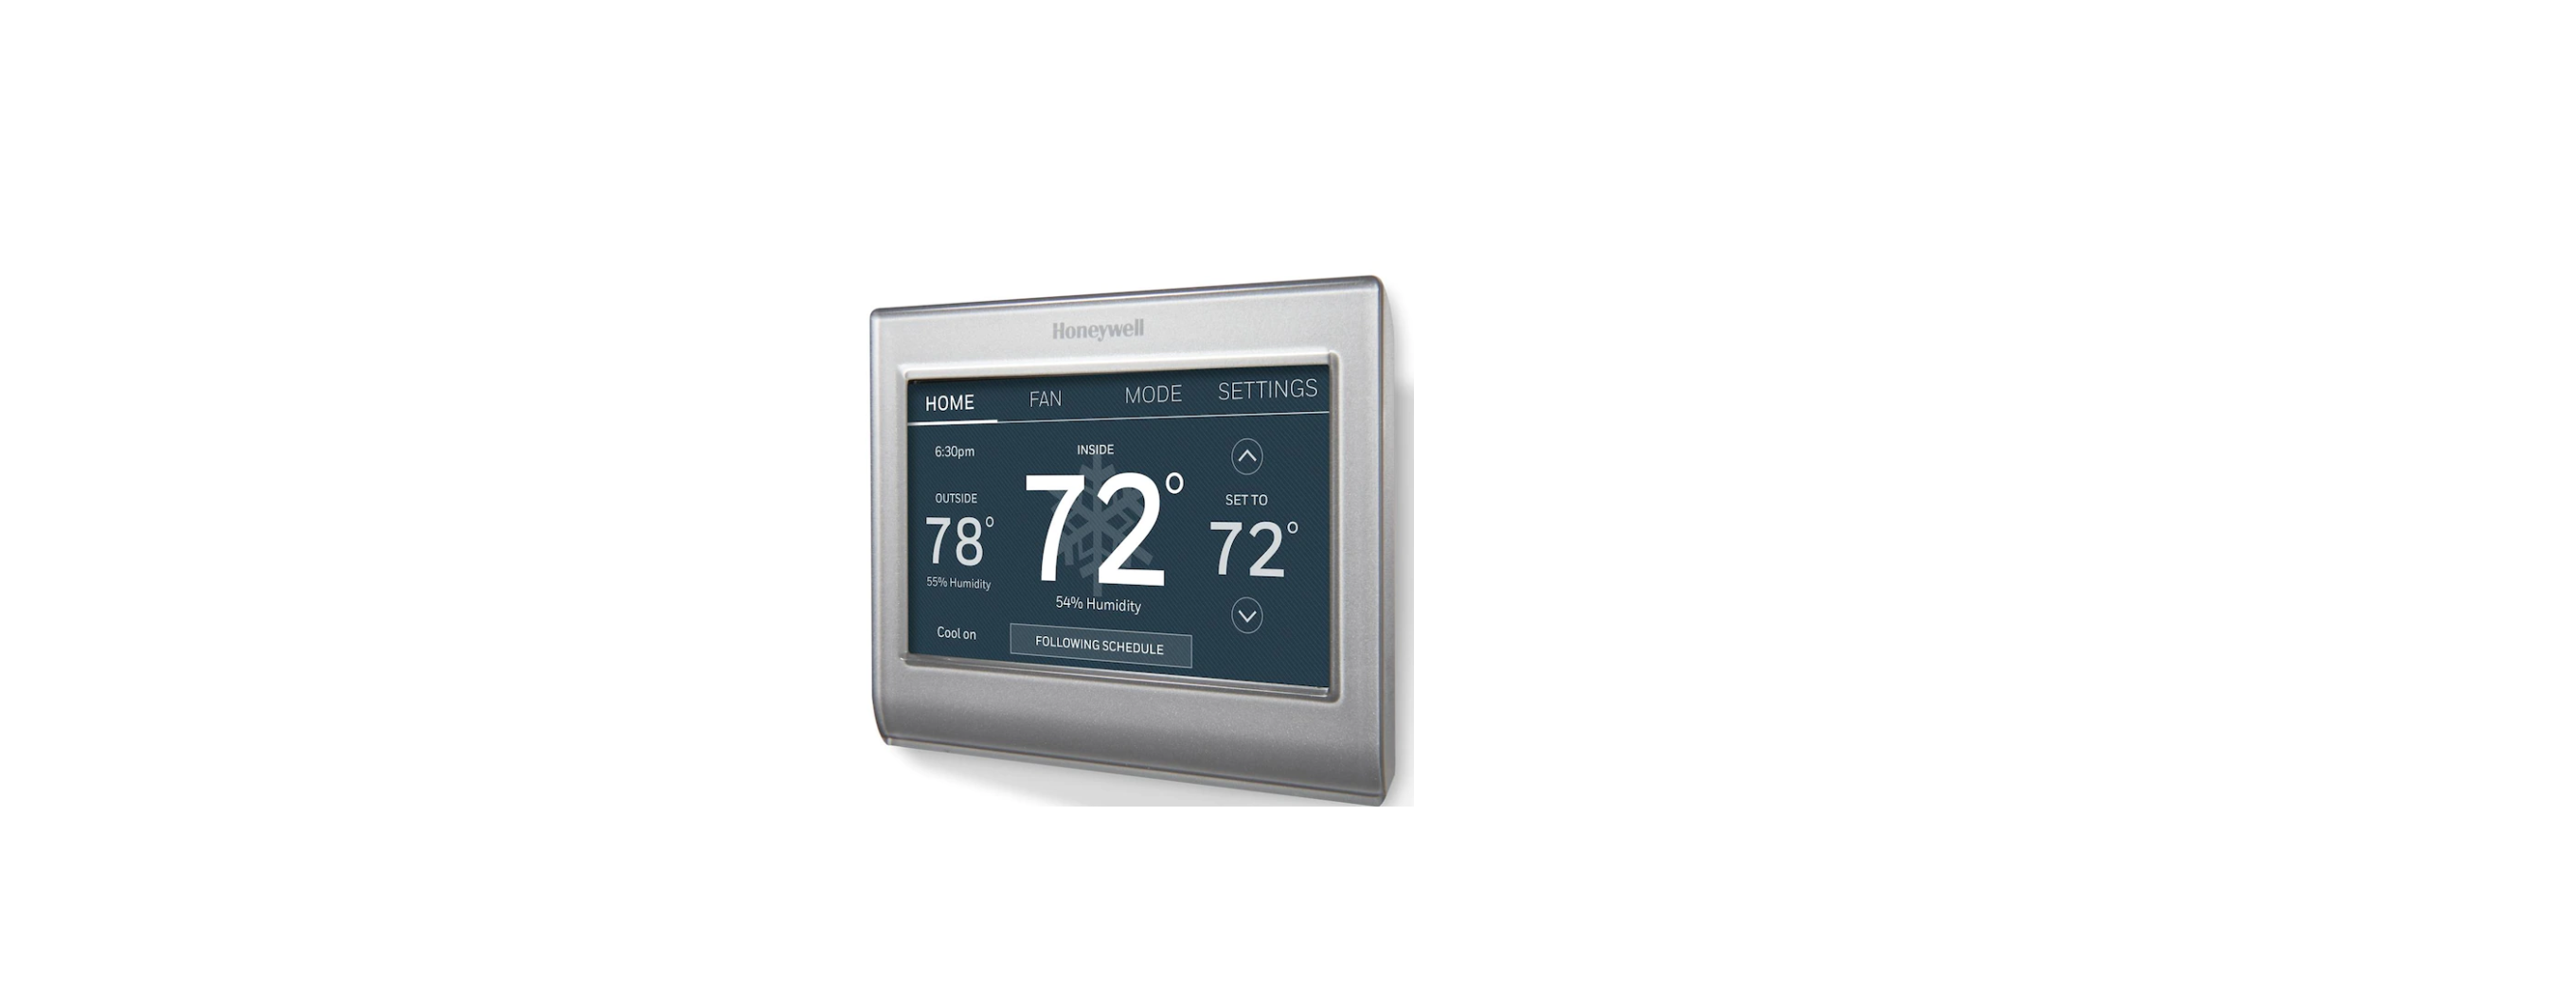
Features of your thermostat
With your new thermostat, you can:
- Connect to the Internet to monitor and control your heating/cooling system.
- View and change your heating/cooling system settings.
- View and set temperature and schedules.
- Receive alerts via email and get automatic upgrades.
- View outdoor temperature and humidity (requires Wi-Fi set up and registration).
Welcome
Congratulations on your purchase of a color touchscreen programmable thermostat. When registered to Total Connect Comfort, you can remotely monitor and control the heating and cooling system in your home or business—you can stay connected to your comfort system wherever you go. Total Connect Comfort is the perfect solution if you travel frequently, own a vacation home, or a business, manage an investment property, or if you are simply looking for peace of mind. This thermostat works with common 24-volt systems such as forced air, hydronic, heat pump, oil, gas, and electric. It will not work with millivolt systems, such as a gas fireplace, or with 120/240 volt systems such as baseboard electric heat.
Quick reference: home use

Quick reference: business use

Setting up your thermostat
Setting up your programmable touchscreen thermostat is easy. It is preprogrammed and ready to go as soon as it is installed and registered.
- Install your thermostat.
- Connect it to your home wireless network.
- Register online for remote access.
Installing your thermostat
You might need the following tools to install this thermostat:
- No. 2 Phillips screwdriver
- Pen • Pencil
- Level (optional)
- Drill and bits (3/16” for drywall, 7/32” for plaster) (optional)
- Hammer (optional)
- Electrical tape (optional)

- Switch OFF power to your heating/cooling system. Important! To protect your equipment, switch OFF the power to your heating/cooling system at the breaker box or the system switch.

- Remove the old thermostat faceplate and leave the wires connected.
- 2a
Take a picture of the wire connections for later reference. - 2b
If no wire is connected to a terminal labeled C or no C terminal exists on the old thermostat, view the Alternate Wiring videos at honeywellhome.com/wifi-thermostat or reference the C-wire addendum in the box.
- 2a

Important!
C wire is required and is the power source for your thermostat. Without a C wire, your thermostat will not power up.
Installing your thermostat
- Label the wires. Use the supplied sticky tags to label each wire as you disconnect it. Label wires according to the old thermostat terminal designations, not by wire color.
Note: If no tag matches a terminal designation, write the appropriate letter on a blank sticky tag. - Remove the wallplate. Remove the old wallplate from the wall after all wires have been labeled and disconnected.
Note: Wrap the wires around a pencil to prevent them from falling back into the wall. LEVEL HERERYCWGMCR34499CKRcRW-O/BYGW2-Aux/EY2L - Mount the wallplate for the thermostat. Mount your new wallplate using screws and anchors included with the thermostat. If necessary: Drill 3/16-in holes for drywall. Drill 7/32-inch holes for plaster.
Important!
This thermostat requires a C, or common, wire for power. The C, or common, wire brings 24 VAC power to the thermostat. If you are replacing an existing thermostat, it might not have a C wire connected to it. Many older mechanical or battery-operated thermostats do not require a C wire. See the C Wire Addendum document included in this package for more information.
Note: Not all heating/cooling systems label the 24 VAC common C. Check your system manual or contact the manufacturer to find out which terminal is the 24 VAC common.
Alternate wiring (Conventional System)
Use this if your wire labels don’t match the terminal labels. Note: You must have a C wire or equivalent

Alternate wiring (Heat Pump System)
Use this if your wire labels don’t match the terminal labels. Note: You must have a C wire or equivalent.
Alternate wiring key (Heat Pump System)
- If you have both an R and Rc wire, unplug the jumper loop by pulling on the wire loop. If your old thermostat had both R and RH wires, connect the R wire to the Rc terminal, the RH wire to the R terminal, and unplug the jumper loop.
- If your old thermostat had both V and VR wires, check honeywellhome.com/wifi-thermostat for help.
- If your old thermostat had separate O and B wires and is controlling a single zone heat pump system, attach the B wire to the C. If there is more than one thermostat controlling the system, call Resideo Zoning at 800-828-8367 for wiring assistance.
- If your old thermostat had separate Y1, W1, and W2 wires, check honeywellhome.com/wifi-thermostat for help.
- If the old thermostat has separate wires on Aux and E, use a wire nut to attach both wires to a separate wire. Slide this third wire into the W2-Aux/E terminal. This is the system monitor.
- If the monitor finds a problem, you will see an orange alert button on the thermostat home screen.
Connecting to your Wi-Fi

network After touching Done on the final screen of the initial setup, the thermostat displays an option to connect to your Wi-Fi network.
- Connect the Wi-Fi network. Touch Yes to connect the thermostat to your Wi-Fi network. The screen displays the message “Searching for wireless networks. Please wait…” after which it displays a list of all Wi-Fi networks it can find. Note: If you cannot complete this step now, touch I’ll do it later. The thermostat will display the home screen. Complete this process by selecting SETTINGS > Wi-Fi Setup. Continue with Step 2.
- Select the network. 2a Touch the name of the network you want to use. The thermostat displays a password page.

2b Using the keyboard, touch the characters that spell out your home network password. 2c Touch Done. The thermostat displays “Connecting to your network. Please wait…” and then shows a “Connection Successful” screen. 2d Touch OK to display the registration information screen. 2e Note your Thermostat MAC and Thermostat CRC. You need these numbers to complete the online registration

Disconnecting your Wi-Fi network

- Touch SETTINGS.
- Select Wi-Fi Setup.
- Touch Disconnect from Network. The thermostat will display a question to confirm your selection.
- Touch Yes to confirm that you want to disconnect from the network. The thermostat will display the Wi-Fi Setup screen.
- Touch OK to display the menu.
Reconnecting your Wi-Fi network

- Touch SETTINGS.
- Select Wi-Fi Setup.
- Touch the name of the network you want to use. The thermostat may display a password page.
- To enter a password, touch characters to spell out your home network password, then touch Done.
- The thermostat displays “Connecting to your network. Please wait…” and then a “Connection Successful” screen.
- Touch Next.
Setting holiday override: business use
This feature lets you customize temperature settings to be maintained from now until a specified date. The thermostat resumes normal scheduling on the date you select.
- Touch SETTINGS.
- Select Holiday Mode to display temperatures while you are away on holiday.
- Touch p to select the Heat and Cool temperatures, then touch Next to select the return date.
- Review the settings and touch Done to save them. Touch Back, then Cancel to ignore the changes.
Note:
The cool temperature can only be set higher than the unoccupied program setting and the heat temperature can only be set lower than the unoccupied program setting.
Initiating occupancy mode: business use
This feature keeps the temperature at an energy-saving level until you touch OVERRIDE. When you arrive, touch the button to maintain a comfortable temperature while the room is occupied. Touch the p or buttons to set the temperature or the Hold Until time. The temperature is maintained until the time you set. Temperature returns to an energy-saving level after the timer expires, or the “Occupied” period ends.
Setting preferences
Preference menu options let you select how the thermostat displays information or responds to certain situations.
- Touch SETTINGS and select Preferences.
- Select an option and follow the prompts:
- Reminders
- Utility Schedule Options
- Backlight
- Smart Response Technology*
- Advanced Preferences
- Restore Default Schedule
- Restore Factory Defaults
- Touch Done to save your settings. Touch Cancel to ignore changes.
* Smart Response is not available if the thermostat is configured for business.
Setting system mode

- Touch MODE to display system settings.
- Touch desired option: Heat: The thermostat controls only the heating system. Cool: The thermostat controls only the cooling system. Off: Heating/cooling systems are off. Automatic: The thermostat selects heating or cooling as needed depending on the indoor temperature. Emergency Heat (heat pumps with aux. heat): Controls auxiliary/emergency heat. The compressor is locked out.
- Touch Done to save and exit.
Preset energy-saving schedules
This thermostat uses default Energy Saver settings that can reduce your heating/ cooling expenses.


