Braun BC20 Digital Rectangular Alarm Clock User Manual

BC20

Battery precautions
- Do not use rechargeable batteries.
- Use only 3V, CR2032 batteries of the same or equivalent type.
- Insert batteries with the correct polarity.
- Keep batteries away from children.
- Dispose of exhausted batteries according to local legal requirements. Do not dispose of them by throwing them away with normal household rubbish.
- Avoid short-circuiting the contacts in the battery compartment and battery terminals.
- Remove batteries from the unit if it will not be used for a long period.
- Exhausted batteries should be removed from the battery compartment to prevent over-discharge, which can cause leakage and may cause damage to the clock.
- Do not expose batteries to excessive heat such as the sun, or fire. CAUTION: Danger of explosion if the battery is incorrectly replaced. Replace only with the same (CR2032) or equivalent type.
Precaution of using an adaptor:
- The AC/DC adaptor and apparatus should not be exposed to dripping or splashing and no objects filled with liquids should be placed on the AC/DC adaptor and apparatus.
- When disconnecting the AC/DC adaptor it should not be obstructed and should be easily accessed. To completely disconnect the power input, the AC/DC adaptor should be disconnected from the mains.
Getting started
- Remove the battery door by turning with a coin or similar.
- Take out the button cell battery and remove the plastic strip.
- Replace the button cell battery.
- Close the battery door.
- Plug the power adapter into the DC jack at the back of the clock.
Note:
The button cell battery is for time backup only in case of a power outage or if the clock is temporarily unplugged. The clock and charging function only work when plugged into a mains socket via the included power adapter.
Function keys
ALARM / TIME / BRIGHTNESS switch
- Slide to the ALARM position to set the alarm time.
- Slide to the TIME position to set the clock time.
- Slide to the BRIGHTNESS position to set the clock display brightness.
+ Key
- In the ALARM / TIME setting mode, press to increase the setting value. Press and hold to speed up the setting.
- In the BRIGHTNESS mode, press to increase the clock display brightness.
– Key
- In the ALARM / TIME setting mode, press to decrease the setting value. Press and hold to speed up the setting.
- In the BRIGHTNESS mode, press to decrease the clock display brightness.
12/24H Key
- Press to change to a 12 or 24-hour format
ALARM ON / OFF touch button
- Touch and hold the ALARM ON / OFF touch button for ~ 1 second to enable the alarm, the green light will light up.
- Touch and hold the ALARM ON / OFF touch button for ~ 2 seconds to disable the alarm, the green light will go out.
DATE button
- Press the DATE button to set the year/month/date.
Product description (Image 1)
- LCD display
- ALARM ON / OFF touch key
- SNOOZE touch key
- + key
- – key
- 12/24H key
- Light sensor
- ALARM / TIME / BRIGHTNESS switch
- Backup battery compartment
- RESET button
- DATE button
- DC jack
- 2A USB-C port
- 1A USB-C port
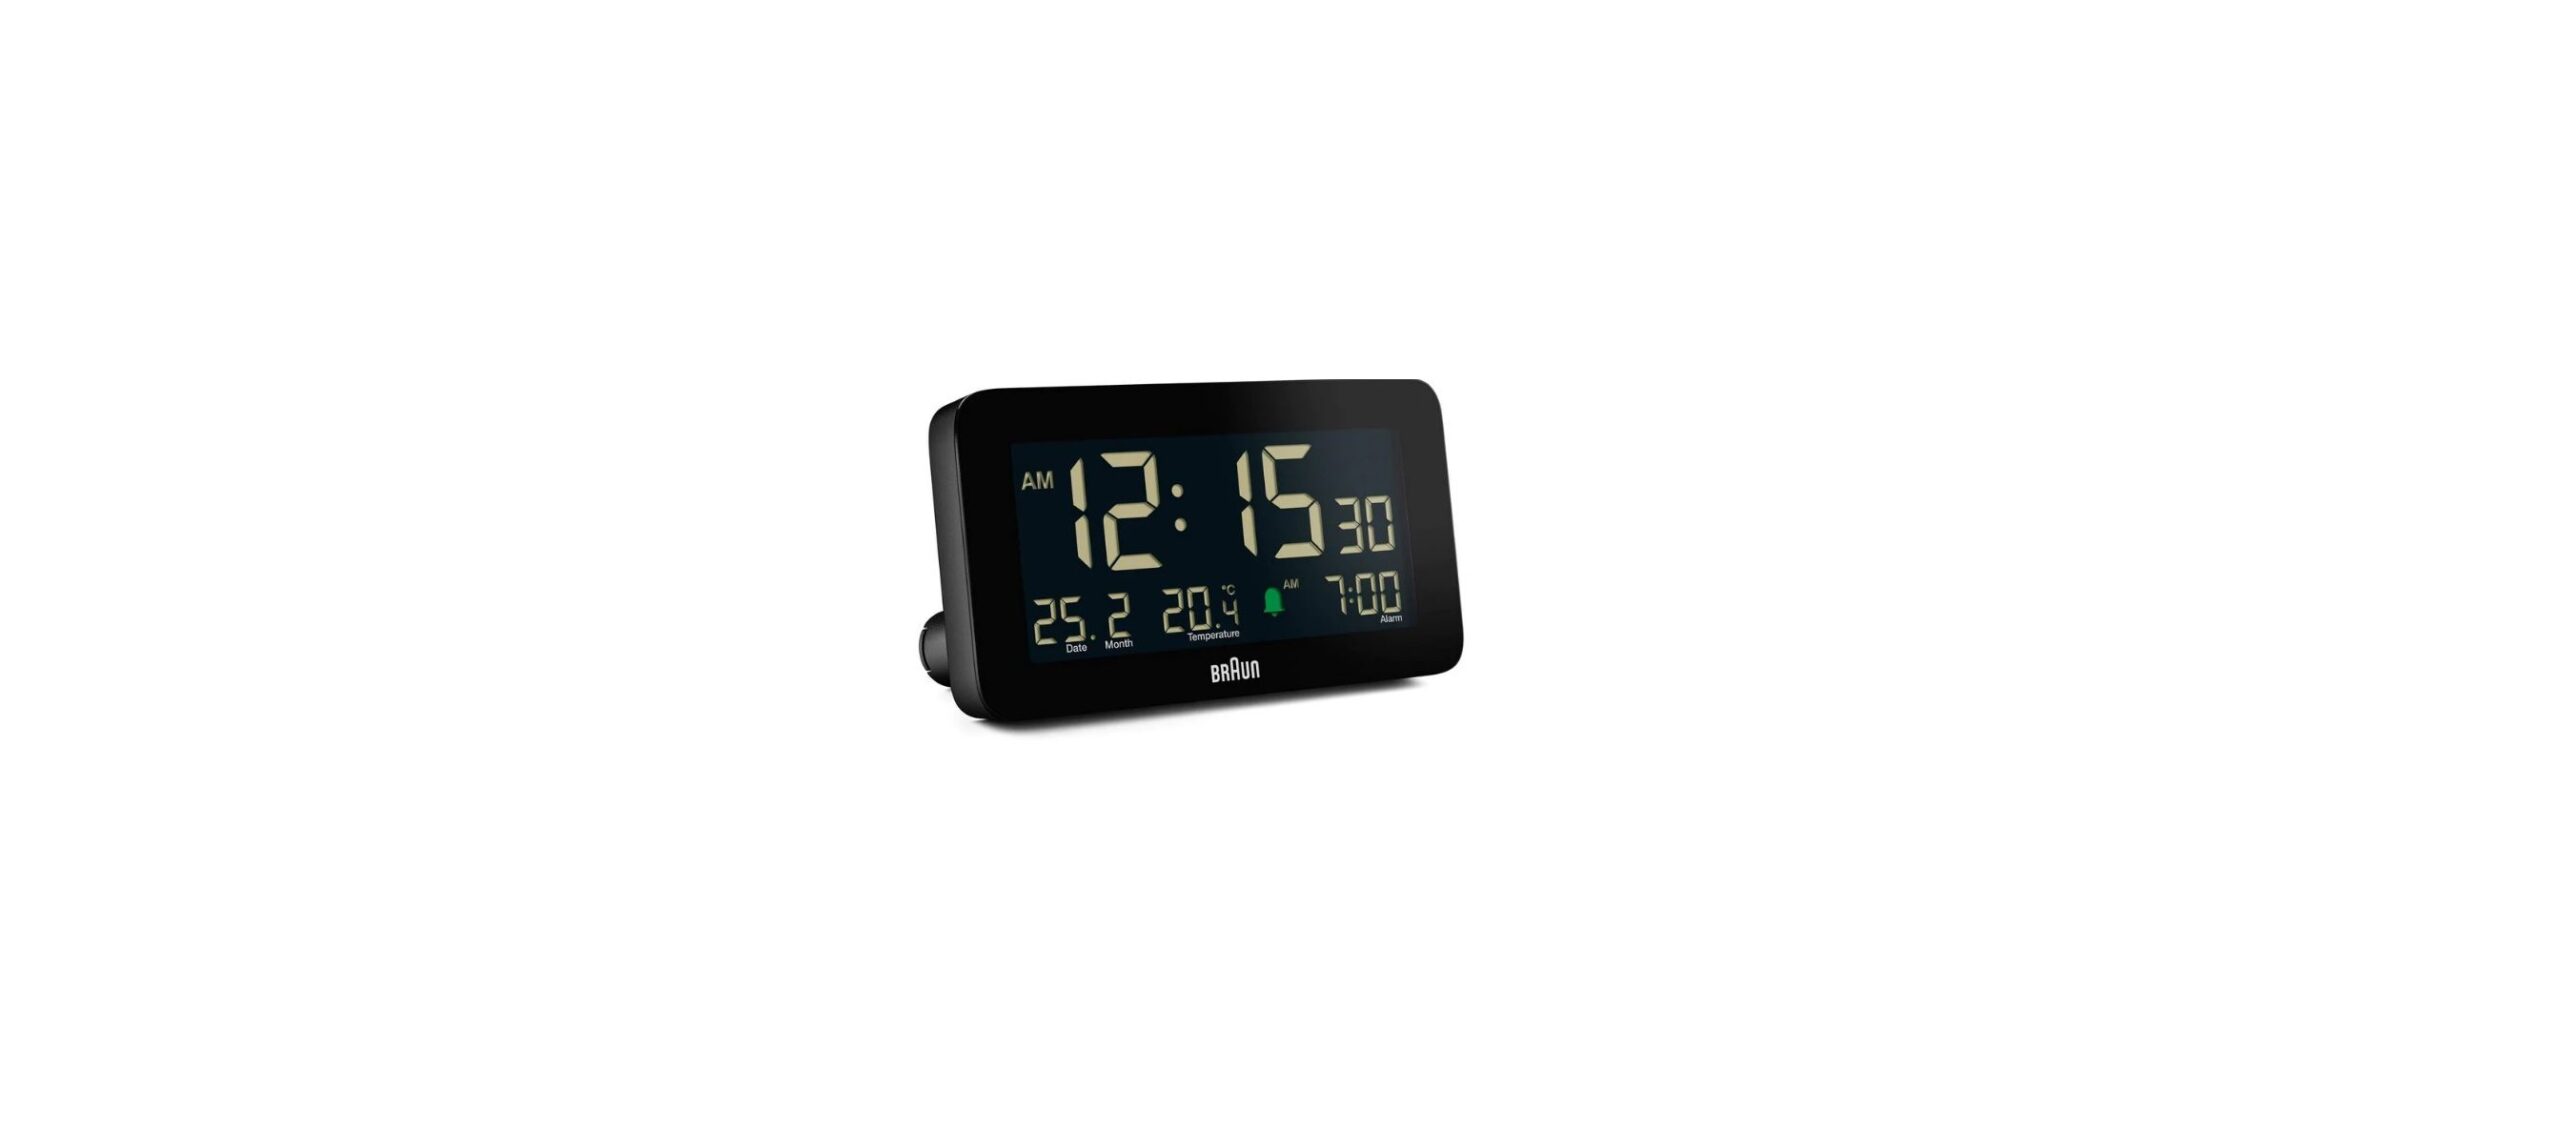
Display symbols (Image 2)
- A. Time
- B. Date
- C. Month
- D. Alarm icon
- E. Alarm time
Setting the time
- Slide the ALARM / TIME / BRIGHTNESS switch to the TIME position.
- Press the ‘+’ or ‘-‘ key to set the desired value. Press and hold the ‘+’ or ‘-‘keys to speed up the setting.
- Slide the ALARM / TIME / BRIGHTNESS switch to the BRIGHTNESS position to save the setting and return to the normal display.
Setting the alarm
- Slide the ALARM / TIME / BRIGHTNESS switch to the ALARM position.
- Press the ‘+’ or ‘-‘ key to set the desired value. Press and hold the ‘+’ or ‘-‘keys to speed up the setting.
- Slide the ALARM / TIME / BRIGHTNESS switch to the BRIGHTNESS position to save the setting and return to the normal display.
Setting the clock display brightness
The clock will automatically adjust the display brightness depending on the surrounding level of light.
- In a well-lit environment, slide the ALARM / TIME / BRIGHTNESS switch to the BRIGHTNESS position.
- Press the ‘+’ or ‘-‘ key to set the desired brightness.
- In a dark environment (or by covering the sensor), slide the ALARM / TIME / BRIGHTNESS switch to the BRIGHTNESS position.
- Press the ‘+’ or ‘-‘ key to set the desired brightness.
Setting the year, date, and month
- Press the DATE button.
- Press the ‘+’ or ‘-‘ key to set the current year. Press and hold the ‘+’ or ‘-‘keys to speed up the setting. Press the DATE button to save the setting.
- Press the ‘+’ or ‘-‘ key to set the current month. Press and hold the ‘+’ or ‘-‘keys to speed up the setting. Press the DATE button to
save the setting. - Press the ‘+’ or ‘-‘ key to set the current date. Press and hold the ‘+’ or ‘-‘keys to speed up the setting. Press the DATE button to save the setting.
Using the alarm and snooze function
- Enable the alarm by touching the ALARM ON / OFF button for ~ 1 second. The green light will light up and the bell icon will appear on the LCD display.
- Touch the SNOOZE key to stop the alarm and activate the snooze function. When the alarm sounds, the alarm icon will flash.
- To disable the alarm and snooze function, touch the ALARM ON / OFF button for ~ 2 seconds. The green light will go out and the bell icon will disappear.
Note:
When the snooze function is activated, the alarm will automatically start again after 5 minutes. The snooze function will not
stop unless you press the ALARM ON/OFF button to turn off the snooze.
Battery replacement
- If the AC/DC adapter is removed from the clock and the current time is not memorized after plugging in again, then the button cell battery must be replaced immediately.
- It is recommended to replace the button cell battery once a year.
WARNING! This product is covered by the Waste Electrical and Electronic Equipment (WEEE) Directive and the battery used in this item is covered by the Battery Directive. It should not be discarded with normal household waste but taken to your local collection center for recycling. This product conforms to the EMC requirements as per Council directive 2014/30/EU. Certain trademarks are used under license from the Procter & Gamble Company or its affiliates.
REFERENCE LINK


 Afrikaans
 Albanian
 Amharic
 Arabic
 Armenian
 Azerbaijani
 Basque
 Belarusian
 Bengali
 Bosnian
 Bulgarian
 Catalan
 Cebuano
 Chichewa
 Chinese (Simplified)
 Chinese (Traditional)
 Corsican
 Croatian
 Czech
Czech Danish
 Dutch
Dutch English
 Esperanto
 Estonian
 Filipino
 Finnish
 French
 Frisian
 Galician
 Georgian
 German
 Greek
Greek Gujarati
 Haitian Creole
 Hausa
Hausa Hawaiian
 Hebrew
 Hindi
Hindi Hmong
Hmong Hungarian
 Icelandic
 Igbo
Igbo Indonesian
 Irish
Irish Italian
 Japanese
 Javanese
 Kannada
 Kazakh
 Khmer
Khmer Korean
 Kurdish (Kurmanji)
 Kyrgyz
 Lao
Lao Latin
Latin Latvian
 Lithuanian
 Luxembourgish
 Macedonian
 Malagasy
 Malay
Malay Malayalam
 Maltese
 Maori
Maori Marathi
 Mongolian
 Myanmar (Burmese)
 Nepali
 Norwegian
 Pashto
 Persian
 Polish
 Portuguese
 Punjabi
 Romanian
 Russian
 Samoan
 Scottish Gaelic
 Serbian
 Sesotho
 Shona
Shona Sindhi
 Sinhala
 Slovak
 Slovenian
 Somali
 Spanish
 Sundanese
 Swahili
 Swedish
 Tajik
Tajik Tamil
Tamil Telugu
 Thai
Thai Turkish
 Ukrainian
 Urdu
Urdu Uzbek
Uzbek Vietnamese
 Welsh
Welsh Xhosa
Xhosa Yiddish
 Yoruba
 Zulu
Zulu