BUDDEE BD903001-BK Bluetooth Digital Alarm Clock User Guide
INTRODUCTION
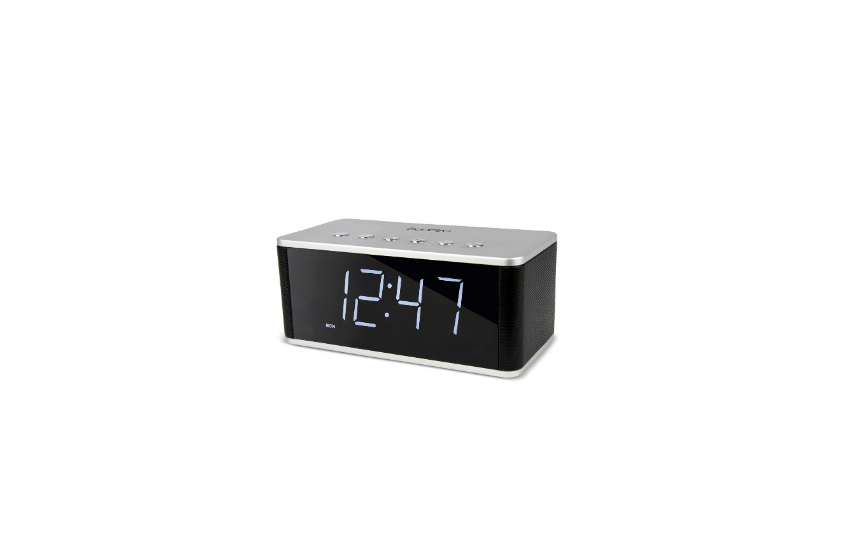
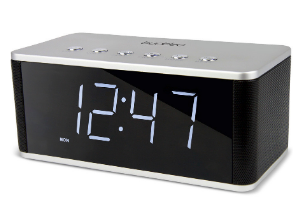
Wake up on time with the Bluetooth® Digital Alarm Clock from Buddee. This product features a large digital clock with alarm, FM radio and snooze functions so you will be up and ready for any occasion. Wirelessly stream your music via Bluetooth®, play via 3.5mm auxiliary cable, or insert a TF / microSD card for playback. The large LED display makes checking the time easy no matter where you are in the room.
PACKAGE CONTENTS
Before attempting to use this unit, please check the packaging and make sure the following items are contained in the shipping carton:
- Bluetooth® Digital Alarm Clock
- Micro-USB charging cable
- 3.5mm AUX cable
- User manual
FEATURES
- Bluetooth® audio
- 10m wireless range
- USB charging
- AUX input
- Alarm
- TF card playback
- USB port for phone charging
- Large LED display
- FM radio
- Dual speakers
FUNCTIONS
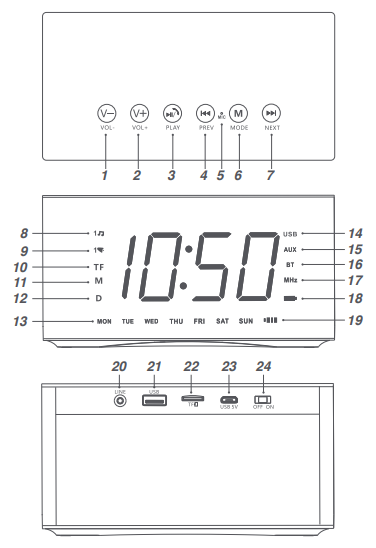
- Increase volume
- Decrease volume
- Play/pause and answer call
- Previous button
- Microphone
- Mode (Toggle Bluetooth®, AUX line-in, FM radio and clock modes)
- Next button
- Alarm sound indication
- Alarm indication
- TF card indication
- Month indication
- Date indication
- Day indication
- USB mode indication
- AUX mode indication
- Bluetooth® indication
- FM radio indication
- Power display
- Charging indication
- AUX line-in audio port
- USB port
- TF card slot
- Micro-USB port
- Power switch (ON/OFF)
POWERING ON
- Slide the power switch to the ON position and the display will light up. The alarm clock will activate into Bluetooth® mode.
- Slide the power switch to the OFF position to power down the alarm clock.
CHARGING
- Connect the micro-USB end of the included cable into the charging port on the back of the alarm clock.
- Connect the USB end with a powered USB source such as a computer, laptop or USB wall charger. The charging indicator will flash red. A flashing charging indicator light means the alarm clock is low on battery.
- Once the device is fully charged the charging indicator will turn off.
NOTE: Please fully charge the alarm clock prior to first use.
ANSWER PHONE CALLS
- To accept a phone call, firstly pair your mobile with the alarm clock via Bluetooth®. Once paired, simply press the play button located on the top of the alarm clock to accept an incoming call. Your voice will be delivered through the built in microphone.
- To end the call, press the play button once more.
NOTE: You can also use the controls on your mobile phone.
BLUETOOTH® MODE
PAIRING A DEVICE AND PLAYING AUDIO
- When activating Bluetooth® mode the LED display will flash, indicating the alarm clock is waiting to be paired. When pairing remain within one metre of the device.
- In the Bluetooth® settings menu of the device you wish to pair, select BD-ALMCLK-1 in the list of available Bluetooth® devices. If your device requires a password, enter 0 0 0 0. Refer to the manual of your device for specific instructions on pairing and connecting Bluetooth® devices.
- Once pairing is successful, the LED display will stop flashing. Audio played through the connected Bluetooth® device will now be heard through the alarm clock.
- Use the controls on your connected device to select and begin to play audio. To play/pause audio, skip songs or adjust the volume use the controls on the top of the alarm clock. You can also use the controls on your connected device.
TF / MICRO SD CARD MODE
- Insert your TF or micro SD card into the slot located on the back of the alarm clock. Press the mode button until you reach the TF card mode. The TF indicator will light up on the LED display.
- Use the controls located on the top of the alarm clock to play/pause, adjust volume or skip songs stored on your TF card.
AUX LINE-IN MODE
- Connect a 3.5mm AUX cable to your alarm clock in the AUX port located on the back of the device. Press the mode button until you reach the AUX Line-In mode.
- Begin playing audio through your connected AUX device and it will now be heard through the alarm clock speaker.
SETTING THE TIME AND DATE
- Press the mode button until you reach clock mode.
- Press the next button and the LED display will begin to flash. Keep pressing the next button again to sort between changing the hour, minutes, month and weekday information displayed on the alarm clock.
- Use the increase volume and decrease volume buttons to set the time and date.
USING THE ALARM
- Press the mode button until you reach clock mode.
- Press the previous button and the LED display will being to flash. Keep pressing the next button to sort between setting the hour and minutes for your alarm time.
- Use the increase volume and decrease volume buttons to set the time. Once you have set your desired alarm time do not touch any buttons for approximately four seconds and the alarm clock will display the current time again. This means it has set successfully.
- After setting your alarm, press the play button to toggle the alarm from ON and OFF.
TECHNICAL SPECIFICATIONS
- Input: 5V
- Output: 5W x 2
- Speaker size: Φ52mm
- Impedance: 4Ω5W
- Frequency: 100Hz – 18KHz
- FM Frequency: 87.5 – 188MHz
- AUX input: 3.5mm
- Bluetooth® Version: 2.1+ESR
- Battery Life: 4 hours at 80% volume
REFERENCE LINK
https://www.buddeegear.com/content/BD903209-BK