VEHO Cave Outdoor Wireless IP Camera Manual
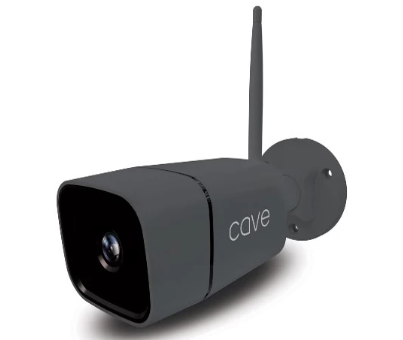
 Introduction to the Cave HD Outdoor IP Camera
Before pairing the Cave camera with your Cave Smart Hub please read the following.
Ensure the camera and Smart Hub is within range of the mobile device which you use to access the Cave app.
You will need your router username and password to hand.
IMPORTANT: Only use the supplied power cable with the camera and a compatible power source. Failure to do so may invalidate your warranty.
Visit our YouTube channel for Cave installation guides https://www.youtube.com/VehoWorld
Installing the Cave camera
 Before installation insert a compatible microSD card, class 10 up to 128GB (not included). Remove the two screws that secure the bottom panel and insert the microSD card into the slot. Secure the bottom panel in place with the two screws.
 We recommend the installation is carried out by a qualified Electrician. Before mounting the camera ensure the mounting surface can easily support the weight of the camera.
Pairing the Cave camera
 STEP 1
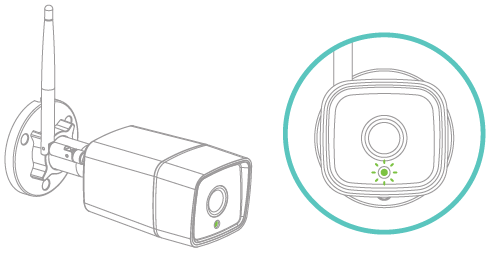
Once installed and plugged into a compatible power source, the Cave camera LED (on the front) will continuously flash green to indicate it is in pairing mode.

Open the Cave app and press the ‘Add Accessory’ button then press ‘By scanning QR Code’.
 STEP 3
Scan the QR Code on the base of the camera using the scan window in the app. Take note of the camera pairing name, shown on the screen, next, open the Wi-Fi settings on your device.

Note: If the camera does not appear on the Wi-Fi list press and hold the reset button on the rear of the camera for 10 seconds, when released, you will hear
a ‘Beep’. The camera should appear within 30 seconds.
 STEP 4
Select the camera from the Wi-Fi list and enter the default password ‘01234567’ and click ‘Join’. The camera should connect to your Wi-Fi.
 STEP 5
Re-enter the Cave app your wi-fi router should be already listed, enter your Wi-Fi router password and confirm the password before clicking ‘Start’. Network configuration may take up to a few minutes.
 STEP 6
Enter a name for your new IP camera and click the tick icon to save. The camera will now appear in the Cave app under‘Smart cameras’.
 STEP 7
To view the camera for the first time, you will need to reset the default password. Press ‘OK’ and enter a new password, once confirmed the camera will be online and ready to view.
Live view, recording & playback
 Click on the ‘Smart Camera’ icon on the home screen where all IP cameras are listed. For a live view of any camera’s click the play icon on the left. In live view mode, you can take a snapshot, listen to audio and talk through the camera.
 To review recorded footage click the ‘Video’ link for a list of recorded events. All footage is automatically saved onto a microSD card (not included).
Camera settings
 Change camera password / Motion detection & recording / Sync time zone / Record in HD or SD / Horizontal and vertical flip / Update wi-fi settings / Format SD card.
What are the requirements for an IP camera?
The computer required for an IP system is called a local area network (LAN), which is a PoE switch that connects cameras and NVRs. Internet is only required if you want to be able to remotely monitor your IP monitor over the Internet while you are away.
What is the working voltage of the IP camera?
Some IP cameras can be powered by 24 volts or PoE; others only offer 24 VAC or 12 VDC options. Note that while the power supply is proprietary, the camera won’t work without it, so don’t skimp on the power supply or plan to replace it in a few years.
Do IP cameras need memory cards?
First, when there is an Internet connection, your smart camera cannot record anything without a microSD card inserted. That’s why we always like to have cards in our cameras for peace of mind.
How much data does an IP camera use?
IP cameras typically use 3 to 389 GB per month. When we examine this in more detail, each security camera has 100 MB to 13 GB per day or 4.17 MB to 540 MB per hour or 0.01 Mbit and 1. 2 megabits per second.
How many types of camera cables are there?
When connecting a surveillance camera, you must send the video via some kind of cable. RG59 cables, RCA plug-and-play cables, and CAT5 cables can be used in the CCTV industry. These are the three types of CCTV cables.
Specifications
Camera
- Image sensor… 1/2.7” 1080P CMOS
- Effective pixels… 1920(H) x 1080(V)
- WDR… Digital WDR
- Noise Reduction… 3D DNR
- Day/Night control (IR-Cut)… Auto (ICR)/Color/B&W
- Motion detection… Supported
- SD card… Supported, up to 128GB
- IR distance… 30m (98.5ft)
Lens
- Focal length… 4mm
- Max aperture… F2.4
- Focus control… Fixed
- The angle of view… 114°
Video
- Encode… H.265 Main profile
- Resolution… 1080P (1920×1080), VGA (640×352)
- Video bitrates… 32Kbps ~ 8Mbps
- Video frame rate… 30fps@1080P
- Image snapshot… Supported
General
- Power supply… DC 12V/1A
- Hard reset… Supported
- Working power… <5W
- Working temp… -10℃~+55 / 10%~90% RH
- Water resistant… IP65
- Dimensions… 188mm x 65mm x 60 mm
- Weight… 385g
Network
- Network protocol… HTTP, FTP, TCP/IP, UDP, SMTP,
- DHCP, NTP, UPNP, RTSP, Novib, DDNS
- App… iOS (9.0+), Android (5.0+)
- Wi-Fi… Wi-Fi (802.11b/g/n), 2.4G only, supports
- WEP / WPA-PSK /WPA2-PSK encryption
- P2P… Supported
Support & troubleshooting
How do you reset the Cave HD Outdoor Wireless IP Camera?
Press and hold the reset button on the rear of the camera until you hear the reset success tone, approximately 10 seconds. Release the button and wait until you hear a beep to confirm the camera is in pairing mode, this can take up to 30 seconds; proceed to set up the camera after the beep.
Contacting Veho
To contact Veho for support or troubleshooting for your Cave IP Camera visit our website at vehoworld.com and use our pop-up chat box.
DISCLAIMER:
Veho is not responsible for ensuring all footage is captured. Please ensure the Cave HD Outdoor Wireless IP Camera is installed and positioned correctly, and that you are familiar with operating the camera and app before using it.
REFERENCE
https://veho-world.com/wp-content/uploads/2021/10/VHS-010-OC_manual.pdf


 Introduction to the Cave HD Outdoor IP Camera

