

Danby DMW077BLSDD Designer 0.7cu.ft Microwave Oven User Guide
IMPORTANT SAFETY INSTRUCTIONS
- Read and follow the specific “Precautions to Avoid Possible Exposure to Excessive Microwave Energy” on page
- Connect only to a properly grounded outlet. See “Grounding Instructions” section on page 5.
- Do not operate this appliance if it has a damaged power cord or plug, if it is not working properly, or if it has been damaged or dropped.
- Do not cover or block any openings on the appliance.
- Use this appliance only for its intended use as described in this manual. Do not use corrosive chemicals or vapors in this appliance.
- This microwave oven is specifically designed to heat, dry or cook food, and is not intended for laboratory or industrial use.
- Some products such as whole eggs and sealed containers – for example, closed glass jars- may explode and should not be heated in this oven.
- Do not store this appliance outdoors.
- Do not use this product near water-for example, in a wet basement, near a swimming pool or near a sink.
- Keep power cord away from heated surfaces.
SPECIAL NOTES ABOUT MICROWAVING
ARCING
Arcing is the microwave term for sparks in the oven.
- Metal or foil touching the side of the oven.
- Foil not molded to food (upturned edges act like antennae).
- Metal, such as twist-ties, poultry pins, or gold-rimmed dishes, in the microwave.
- Recycled paper towels containing small metal pieces being used in the microwave.
FOODS
- Only cook popcorn in your microwave oven using a special microwave popcorn accessory dish, unless you use popcorn labeled for use in microwave ovens.
- Some products- such as whole eggs (with shell), sealed containers, and closed jars – will explode and should not be heated in this microwave oven. Heating these products in the microwave oven could result in injury.
- Do not boil eggs in a microwave oven. Pressure will build up inside egg yolk and will cause it to burst, possibly resulting in injury.
MICROWAVE-SAFE COOKWARE:
Make sure all cookware used in your microwave oven is suitable for microwaving.
- If you use a meat thermometer while cooking, make sure it is safe for use in microwave ovens.
- Do not use recycled paper products. Recycled paper towels, napkins, and waxed paper can contain metal flecks which may cause arcing or ignite.
- Not all plastic wrap is suitable for use in microwave ovens. Check the package for proper use.
INSTALLATION GUIDE
- Make sure that all packing materials are removed from the inside of the microwave oven.
- Check the microwave for any damage, such as misaligned or bent door, damaged door seals and sealing surface, broken or loose door hinges and latches, and dents inside the cavity or on the door. If there is any damage, do not operate the oven but contact a qualified service personnel.
- This microwave oven must be placed on a flat, stable surface to hold its weight.
- Do not place the microwave oven where heat, moisture, or high humidity are generated, or near combustible materials.
- For correct operation, the microwave oven must have sufficient air flow. Allow 20 cm of space above the microwave oven, 10 cm at back and 5 cm at both sides. Do not cover or block any openings on the appliance. Do not remove the feet on which the microwave oven stands.
- Do not operate the oven without glass tray, roller support, and shafts in their proper positions.
- Make sure that the power supply cord is undamaged and does not run under the microwave oven or over any hot or sharp surfaces.
- The socket must be readily accessible so that it can be easily unplugged in an emergency.
OPERATING INSTRUCTIONS
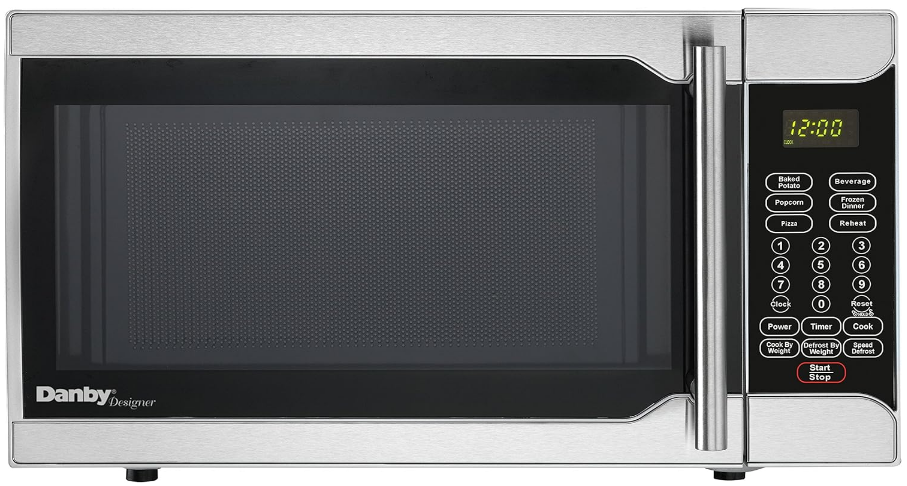
FEATURES OF YOUR MICROWAVE

- Oven Window: Screen allows cooking to be viewed while keeping microwave energy confined in oven.
- Turntable Shaft
- Roller Ring
- Removable Glass Turntable: Turntable and support must be in place when using the oven. The turntable may be removed for cleaning.
- Control Panel
- Electronic Display
CONTROLS

- POWER
- KITCHEN TIMER
- WEIGHT DEFROST
- TIME DEFROST
- MEMORY
- AM/PM
- STOP/CLEAR: Clears all previous settings entered before cooking starts. During cooking: Press once to stop oven. Press twice to stop and clear all entries.
- AUTO MENU: Popcorn, Potato, Pizza, Beverage, Soup, Dinner Plate, Fresh Vegetable, Frozen Vegetable.
- NUMBER KEYS
- CLOCK/PRE-SET
- START/+30 SEC.
SETTING THE CLOCK
When the microwave oven is plugged into an outlet, the oven will display “0:00”;
- Press “CLOCK/PRE-SET”, LED will display 00:00 and clock indicator will be illuminated. The hour figures will flash; “0” and “:” will illuminate.
- Press the number keys and enter the correct time. For example, time is 10:12- press “1, 0, 1, 2” in turn.
- Press “AM/PM” to choose AM or PM in turn by pressing the AM/PM button until your desired choice is displayed.
- Press “CLOCK/PRE-SET” to finish setting the clock; the clock indicator will go out and “:” will flash as the clock time displays.
- If the numbers input are not within the range of 1:00-12:59, the setting will be invalid until valid numbers are entered.
NOTE: In the process of clock setting, if the “STOP/CLEAR” button is pressed or if there is no operation within 1 minute, the oven will revert to the former setting automatically.
SETTING THE KITCHEN TIMER
- Press “KITCHEN TIMER”; LED will display “00:00”, and the first hour figure will flash.
- Press the number keys and enter the timer time (the maximum cooking time is 99 minutes and 99 seconds).
- Press “START/+30 SEC.” to confirm the setting
- When the kitchen timer time is reached, the clock indicator will go out and the microwave will sound 5 times. If the clock is set the LED will show current time.
NOTE: The kitchen timer is different from the 12-hour clock system and is intended only for use when timing.
SPEEDY COOKING
- Instant cooking (from waiting state) at 100% power level can be started by selecting a cooking time from 1 to 6
minutes, by pressing the number pads 1 to 6. Press “START/+30 SEC.” to increase the cooking time; the maximum cooking time is 99 minutes and 99 seconds. - Instant cooking at 100% power level for a duration of 30 seconds’ cooking time can be started by pressing “START/+30 SEC.”. Each press on this button will increase cooking time by 30 seconds (to a maximum of 99 minutes, 59 seconds).
NOTE: During microwave cooking and time defrost, time can be added by pressing the “START/30 SEC.” button.
DEFROST BY WEIGHT
- Press “WEIGHT DEFROST”; LED will display “dEF1”
- Press numerical buttons to input weight to be defrosted. Input the weight ranged between 4~100 Oz.
- If the weight input is not within 4~100, the input will be invalid. No “beep” will be sound and the unit will not work until valid numbers are input.
- Press ” START/+30 SEC. ” to start defrosting and the cooking time remained will be displayed۔

POPCORN
- Press ” POPCORN ” repeatedly until the number you wish appears in the display, “1.75”,”3.0″,”3.5″ Oz will display in order. For example, press “POPCORN” once , “1.75” appears.
- Press ” START/+30 SEC. ” to cook, buzzer will sound five times and then turn back to waiting state.
![]()
TIME DEFROST
- Press “TIME DEFROST”; LED will display “dEF2”.
- Press the number buttons to input defrosting time. The accepted time range is 00:01-99:99; if the time input is not within this range, no “beep” will sound and the microwave will not function until valid numbers are input.
- The default microwave power is power level 3. If you want to change the power level, press “POWER” once,
and the LED will display “PL3”; press the number of the power level you desire. - Press “START/+30 SEC.” to start defrosting and the remaining cooking time will be displayed.
FROZEN VEGETABLES
- Press ” FROZEN VEGETABLE ” repeatedly until the number you wish appears in the display, “4.0”,”8.0″,”16.0″ oz will display in order. For example, press “FROZEN VEGETABLE” once , “4.0” appears.
- Press ” START/+30 SEC. ” to cook, buzzer sounds once. When cooking finish,buzzer sounds five times and then turn back to waiting state.

BEVERAGES
- Press ” BEVERAGE ” repeatedly until the number you wish appears in the display, “1”,”2″,”3″ cup will display in order. One cup is about 120 ml. For example, press “BEVERAGE” once , “1” appears.
- Press ” START/+30 SEC. ” to cook, buzzer sounds once.When cooking finish,buzzer sounds five times and
then turn back to waiting state.
FRESH VEGETABLES
- Press “FRESH VEGETABLE” repeatedly until the number you wish appears in the display; “4.0, 8.0, 16.0” (ounces) will be displayed in turn. For example, press “FRESH VEGETABLE” once; “4.0” appears.
- Press “START/+30 SEC.” to cook;
MULTI-STAGE COOKING
- Press “TIME COOK” once,then press “5”,”0″,”0″ to set the cooking time;
- Press “POWER” once,then press “8” to select 80% microwave power.
- Press “TIME COOK” once,then press “1”,”0″,”0″,”0″ to set the cooking time;
- Press “POWER” once,then press “6” to select 60% microwave power.
- Press “START/ +30 SEC.” to start cooking.
CARE AND MAINTENANCE
- Turn off the oven and remove the power plug from the wall socket before cleaning.
- Keep the inside of the oven clean.When food splatters or spilled liquids adhere to oven walls,wipe with a damp cloth. Mild detergent may be used if the oven gets very dirty. Avoid the use of spray and other harsh cleaners as they may stain, streak or dull the door surface.
- The outside surfaces should be cleaned with a damp cloth. To prevent damage to the operating parts inside the oven, water should not be allowed to seep into the ventilation openings.
- Wipe the window on both sides with a damp cloth to remove any spills or spatters.
- Do not allow the control panel to become wet. Clean with a soft, damp cloth.When cleaning the control panel, leave oven door open to prevent oven from accidentally turning on.
- If steam accumulates inside or around the outside of the oven door, wipe with a soft cloth. This may occur when the microwave oven is operated under high humidity conditions; this is normal.
- It is occasionally necessary to remove the glass tray for cleaning. Wash the tray in warm sudsy water or in a dishwasher.
- The roller ring and oven floor should be cleaned regularly to avoid excessive noise. Simply wipe the bottom surface of the oven with mild detergent. The roller ring may be washed in mild sudsy water or dishwasher. When removing the roller ring from cavity floor for cleaning, be sure to replace in the proper position.
- Remove odors from your oven by combining a cup of water with the juice and skin of one lemon in a deep bowl, microwave for 5 minutes. Wipe thoroughly and dry with a soft cloth.
- When it becomes necessary to replace the oven light, please consult a dealer to have it replaced.
TROUBLESHOOTING
| PROBLEM | POSSIBLE CAUSE | SOLUTION |
| Oven will not start | a. Electrical cord for oven is not plugged in. b. Door is open. c. Wrong operation is set. | a. Plug into the outlet. b. Close the door and try again. c. Check instructions. |
| Arcing or sparking | a. Materials to be avoided in microwave oven were used. b. The oven is operated when empty. c. Spilled food remains in the cavity. | a. Use microwave-safe cookware only. b. Do not operate with oven empty. c. Clean cavity with wet towel. |
| Unevenly cooked foods | a. Materials to be avoided in microwave oven were used. b. Food is not defrosted completely. c. Cooking time, power level is not suitable. d. Food is not turned or stirred. | a. Use microwave-safe cookware only. b. Completely defrost food. c. Use correct cooking time, power level. d. Turn or stir food. |
| Overcooked foods | Cooking time, power level is not suitable. | Use correct cooking time, power level. |
|
Under cooked foods | a. Materials to be avoided in microwave oven were used. b.Food is not defrosted completely. c.Oven ventilation ports are restricted. d.Cooking time, power level is not suitable. | a. Use microwave-safe cookware only. b. Completely defrost food. c. Check to see that oven ventilation ports are not restricted. d. Use correct cooking time, power level. |
|
Improper defrosting | a. Materials to be avoided in microwave oven were used. b. Cooking time, power level is not suitable. c. Food is not turned or stirred. | a. Use microwave-safe cookware only. b. Use correct cooking time, power level. c. Turn or stir food. |
FCC Statement
- This device may not cause harmful interference,
- This device must accept any interference received, including interference that may cause undesired operation. Any changes or modifications not expressly approved by the party responsible for compliance could void the user’s authority to operate the equipment.
Note:
This equipment has been tested and found to comply with the limits for a Class B digital device, pursuant to Part 15 of the FCC Rules. These limits are designed to provide reasonable protection against harmful interference in a residential installation. This equipment generates, uses and can radiate radio frequency energy and, if not installed and used in accordance with the instructions, may cause harmful interference to radio communications. However, there is no guarantee that interference will not occur in a particular installation. If this equipment does cause harmful interference to radio or television reception, which can be determined by turning the equipment off and on, the user is encouraged to try to correct the interference.


 Afrikaans
 Albanian
 Amharic
 Arabic
 Armenian
 Azerbaijani
 Basque
 Belarusian
 Bengali
 Bosnian
 Bulgarian
 Catalan
 Cebuano
 Chichewa
 Chinese (Simplified)
 Chinese (Traditional)
 Corsican
 Croatian
 Czech
Czech Danish
 Dutch
Dutch English
 Esperanto
 Estonian
 Filipino
 Finnish
 French
 Frisian
 Galician
 Georgian
 German
 Greek
Greek Gujarati
 Haitian Creole
 Hausa
Hausa Hawaiian
 Hebrew
 Hindi
Hindi Hmong
Hmong Hungarian
 Icelandic
 Igbo
Igbo Indonesian
 Irish
Irish Italian
 Japanese
 Javanese
 Kannada
 Kazakh
 Khmer
Khmer Korean
 Kurdish (Kurmanji)
 Kyrgyz
 Lao
Lao Latin
Latin Latvian
 Lithuanian
 Luxembourgish
 Macedonian
 Malagasy
 Malay
Malay Malayalam
 Maltese
 Maori
Maori Marathi
 Mongolian
 Myanmar (Burmese)
 Nepali
 Norwegian
 Pashto
 Persian
 Polish
 Portuguese
 Punjabi
 Romanian
 Russian
 Samoan
 Scottish Gaelic
 Serbian
 Sesotho
 Shona
Shona Sindhi
 Sinhala
 Slovak
 Slovenian
 Somali
 Spanish
 Sundanese
 Swahili
 Swedish
 Tajik
Tajik Tamil
Tamil Telugu
 Thai
Thai Turkish
 Ukrainian
 Urdu
Urdu Uzbek
Uzbek Vietnamese
 Welsh
Welsh Xhosa
Xhosa Yiddish
 Yoruba
 Zulu
Zulu