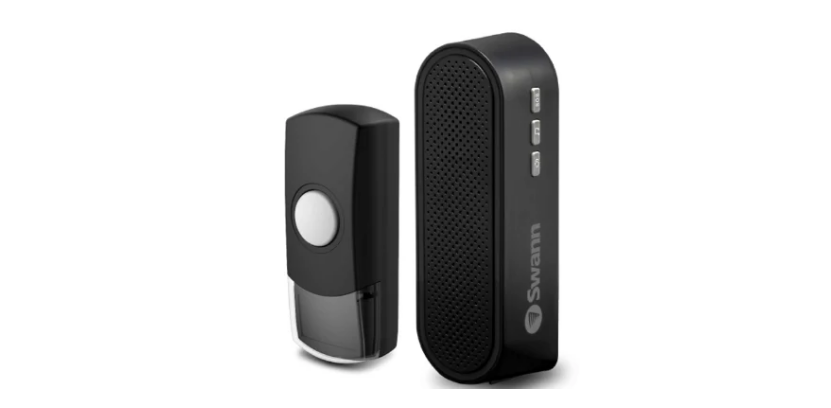
SWANN DC819B Wireless Doorbell Kit User Guide

Product Overview
Speaker unit /Doorbell unit

Installing Batteries
Speaker unit
Pull out the battery tab on the rear of the Speaker to activate the pre-installed batteries (2 x AA size). To replace the batteries:
- Open the battery compartment cover with the provided screwdriver.
- Insert batteries according to the polarity markings (+ and –) indicated inside the battery compartment. For reliable, long-lasting performance, use high quality alkaline batteries only.
- Replace the battery compartment cover and fasten it in place with the previously removed screw.
Doorbell unit

- Remove the nameplate cover, pull out the screw cover in the bottom right corner with a tweezer (or similar item such as a paper clip) and then remove the locking screw securing the Doorbell front cover with a small Philips® screwdriver.
- Insert a small flat-head screwdriver into the notch at the base of the Doorbell unit and turn to lift the front cover off.
- Place a new “CR2032” battery into the battery holder with the positive (+) side facing up.
- Snap the front cover back onto the base and fasten it in place with the previously removed screw. Replace both the screw and nameplate covers.
Pairing the Speaker with the Doorbell
- Briefly press the Pair button on the Speaker. The Speaker beeps once to indicate that it is in pairing mode.
- Within 10 seconds, press the Doorbell button. The Speaker confirms pairing by playing the chime melody.
- If pairing is not completed within 15 seconds, the Speaker will double-beep to indicate that it is no longer in pairing mode. Repeat steps 1 – 2 to pair the Speaker with the Doorbell again.
Changing the Melody
Press the Melody Select button on the Speaker repeatedly to cycle through all the available melodies. Stop when you hear something you like. There is no need to confirm your selection.
Mounting the Speaker and the Doorbell
Speaker unit
The Speaker can be completely freestanding or mounted. The operating distance between the Speaker and Doorbell is up to 50 m/165 ft but the range may vary depending on local conditions. If you would like to mount the Speaker, simply attach the supplied mounting screw to the wall. Depending on the surface, you may also need to use a masonry or dry wall plug. Do not insert the screw all the way in but leave a small gap between screw head and wall so that you can place the keyhole slot on the back of the Speaker over the screw.
Doorbell unit
- You can stick the Doorbell to the wall using the supplied double-sided tape. Make sure the surface is dry, smooth and free of dust and other substances that could affect adhesion.
- Alternatively, you can mount the Doorbell to the wall using screws— simply open the Doorbell with a screwdriver and separate the front cover from the base. Penetrate the two standby holes on the base with two screws, then screw the base to the mounting surface. Snap the front cover back onto the mounted base and secure with the screw. Make sure the rubber seal around the edge of the base is seated properly.

Resetting the Speaker
To reset the pairing information, press and hold the Pair button on the Speaker for five seconds until you hear five beeps in a row. After you reset the Speaker, you will need to pair it with the Doorbell again.


 Afrikaans
 Albanian
 Amharic
 Arabic
 Armenian
 Azerbaijani
 Basque
 Belarusian
 Bengali
 Bosnian
 Bulgarian
 Catalan
 Cebuano
 Chichewa
 Chinese (Simplified)
 Chinese (Traditional)
 Corsican
 Croatian
 Czech
Czech Danish
 Dutch
Dutch English
 Esperanto
 Estonian
 Filipino
 Finnish
 French
 Frisian
 Galician
 Georgian
 German
 Greek
Greek Gujarati
 Haitian Creole
 Hausa
Hausa Hawaiian
 Hebrew
 Hindi
Hindi Hmong
Hmong Hungarian
 Icelandic
 Igbo
Igbo Indonesian
 Irish
Irish Italian
 Japanese
 Javanese
 Kannada
 Kazakh
 Khmer
Khmer Korean
 Kurdish (Kurmanji)
 Kyrgyz
 Lao
Lao Latin
Latin Latvian
 Lithuanian
 Luxembourgish
 Macedonian
 Malagasy
 Malay
Malay Malayalam
 Maltese
 Maori
Maori Marathi
 Mongolian
 Myanmar (Burmese)
 Nepali
 Norwegian
 Pashto
 Persian
 Polish
 Portuguese
 Punjabi
 Romanian
 Russian
 Samoan
 Scottish Gaelic
 Serbian
 Sesotho
 Shona
Shona Sindhi
 Sinhala
 Slovak
 Slovenian
 Somali
 Spanish
 Sundanese
 Swahili
 Swedish
 Tajik
Tajik Tamil
Tamil Telugu
 Thai
Thai Turkish
 Ukrainian
 Urdu
Urdu Uzbek
Uzbek Vietnamese
 Welsh
Welsh Xhosa
Xhosa Yiddish
 Yoruba
 Zulu
Zulu