
Insignia Digital AM/FM Clock Radio User Guide
Introduction
Congratulations on your purchase of this high-quality Insignia Digital AM/FM Clock Radio. This system represents the state of the art in clock radio design and is designed for reliable and trouble-free performance. This User Guide explains how to correctly set up, operate, and get the best performance from your Insignia clock radio. Read this guide carefully before setting up your clock radio, then keep it handy for quick reference.
Important Safety Instructions
- Read these instructions.
- Keep these instructions.
- Heed all warnings.
- Follow all instructions.
- Do not use this apparatus near water.
- Clean only with dry cloth.
- Do not block any ventilation openings. Install in accordance with the manufacture’s instructions.
- Do not install near any heat sources such as radiators, heat registers, stoves, or other apparatus (including amplifiers) that product heat.
- Do not defeat the safety purpose of the polarized or grounding plug. A polarized plug has two blades with one wider than the other. A grounding plug has two blades and a third grounding prong. The wide blade or the third prong is provided for your safety. If the provided plug does not fit into your outlet, consult an electrician for replacement of the obsolete outlet.
- Protect the power adapter from being walked on or pinched particularly at the plugs, convenience receptacles, and at the point where they exit from the apparatus.
- Only use attachments/accessories provided by the manufacturer.
- Use only with the cart, stand, tripod, bracket, or table specified by the manufacturer, or sold with the apparatus. When a cart or rack is used, use caution when moving the cart/apparatus combination to avoid injury from tip-over.

- Unplug the apparatus during lightning storms or when unused for long periods of time.
- Refer all servicing to qualified personnel. Servicing is required when the apparatus has been damaged in any way, such as the power adapter or plug is damaged, liquid has been spilled or objects have fallen into the apparatus, has been exposed to rain or moisture, does not operate normally, or has been dropped.
- Please keep the unit in a good ventilation environment. Do not install this equipment in a confined space such as a bookcase or similar unit.
- WARNING: To reduce the risk of fire or electric shock, do not expose apparatus to rain or moisture. The apparatus shall not be exposed to dripping or apparatus.
- WARNING: The main plug is used as a disconnect device. The disconnect device shall remain readily operable.
- WARNING: The batteries (battery pack or batteries installed) shall not be exposed to excessive heat, such as sunshine, fire, or the like.


- The lightning flash with arrowhead symbol within an equilateral triangle is intended to alert the user to the presence of non-insulated “dangerous voltage” within the product’s enclosure that may be of sufficient magnitude to constitute a risk of electrical shock. WARNING: To reduce the risk of electric shock, do not remove cover (or back) as The exclamation point within an equilateral triangle is intended to alert the user to the presence of important operating and maintenance instructions in the literature accompanying the appliance.
 The apparatus is classified as a class II apparatus.
Features
Package contents
Your clock radio includes the following items:
- Clock radio
- AC adapter
- AA batteries (2)
- User Guide
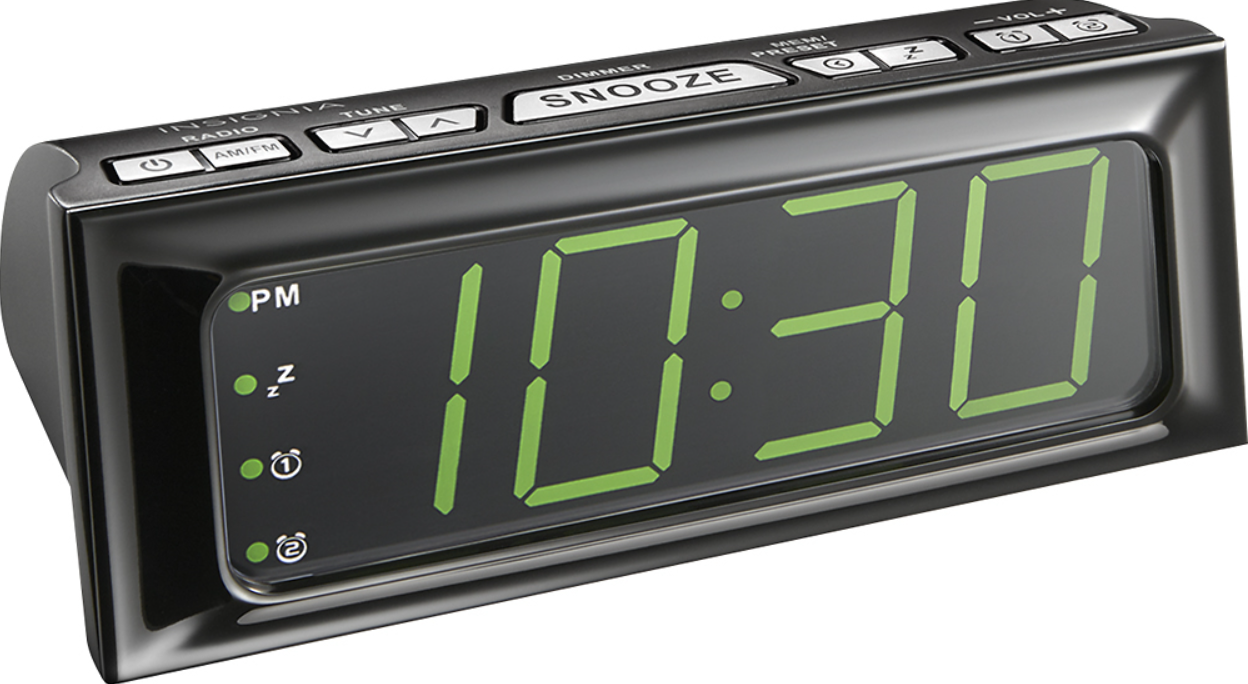
LED display

Top panel


Back panel

Set up your clock radio
Install the backup batteries
The clock radio uses a backup battery system to provide continuous alarm operation and clock settings in the event of a power failure. If the backup batteries have been installed and a power failure occurs or the AC power adapter is accidentally disconnected, the display will not remain lit, but the current time and alarm time settings will be temporarily maintained. Otherwise, you must reset the time and alarm settings. Make sure that the AC power adapter is plugged in, otherwise all settings may be lost during battery installation.
- Turn your clock radio around to the back, then open the battery compartment cover located on the right side of your clock radio.

- Insert two “AA” batteries into the battery compartment. Make sure that the + and – symbols on the batteries align with the + and – symbols inside the battery compartment.
- Close the battery compartment.
CAUTION:
- Do not recharge, short, disassemble, or heat the batteries, or dispose of in a fire.
- Dispose of batteries in the proper manner, according to federal, state, and local regulations.
- Remove the batteries when the charge is depleted or if your clock radio will be left unplugged for an extended period.
- If the batteries leak, clean the battery compartment with a cloth. If chemicals touch your skin, wash immediately. Battery chemicals can cause a rash.
- Do not use a mixture of old and new batteries.
- Do not mix alkaline, standard (carbon-zinc), and recharge able batteries.
- There is a danger of explosion if the batteries are incorrectly replaced. Replace only with the same or equivalent type.
When to Replace the Batteries
- To check the condition of the batteries, unplug the AC power adapter from the wall outlet and plug it in again after a few minutes. If the displayed time is incorrect, replace the batteries with new ones.
Connect the AC adapter
Make sure that the AC power outlet matches the AC adapter’s power specifications (120 V ~ 60 Hz) prior to plugging in the adapter.
- Plug the AC power adapter into an AC power outlet.

Set the clock
- Plug in the AC power adapter. The hour digits will blink on the display.

- Press TUNE
 repeatedly to set the correct hour, then press
  /MEM/PRESET to confirm the setting. The minutes digits will blink.
 - Press TUNE
 repeatedly to set the correct minutes, then press
  /MEM/PRESET to confirm the setting.
Notes:
- When you set the clock to a time after noon, the PM indicator lights.
- 12:00 PM = Noon.
- To reset the clock in standby mode, press and hold / MEM/PRESET. The hour digits will blink on the display.
Use your clock radio
Before using your clock radio, make sure the AC power adapter is securely connected.
Turn your clock radio on and off
- Press
 (power). Your clock radio turns on.
 - Press SNOOZE/DIMMER to control the brightness of the LED.
- Press (power) again to switch your clock radio to standby mode.
Set and use the alarm
Notes:
- Your clock radio must be in standby mode (radio off ) to set the alarm.
- Your clock radio can be set to activate twice a day setting different times in ALARM 1 and ALARM 2.
- Press
 or
or  (depending upon the alarm you want to set). The
  or
or  indicator lights up.

- Press and hold
 or
or . The hour digits will blink on the display.
 - Press TUNE
 repeatedly to set the correct hour, then press
  or
or  to confirm the setting. The minutes digits will blink.
 - Press TUNE
 repeatedly to set the correct minutes, then press
  or
or to confirm the setting.
 - Press TUNE to select the alarm sound source (either buzzer or radio). The alarm mode name will be shown on the display (Buzzer=Bu or Radio=rAd). Press
 or
or  to confirm. If you select radio, tune to the station you want and set the volume.
 - Press TUNE
 to set the volume of the alarm. The alarm will turn on at the time you have set and will turn off automatically after 59 minutes.
 - Repeat these steps to set the alarm to a different time.
Note: In standby mode, press and hold ![]() or
or![]() to reset the alarm time.
to reset the alarm time.
Mute, turn off, or cancel the alarm
- Press SNOOZE/DIMMER to mute the alarm for nine minutes. The alarm can be muted as many times as you want within 59 minutes of the preset alarm time.
- Press any button except SNOOZE/DIMMER to turn the alarm off for 24 hours.
- To cancel the preset alarm, press
 or
or . The ALARM1 or ALARM2 indicator turns off.
Play the radio
- Press (power) to turn on your clock radio, then press AM/FM repeatedly to select radio band you want to listen to.
- If you select the FM band, stretch out the FM antenna on the back of your clock radio and move it around to improve FM reception. -OR If you select the AM band, adjust the position of your clock radio for the best reception.
- Press TUNE repeatedly to tune the radio to a lower or higher frequency.
- Press and hold TUNE to search for the next available lower or higher station.
Note: The search may not stop at a station with a very weak signal.
- Press
 or
or to decrease or increase the volume. Adjust the volume to a comfortable level.
 - Press (power) to turn off your clock radio.
Use radio station presets
Your clock radio can store 20 station presets for AM and FM.
- Press (power) to turn on your clock radio, then press AM/FM repeatedly to select radio band you want to listen to.
- Press TUNE to tune your clock radio to the station you want to save.
- Press and hold
 /MEM/PRESET. The preset number blinks.
 - Press TUNE
 repeatedly to select the preset number you want.
 - Press /MEM/PRESET again to store the station as a preset. The preset number stops blinking.
- Repeat steps 1 through 4 to save additional stations as presets.
Recall radio station presets
- Press (power) to turn on your clock radio, then press the AM/FM button repeatedly to select the radio band you want to listen to.
- Press /MEM/PRESET repeatedly to select the preset station you want.
Use the sleep timer
- When listening to the radio, press the
 (sleep) button repeatedly to set the sleep timer. Settings include 90 min, 60 min, 45 min, 30 min, 15 min, or OFF. The radio automatically turns off after the specified amount of time.
 - After the sleep timer is activated, press (sleep) to view the time remaining. You can change the sleep timer duration when the remaining time is displayed by pressing (sleep) again.
- To stop listening at any time, press (power).
Clean your clock radio
- Use a soft, dry, clean cloth to clean the exterior of your clock radio.
- Do not let liquid drip into the inside of your clock radio.
- For stubborn stains, use a soft cloth dampened with a weak solution of mild detergent and water. Dry your clock radio immediately afterwards with a clean cloth. Do not use abrasive clothes, thinners, alcohol, or other chemical solvents, because they may damage the finish or remove the panel lettering.
Troubleshooting


Specifications

Legal notices
FCC and IC Information:
This device complies with Part 15 of the FCC Rules. Operation is subject to the following two conditions: (1) This device may not cause harmful interference, and (2) this device must accept any interference received, including interference that may cause undesired operation. This device complies with Industry Canada licence-exempt RSS standard(s). Operation is subject to the following two conditions: (1) this device may not cause interference, and (2) this device must accept any interference, including interference that may cause undesired operation of the device.
ONE-YEAR LIMITED WARRANTY
Definitions:
The Distributor* of Insignia branded products warrants to you, the original purchaser of this new Insignia-branded product (“Product”), that the Product shall be free of defects in the original manufacturer of the material or workmanship for a period of one (1) year from the date of your purchase of the Product (“Warranty Period”). For this warranty to apply, your Product must be purchased in the United States or Canada from a Best Buy branded retail store or online at www.bestbuy.com or www.bestbuy.ca and is packaged with this warranty statement.
DOWNLOAD PDF LINK


 Afrikaans
 Albanian
 Amharic
 Arabic
 Armenian
 Azerbaijani
 Basque
 Belarusian
 Bengali
 Bosnian
 Bulgarian
 Catalan
 Cebuano
 Chichewa
 Chinese (Simplified)
 Chinese (Traditional)
 Corsican
 Croatian
 Czech
Czech Danish
 Dutch
Dutch English
 Esperanto
 Estonian
 Filipino
 Finnish
 French
 Frisian
 Galician
 Georgian
 German
 Greek
Greek Gujarati
 Haitian Creole
 Hausa
Hausa Hawaiian
 Hebrew
 Hindi
Hindi Hmong
Hmong Hungarian
 Icelandic
 Igbo
Igbo Indonesian
 Irish
Irish Italian
 Japanese
 Javanese
 Kannada
 Kazakh
 Khmer
Khmer Korean
 Kurdish (Kurmanji)
 Kyrgyz
 Lao
Lao Latin
Latin Latvian
 Lithuanian
 Luxembourgish
 Macedonian
 Malagasy
 Malay
Malay Malayalam
 Maltese
 Maori
Maori Marathi
 Mongolian
 Myanmar (Burmese)
 Nepali
 Norwegian
 Pashto
 Persian
 Polish
 Portuguese
 Punjabi
 Romanian
 Russian
 Samoan
 Scottish Gaelic
 Serbian
 Sesotho
 Shona
Shona Sindhi
 Sinhala
 Slovak
 Slovenian
 Somali
 Spanish
 Sundanese
 Swahili
 Swedish
 Tajik
Tajik Tamil
Tamil Telugu
 Thai
Thai Turkish
 Ukrainian
 Urdu
Urdu Uzbek
Uzbek Vietnamese
 Welsh
Welsh Xhosa
Xhosa Yiddish
 Yoruba
 Zulu
Zulu