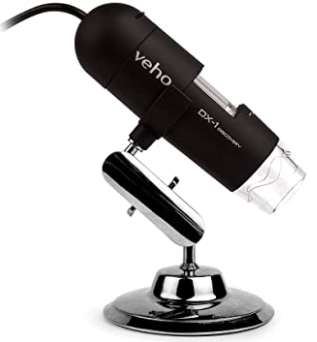
Veho Discovery DX-1 Microscope User Manual

Introduction
The Veho DX-1 microscope allows you to explore the microscopic world. Highly useful for students, teachers, laboratory research, medical analysis, repair services or hobbyists.Please take a moment to read through this manual to ensure you get the most out of the microscope. Keep this manual safe for future reference.Before using the microscope, please read the safety precautions below. Always ensure that the unit is operated correctly:
- The DX-1 microscope is not waterproof
- Use and store within a cool, dry environment (-5°C – 50°C), avoid using in damp conditions
- Do not point the lens toward the sun or a strong light source, this may damage the microscope
- Avoid touching the lens, unless with the supplied cleaning cloth
- Do not stare directly into the LEDs; they may damage your eyes
If you require assistance or have any questions about the DX-1 Microscope, please contact us through our Live Chat on our website at: veho-world.comhttp://veho-world.com

What’s in the box?
- Veho DX-1 Microscope
- Adjustable cradle stand
- Software CD
- Quick start guide
- Calibration ruler
- Cleaning cloth
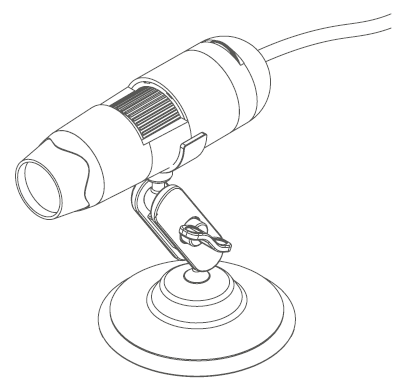
Assembling the DX-1 Microscope

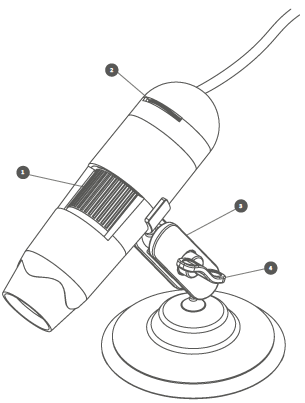
Guide to the DX-1 Microscope

- Focus Wheel Adjusts the focus of the microscope on the object
- Brightness Wheel Adjust the brightness of the 8 LED’s
- Cradle Stand Fully adjustable alloy stand
- Locking Nut Loosen to adjust the angle of the stand, once in position tighten the nut Guide to the DX-1 Microscope.
Installing microscope software
To install the Micro Capture Plus software, use the supplied software CD or visit our website download area at:
veho-world.com/downloads
Operating system requirements
- Windows – 7/8/10Mac OS – 10.12 and later
- P4 1.8 or above
- RAM 1GB
- Video Memory 126M
- USB port 2.0
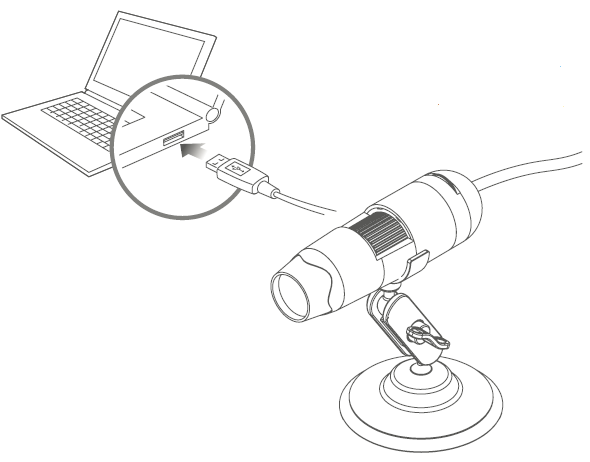
Connecting the DX-1 Microscope

Plug in the microscope before opening the Micro Capture software. Once connected, open Micro Capture software to start using the microscope. If the microscope is not recognized or has been disconnected a notification will be displayed.
What are the advantages of a digital microscope?
The Digital Microscope is a great way to see small objects better. These microscopes are often used for working on circuit boards and other electronic equipment and are great for quick and easy soldering and repair.
Which microscope is more expensive?
The monocular head is the cheapest, followed by the binocular and then the trinocular. Some factors that determine the price are: If the head can be rotated 360 degrees – ideal for storing, sharing or using the machine wherever you feel comfortable.
Focusing the microscope

To focus the microscope rotate the focus wheel on the front of the microscope; clockwise to zoom in or anti-clockwise to zoom out. Using the software, you will be able to see on a screen whether the DX-1 is focused.
Capture a still photo or video footage at any point when using the microscope, use the icons or dropdown menu within the Micro Capture Plus software. Setting and preferences can also be adjusted within the software, these
include:
- Resolution
- Date and time
- Interface language
- Full-screen mode
- Timer for photo/video capture

Calibration & Measurements
Calibration
Ensure ‘Display Crossing’ is turned on, go to ‘Options > XY Guide > On/Off’.The microscope will default to crossing
‘On’, we recommend that this is left on.
Step 1 Focus the microscope on the supplied calibration ruler, and adjust the magnification wheel until the picture is clear. Take a picture of the selected area when the ruler lines are parallel to the blue XY guides, as shown in the image.
Step 2 Double-click on the image captured to enter the measurement interface.

Step 3 Once the image is open, click on the calibration icon. Using the mouse, click on the beginning and ending points; you must know the distance between the points (using the ruler). A dialogue box will pop up, and enter the exact value of the measurement into ‘Actual dimension’.The software will automatically calibrate the magnification rate. Click ‘OK’ and the adjusted magnification rate will show in the upper right corner.
Step 4 Now using ‘Any Angle Line’, under the measurement icon, measure the same distance again. If the value
measured is approximately the same as the actual value, then calibration has been successful.
Measurements
Double-click on the image to enter the measurement interface. Under the ‘Measurement’ icon, choose any of the
following options to measure.
Continuous Line Measurement Allows you to measure any continuous length. Click, hold, and drag from one point to another point, then release.
Radius Circle Measurement Click, hold, and extend out to the chosen radius. The radius, circumference, and area of the circle will be calculated.

Diameter Circle Measurement Click, hold, and extend out to the chosen diameter. The diameter, circumference
and the area of the circle will be calculated.
Three Points Angle Measurement Select any three points, and the angle values will be calculated and displayed.
Specifications
- Image sensor 2 Mega Pixels
- Photo resolution 1920 x 1080, 1280 x 720, 640 x 480
- Video resolution 1920 x 1080, 1280 x 720, 640 x 480
- Focus range Manual focus from 0mm to 150mm
- Magnification ratio 10x or 200x
- Video format AVI
- Photo format JPEG
- The light source 8 LEDs (brightness adjustable)
- PC interface USB2.0
- Power source 5V DC from USB port
- Languages English, German, Spanish, Russian, Italian, French, Portuguese, Dutch, Polish, Japanese, Korean, Chinese
- Bundle software Micro Capture Plus (with measurement for Win/Mac)
- Dimensions Microscope: 110mm x 33mm
Troubleshooting
Problem Solution
- Photo capture or video is blurred or shaky
The image is not in focus, correct this by turning the Focus Wheel. - Use the microscope stand when capturing images to avoid shake.
Microscope does not turn on Try a different USB port . - Download the Micro Capture Plus software.
Screen is blank Ensure that the software is open and the scope is plugged in. - Check the item you want to view is positioned correctly under the lens. Ensure the scope is focused.
- Image looks smudged or blurred Clean the screen and lens carefully with supplied cloth.


 Afrikaans
 Albanian
 Amharic
 Arabic
 Armenian
 Azerbaijani
 Basque
 Belarusian
 Bengali
 Bosnian
 Bulgarian
 Catalan
 Cebuano
 Chichewa
 Chinese (Simplified)
 Chinese (Traditional)
 Corsican
 Croatian
 Czech
Czech Danish
 Dutch
Dutch English
 Esperanto
 Estonian
 Filipino
 Finnish
 French
 Frisian
 Galician
 Georgian
 German
 Greek
Greek Gujarati
 Haitian Creole
 Hausa
Hausa Hawaiian
 Hebrew
 Hindi
Hindi Hmong
Hmong Hungarian
 Icelandic
 Igbo
Igbo Indonesian
 Irish
Irish Italian
 Japanese
 Javanese
 Kannada
 Kazakh
 Khmer
Khmer Korean
 Kurdish (Kurmanji)
 Kyrgyz
 Lao
Lao Latin
Latin Latvian
 Lithuanian
 Luxembourgish
 Macedonian
 Malagasy
 Malay
Malay Malayalam
 Maltese
 Maori
Maori Marathi
 Mongolian
 Myanmar (Burmese)
 Nepali
 Norwegian
 Pashto
 Persian
 Polish
 Portuguese
 Punjabi
 Romanian
 Russian
 Samoan
 Scottish Gaelic
 Serbian
 Sesotho
 Shona
Shona Sindhi
 Sinhala
 Slovak
 Slovenian
 Somali
 Spanish
 Sundanese
 Swahili
 Swedish
 Tajik
Tajik Tamil
Tamil Telugu
 Thai
Thai Turkish
 Ukrainian
 Urdu
Urdu Uzbek
Uzbek Vietnamese
 Welsh
Welsh Xhosa
Xhosa Yiddish
 Yoruba
 Zulu
Zulu