Protoarc EM12 Programmable Mouse User Manual

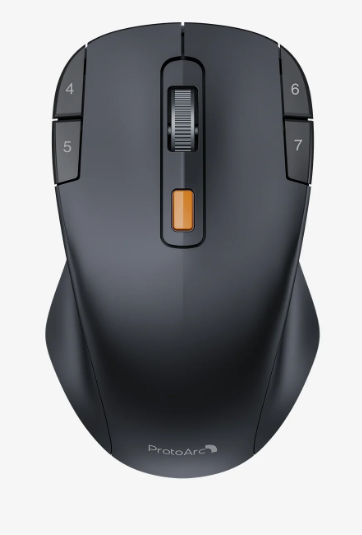
By Default

- A Left Button
- B Right Button
- C Right Button
- D Backward
- E Disabled
- F Disabled
- G Middle button
- H DPI Switch Button
- I Charging/low battery indicator
- J Power Switch
- K USB Receiver
All buttons are macro-enabled Power Switch
Product Parameters
- DPL:800-1200(default)-1600-2000-2400 DPI
- Return rate: 250Hz
- Operating voltage: 3.7V
- Working current: <10mA
- Working distance: 10m / 32 ft
- Mouse button life: 3 million times
- Mouse size: 117.3×71.3×39.5mm / 4.6×2.8×1.6″
- Mouse weight: 55g ‡ 5g / 1.9oz
- System interface: PC available USB interface
Power prompt
Charging: indicator light is on in blue while charging, and turns off when fully charged. Low Battery: indicator light flashes every second in red. Sleep Mode: the mouse will auto-sleep after 15 minutes without any activity, press any button to wake the mouse.
Install the mouse:

Remove the receiver from the bottom of the mouse, plug it directly into the USB port of the device, and turn on the on/off button, the mouse is ready to use.
How To Install Driver:
Please visit our website at ( https://www.protoarc.com ). Go to Menu–Support-=-Download. Find and download the driver for ProtoArc EM12, then unzip the downloaded driver and double click to run (the driver installation is only applicable to Windows system).
Driver main interface:

Button Settings:
Click the desired button customization in the left panel and select a new function from the drop-down menu to use it directly.

Mouse settings:
Movement speed adjustment
- Click “Improve pointer precision”
- Adjust the mouse movement speed
- Adjust the scroll wheel movement speed
- Adjust the speed of the double click.
Return rate adjustment:
Adjustable mouse return rate: 152Hz-250Hz-500Hz.
DPI settings:
5 different levels of DPI can be adapted to the most ideal state.

Multimedia shortcuts and key combinations customization settings: 18 multimedia buttons can be used by your choice.

Customizable combination of shortcut keys (click the desired key and then enter the compound letter)

Macro settings:
- Click “New Macro” and customize the macro name.
- Click “Start Record” and enter your own definition and then click “Stop Record” and click “Save” to finish recording. You can record multiple macro definitions.
- Save the definition profile: Edit the name of the function you defined and save it on your computer.
- Export the definition profile: export the profile saved on the computer directly.


