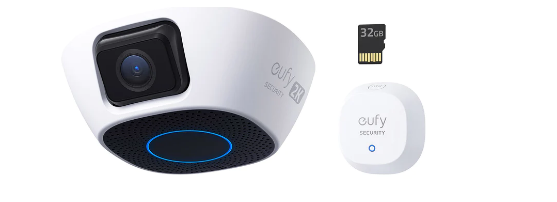
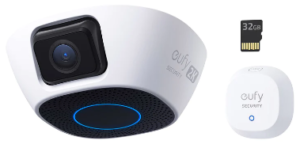
Eufy Garage Control Cam With Sensor
AT A GLANCE
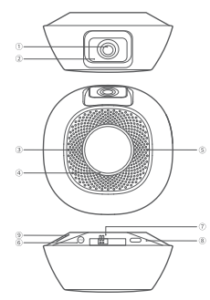
- Camera Lens
- Infrared LED
- Speaker
- Ring Light
• Flashing blue: Connecting to the Internet.
• Blue: Working properly.
• Flashing red: Disconnected from the Internet. - Microphone
- SYNC Button
- Wire Connectors: Model T8453 includes 2 pairs.
- Power Port
- MicroSD Card Slot


Status LED
• Flashing blue: Pairing with the camera.
• OFF: Working properly / Powered off.
SYNC Button
Battery Cove
SETTING UP CAMERA
- Connect the camera to a power outlet. To use local storage, insert a memory card into the microSD card slot before powering the camera (Model T8453 includes one).

- Download and install the eufy Security app, then sign up for an account.

- Follow on-screen instructions to add the camera to your device list


WIRING CAMERA 3 AND TESTING
- Press and hold the orange tabs, then insert one end of the provided motor connection wire into the connectors. Each strand can connect to any connector.

- On the garage door opener, locate the terminals that wire to the wall control. Twist each wire strand to the motor connection wire, then connect the paired strands back to their original terminal.

- Make sure the paired strands are properly connected to their original terminal. If you haven’t connected to the wall control, check your garage door opener’s user manual for wall control wiring instructions to locate the right terminals.
 Model T8453 can wire up to 2 garage doors. Follow the steps above to wire the camera to the other garage door opener.
 - In the eufy Security app, follow on-screen instructions to open the door for a test.


 Model T8453 can wire up to 2 garage doors. Follow the steps above to wire the camera to the other garage door opener.
Visit https://eufyofficial.com/garage-control_cam to watch the step-by-step “How to Install” video.
MOUNTING CAMERA
- Mount the camera underneath the garage door opener or to the ceiling. Option 1. Garage Door Opener Magnetically attach the camera underneath a metal garage door opener or a metal track.


For garage door openers with a non-metal surface, stick the mounting plate underneath the garage door opener with the 3M sticker provided, then magnetically attach the camera to the mounting plate.
Option 2. Ceiling
Fix the mounting iron plate to the ceiling with the provided screw, then magnetically attach the camera to the mounting plate.
For model T8453, mount the camera to the ceiling in the middle of the two garage door openers so that you can see both garage doors through the camera.
PAIRING AND 5 MOUNTING SENSOR
1. Open the battery cover, then install the provided battery
2. Close the battery cover.
3. In the eufy Security app, follow on-screen instructions to pair the sensor with the camera.
4. Select a location on your garage door to mount the sensor.
Roller Door
Mount the sensor at the end of the drum wheel spoke.
Sectional Door
Mount the sensor on the top of the door (the gray area in the figure below).
Tilt Door
Mount the sensor on the top of the door (the gray area in the figure below).
5. Mount the sensor with the provided 3M sticker
For wood sectional doors, you can also mount the sensor with the screws provided. Make sure the SYNC button faces the same direction as the arrow on the battery cover
6. In the eufy Security app, follow on-screen instructions to open the door for a test.
Model T8453 can work with up to 2 garage doors. Buy another sensor for the other garage door, then follow the steps above to pair and mount the sensor.
PPENDIX. REPLACING 6 BATTERY FOR SENOR%
- Pull the sensor off the battery cover.

- Remove the battery using the provided detaching pin. Press the battery with your finger when detaching to keep the battery from suddenly popping out.


NOTICE
CAUTION RISK OF EXPLOSION IF BATTERY IS REPLACED BY AN INCORRECT TYPE. DISPOSE OF USED BATTERIES ACCORDING TO THE INSTRUCTIONS AT T E N T I O N R I S Q U E D ‘ E X P LO S I O N S I L A BATTERIE EST REMPLACÉE PAR UN TYPE INCORRECT. ÉLIMINER LES BATTERIES USÉES SELON LES INSTRUCTIONS
Warning:
– replacement of a battery with an incorrect type that can defeat a safeguard;
– disposal of a battery into fire or a hot oven, or mechanically crushing or cutting of a battery, that can result in an explosion;
– leaving a battery in an extremely high temperature surrounding environment that can result in an explosion or the leakage of flammable liquid or gas; and – a battery subjected to extremely low air pressure that may result in an explosion or the leakage .
FCC Statement
This device complies with Part 15 of the FCC Rules. Operation is subject to the following two conditions: (1) this device may not cause harmful interference, and (2) this device must accept any interference received, including interference that may cause undesired operation. Warning: Changes or modifications not expressly approved by the party responsible for compliance could void the user’s authority to operate the equipment. Note: This equipment has been tested and found to comply with the limits for a Class B digital device, pursuant to Part 15 of the FCC Rules. These limits are designed to provide reasonable protection against harmful interference in a residential installation. This equipment generates, uses, and can radiate radio frequency energy and, if not installed and used in accordance with the instructions, may cause harmful interference to radio communications. However, there is no guarantee that interference will not occur in a particular installation. If this equipment does cause harmful interference to radio or television reception,
which can be determined by turning the equipment off and on, the user is encouraged to try to correct the FCC Radio Frequency Exposure Statement
The device has been evaluated to meet general RF exposure requirements. The device can be used in fixed/mobile exposure condition. The min separation
distance is 20cm The following importer is the responsible party Company Name: POWER MOBILE LIFE, LLC Address: 10900 NE 8th St, Ste 501, Bellevue WA 98004
Telephone: 1-800-988-7973
CUSTOMER SERVICE
Warranty
12-month limited warranty
Call Us
United States
+1 (800) 988 7973 Mon-Fri 6:15-17:00(PT)
Sat-Sun 6:30-16:30(PT)
United Kingdom
+44 (0) 1604 936 200 Mon-Fri 6:00-17:00
Sat-Sun 6:00-14:00
Germany
+49 (0) 69 9579 7960 Mon-Fri 8:00-16:00
Email Us
support@eufylife.com
Anker Innovations Limited
Room 1318-19, Hollywood Plaza, 610 Nathan Road,
Mongkok, Kowloon, Hong Kong