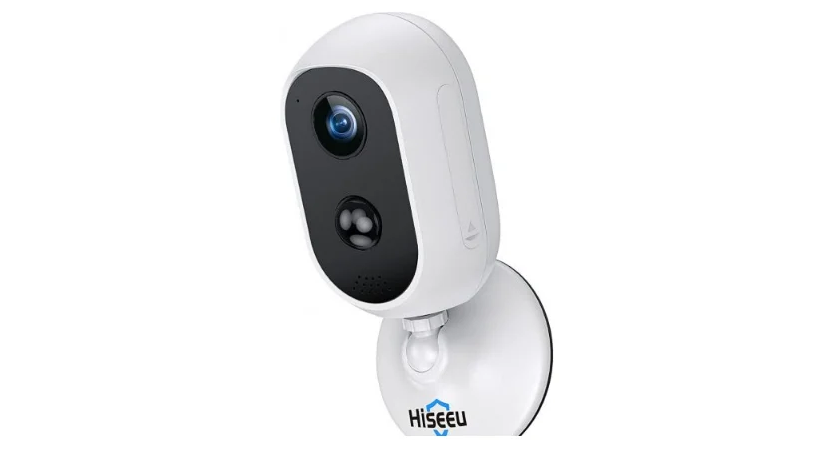
Hiseeu C30 Wire-Free 2K Security Camera Kit User Guide

Box Contents

Product Overview
NVR

- WAN connection status indicator: When LAN or WAN disconnect, it will flashes slowly. When WAN connects, it is always on.
- Cameras connection status lights: When camera is connected to the base station, the lights is steady on, when disconnected, it will flashes slowly.
- SYNC (match code button): Long press the button for 4 seconds to enter the match code state, hear the voice prompts: “start matching code, please wait for the voice prompts to complete”; and then press the camera reset button for 10 seconds, and wait for a while until have voice prompts : “Matching code Success”, if match code failed, it will prompts “Matching code fails.”
- TF card slot: After inserting TF card (SD card), the system defaults to motion recording.
- NET: Network cable interface, connect to router
- Power Input port (DC SV): Mini NVR power slot.
- Reset (NVR Reset button): Long press 10 seconds to reset the NVR to factory settings.
Battery Camera

- Green light+ red light is always on: The camera is being previewed remotely (privacy light)
Green light is on for ls: The device is turned on or is woken up - The green light flashes constantly: Upgrading
- Green light is always on: Charging
- Red light flashes 3 times: Power off
- Red light flashes constantly fast: Matching code
- Red light flashes constantly slowly: Connecting to the internet
- Red light is always on: Low battery
Battery Camera with Solar Panel

Open the camera rubber cover, insert the solar panel type-C cable to it. Solar charging panel that can be used in
conjunction with it, so you don’t have to worry about the battery electricity of the camera.
Connect Your Base Station NVR To A Mobile App
Install EseeCloud App
Search EseeCloud in your mobile app store or scan the following QR code to download and install.

Register Account and Login
Launched the EseeCloud app, register an account by a valid Email address or phone number as the new user and then log in.

Connect the device

Press and hold the button for 2s to power on the camera, if it doesn’t on, pis use the cable charge the camera. Connect the NVR to a power source using the USB cable, and then connect it to your WiFi router by network cable.
- Log in EseeCloud app, tap Add camera
 Scan the base station’s QR code, then click Add.

Main Menu Functions

Mall
Purchase cloud service

Me:
Click on settings 7 enable push notification 7 click on system authority settings 7 open permissions. Then your mobile phone will receive an alert message when the cameras detected.

Live Video

- Adjust Picture quality, switch the SD/HD manually.
- It can display all four cameras view at the same time, or you can choose to display only one screen.
- Turn on/off volume .
- Screenshot of current cameras view.
- Manual record.
- Horizontal view.
- Cloud record playback / local SD card playback.
- View alarm message
- Microphone, support two-way audio, press to talk.
- Preset position (This camera doesn’t support)
- For more option.
Base Station NVR Settings
Click the three dots to show the settings icon. Click storage settings you will see the SD card storage status Time settings Set a password for your base station NVR.

Cameras Function Settings
- Click the play button to access the live view click the upper right corner to access the camera channel settings.

- You will see your camera battery and signal status there. Enable detection alarm adjust the motion sensitivity Set the time you want to detect.

- Enable APP push alert message, otherwise your cameras won’t send the alarm message to your phone app.

Record Setup Mode
Since this is a battery/solar-powered camera, its main function on the market is to make the camera work for a long time without charging, so it is best to set it to record only when motion detection is triggered. If you need to record all the time, it’s need to plug in the camera’s power cord all the time and change the device’s recording mode to Keep recording.

Camera Working Parameters
- The camera shooting angle is about 90°.
- PIR senses human activities, and the distance to activate the monitoring is about 16ft 20ft.
- It takes about 6 hours to fully charge.
- The camera is not easy to appear offline within 100 ft from the base station.
- When using the camera for the first time, it is recommended that you charge the camera for 12 hours first.Install the camera 2-3 meters (7-10ft} above the ground to maximize the detection range of the PIR motion sensor. For effective motion detection, please install the camera angularly. NOTE: If a moving object approaches the PIR sensor vertically, the camera may fail to detect motion.

How to pair the cameras to a base station?
Press the camera reset button for 10 seconds, reset the camera to factory settings. Press the Mini NVR “Sync” button for 4 seconds, wait for the voice prompt “matching code success”, check that the Mini NVR channel indicate light is steady on. If the light is always on, then match code is successfully.


 Scan the base station’s QR code, then click Add.

