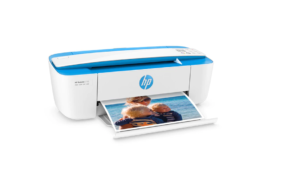
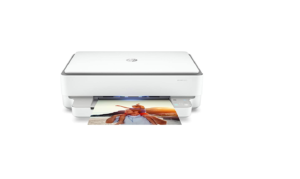
HP D110 series Photosmart Printer User Manual

Printer parts

| 1 | Color graphics display (also referred to as the display) |
| 2 | Control panel |
| 3 | On button |
| 4 | Photo light |
| 5 | Memory card slots for Memory Stick DUO and Secure Digital (SD-MMC) cards |
| 6 | Wireless button: Launches the wireless menu. Pushing and holding the wireless button launches Wi-Fi Protected Setup (WPS). |
| 7 | Paper tray |
| 8 | Paper tray extender (also referred to as the tray extender) |
| 9 | Cartridge door |
| 10 | Cartridge access area |
| 11 | Print carriage |
| 12 | Glass |
| 13 | Lid-backing |
| 14 | Lid |
| 15 | Rear door |
| 16 | Rear USB port |
| 17 | Power connection (Use only with the power adapter supplied by HP.) |
Control panel features

| 1 | Back: Returns to the previous screen. |
| 2 | Cancel: Stops the current operation, restores default settings, and clears the current photo selection. |
| 3 | Directional keys: Allow you to navigate through photos and menu options. |
| 4 | Setup: Opens the Setup menu where you can change product settings and perform maintenance functions. |
| 5 | OK: Selects a menu setting, value, or photo. |
| 6 | Copy: Opens the Copy menu where you can select a copy type or change the copy settings. |
| 7 | Photo: Opens the Photo Menu. |
| 8 | Scan: Opens the Scan Destination Menu menu where you can select a destination for your scan. |
| 9 | Apps: TouchSmart Web provides a quick and easy way to access and print information from the Web, such as coupons, coloring pages, and puzzles. |
TouchSmart Web
The TouchSmart Web Manager can be used to add new Apps or to remove Apps.
Manage Apps
Add new Apps.
- a. Press the directional keys to scroll to the Web menu option. Press OK.
- b. Press the directional keys to scroll to the More menu option. Press OK. Check desired Apps. Press OK. Follow prompts.
Print documents
Most print settings are automatically handled by the software application. You need to change the settings manually only when you change print quality, print on specific types of paper or transparency film, or use special features.
To print from a software application
- Make sure you have paper loaded in the paper tray.
- On the File menu in your software application, click Print.
- Make sure the product is the selected printer.
- If you need to change settings, click the button that opens the Properties dialog box.
Depending on your software application, this button might be called Properties, Options, Printer Setup, Printer, or Preferences. - Select the appropriate options for your print job by using the features available in the Advanced, Printing Shortcuts, Features, and Color tabs.
Tips for print success
Use the following tips to print successfully.
Print tips
- Use genuine HP cartridges. Genuine HP cartridges are designed for and tested with HP printers to help you produce great results, time after time.
- Make sure the cartridges have sufficient ink. To check the estimated ink levels, follow the instruction in the Tools menu on the display. Alternatively, you can check the ink levels in Printer Toolbox from the software.
- Load a stack of paper, not just one page. Use clean and flat paper of the same size.
Make sure only one type of paper is loaded at a time. - Adjust the paper-width guide in the input tray to fit snugly against all paper. Make sure the paper-width guide does not bend the paper in the input tray.
- Set the print quality and paper size settings according to the type and size of paper loaded in the input tray.
- Use print preview to check margins. Do not let the margin settings for the document exceed the printable area of the printer.
- Learn how to share your photos online and order prints. Click here to go online for more information.
Tips for copy and scan success
Use the following tips to copy and scan successfully:
- Keep the glass and the back of the lid clean. The scanner interprets anything it detects on the glass as part of the image.
- Load your original, print side down, on the right front corner of the glass.
- To copy or scan a book or other thick originals, remove the lid.
- To make a large copy of a small original, scan the original into the computer, resize the image in the scanning software, and then print a copy of the enlarged image.
HP support
Phone support period
One year of phone support is available in North America, Asia Pacific, and Latin America (including Mexico). To determine the duration of phone support in Europe, the Middle East, and Africa, go to HP.com/support. Standard phone company charges apply.
Placing a call
Call HP support while you are in front of the computer and the product. Be prepared to provide the following information:
- Product name (HP Photosmart D110 series)
- Serial number (located on the back or bottom of the product)
- Messages that appear when the situation occurs
- Answers to these questions:
- Has this situation happened before?
- Can you re-create it?
- Did you add any new hardware or software to your computer at about the time that this situation began?
- Did anything else occur prior to this situation (such as a thunderstorm, product was moved, etc.)?
For the list of support phone numbers, visit HP.com/support.
Additional warranty options
Extended service plans are available for the HP Photosmart at additional costs. Go to HP.com/support, select your country/region and language, then explore the services and warranty area for information about the extended service plans.
Technical information
The technical specifications and international regulatory information for the HP Photosmart are provided in this section.
Specifications
Technical specifications for the HP Photosmart are provided in this section. For complete product specifications, see the Product Data Sheet at HP.com/support.
System requirements
Software and system requirements are located in the Readme file.
For information about future operating system releases and support, visit the HP online support Web site at HP.com/support.
Environmental specifications
- Recommended operating temperature range: 15 ºC to 32 ºC (59 ºF to 90 ºF)
- Allowable operating temperature range: 5 ºC to 40 ºC (41 ºF to 104 ºF)
- Humidity: 20% to 80% RH non-condensing (recommended); 28 ºC maximum dewpoint
- Non-operating (Storage) temperature range: –25 ºC to 60 ºC (13 ºF to 140 ºF)
- In the presence of high electromagnetic fields, it is possible the output from the HP Photosmart may be slightly distorted
- HP recommends using a USB cable less than or equal to 3 m (10 feet) in length to minimize injected noise due to potential high electromagnetic fields
Paper specifications
| Type | Paper weight | Paper tray* |
| Plain paper | 20 to 24 lb. (75 to 90 gsm) | Up to 80 (20 lb. paper) |
| Type | Paper weight | Paper tray* |
| Legal paper | 20 to 24 lb. (75 to 90 gsm) | Up to 80 (20 lb. paper) |
| Index cards | 110 lb. index max (200 gsm) | Up to 30 |
| Hagaki cards | 110 lb. index max (200 gsm) | Up to 40 |
| Envelopes | 20 to 24 lb. (75 to 90 gsm) | Up to 10 |
| 5 x 7 inch (13 x 18 cm) Photo paper | 145 lb. (236 gsm) | Up to 30 |
| 4 x 6 inch (10 x 15 cm) Photo paper | 145 lb. (236 gsm) | Up to 30 |
| 8.5 x 11 inch (216 x 279 mm) Photo paper | 145 lb. (236 gsm) | Up to 30 |
Regulatory notices
Regulatory model identification number
For regulatory identification purposes, your product is assigned a Regulatory Model Number. The Regulatory Model Number for your product is SNPRH-0901. This regulatory number should not be confused with the marketing name (HP Photosmart D110 series, etc.) or product numbers (Q8380A, etc.).
FCC statement
The United States Federal Communications Commission (in 47 CFR 15.105) has specified that the following notice be brought to the attention of users of this product.
This equipment has been tested and found to comply with the limits for a Class B digital device, pursuant to Part 15 of the FCC Rules. These limits are designed to provide reasonable protection against harmful interference in a residential installation.
This equipment generates, uses and can radiate radio frequency energy and, if not installed and used in accordance with the instructions, may cause harmful interference to radio communications.
However, there is no guarantee that interference will not occur in a particular installation.
If this equipment does cause harmful interference to radio or television reception, which can be determined by turning the equipment off and on, the user is encouraged to try to correct the interference by one or more of the following measures:
- Reorient the receiving antenna.
- Increase the separation between the equipment and the receiver.
- Connect the equipment into an outlet on a circuit different from that to which the receiver is connected.
- Consult the dealer or an experienced radio/TV technician for help.
For further information, contact:
- Manager of Corporate Product Regulations
- Hewlett-Packard Company
- 3000 Hanover Street
- Palo Alto, Ca 94304
- (650) 857-1501
Modifications (part 15.21)
The FCC requires the user to be notified that any changes or modifications made to this device that are not expressly approved by HP may void the user’s authority to operate the equipment.
This device complies with Part 15 of the FCC Rules. Operation is subject to the following two conditions: (1) this device may not cause harmful interference, and (2) this device must accept any interference received, including interference that may cause undesired operation.
REFRENCESS LINK
DOWNLOAD PDF
HP D110 series Photosmart Printer featured


