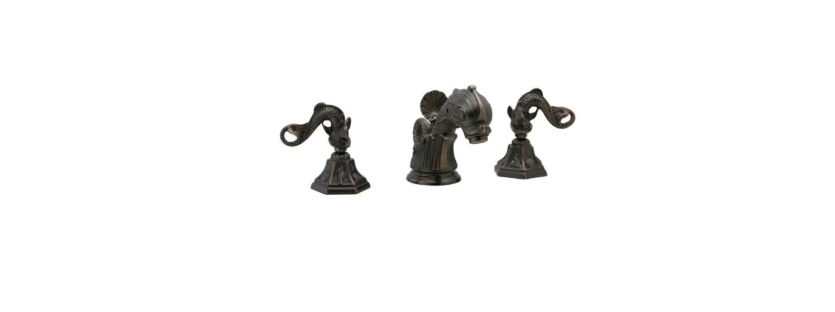
Pyhlrich-K101-Dolphin-Lavatory-Faucet-User-Instructions-Feature-Image

Pyhlrich K101 Dolphin Lavatory Faucet User Instructions

Pyhlrich-K101-Dolphin-Lavatory-Faucet-User-Instructions-Image-1

Pyhlrich K101 Dolphin Lavatory Faucet User Instructions

Pyhlrich-K101-Dolphin-Lavatory-Faucet-User-Instructions-Image-18


Step 1 Pyhlrich-K101-Dolphin-Lavatory-Faucet-User-Instructions-Image-3

Should a counter top need to be drilled, please reference the diagram above.

Step 2Pyhlrich-K101-Dolphin-Lavatory-Faucet-User-Instructions-Image-4

Insert spout base nipple into center hole in lavatory or counter top. Install stainless washer (7) and spont (8) on
spout nipple and tighten. Place pop-up knob rod (14) though spout.

Step 3Pyhlrich-K101-Dolphin-Lavatory-Faucet-User-Instructions-Image-5

Install spout tee assembly (9, 10, 11, 12 and 13) as shown in diagram.

Step 4Pyhlrich-K101-Dolphin-Lavatory-Faucet-User-Instructions-Image-6

Remove top fastening nut and washer (2 & 3) from the lavatory valve with one right-hand valve and one left-hand valve. Install valve with the blue dot on the cold side [Round handle sets are supplied with two hot valves that turn in the same direction]). Insert valve from below through hole in lavatory or counter top.

Step 5Pyhlrich-K101-Dolphin-Lavatory-Faucet-User-Instructions-Image-7

Reattach top fastening nut and washers (2 and 3).

Step 6Pyhlrich-K101-Dolphin-Lavatory-Faucet-User-Instructions-Image-8

Set valve to proper rough-in height “A”, by adjusting bottom fastening nut. Secure valve by tightening top fastening nut *YOU MAY NEED TO CUT THE ALL BROACHED STEM TO REDUCE THE VISIBILITY BETWEEN HANDLE AND ESCUTCHEON. Repeat procedure for the second lavatory valve. Please see page P99030A for the “A” measurement for your trim.

Step 7Pyhlrich-K101-Dolphin-Lavatory-Faucet-User-Instructions-Image-9

Connect stainless steel flex lines (6) from valve outlets to spout tee (10).  Adjust valves and or spout tee to eliminate and kinking in the flex lines. Install escutcheons onto the valves and hand tighten. Do not over-tighten. Install handles onto valve stems

Step 8Pyhlrich-K101-Dolphin-Lavatory-Faucet-User-Instructions-Image-10Pyhlrich-K101-Dolphin-Lavatory-Faucet-User-Instructions-Image-11

Insert drain rim (25) into the basin placing the Teflon washer (26) under the rim. From below slip on washer (27)onto the bottom thread of the drain rim and secure to basin with drain nut and washer (28 and 29)

Step 9Pyhlrich-K101-Dolphin-Lavatory-Faucet-User-Instructions-Image-12Pyhlrich-K101-Dolphin-Lavatory-Faucet-User-Instructions-Image-13Pyhlrich-K101-Dolphin-Lavatory-Faucet-User-Instructions-Image-14

Insert drain plug (21) into drain assembly and insert ball rod (19) as diagramed. Attach pop-up rod extension (15) to
horizontal ball rod (19) with “V” clip (17). Attach pop-up rod extension to pop-up rod. To secure drain plug install
the ball rod (19) though the bottom hole (24) as show in diagram “B”. To install the drain plug so that it may be removed, place the drain plug (24) on top of the ball rod (19). Adjust the height of the drain plug (21) and pop-up rod extension so that the basin both seals and drains adequately. Tighten pop-up rod extension to secure assembly

Step 10Pyhlrich-K101-Dolphin-Lavatory-Faucet-User-Instructions-Image-15

Flush hot and cold supply lines before connecting faucet to supply lines. Connect the supplies to the bottom of the lavatory valves using the brass coupling nuts (5) provided or with a flexible line. Connect your waste P-trap to the drain tail piece.


Pyhlrich-K101-Dolphin-Lavatory-Faucet-User-Instructions-Image-16

Pyhlrich-K101-Dolphin-Lavatory-Faucet-User-Instructions-Image-17

REFERENCE LINK

Leave a Reply