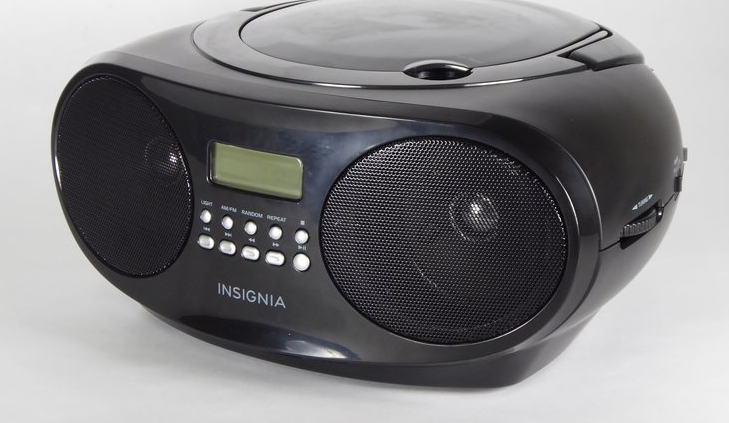
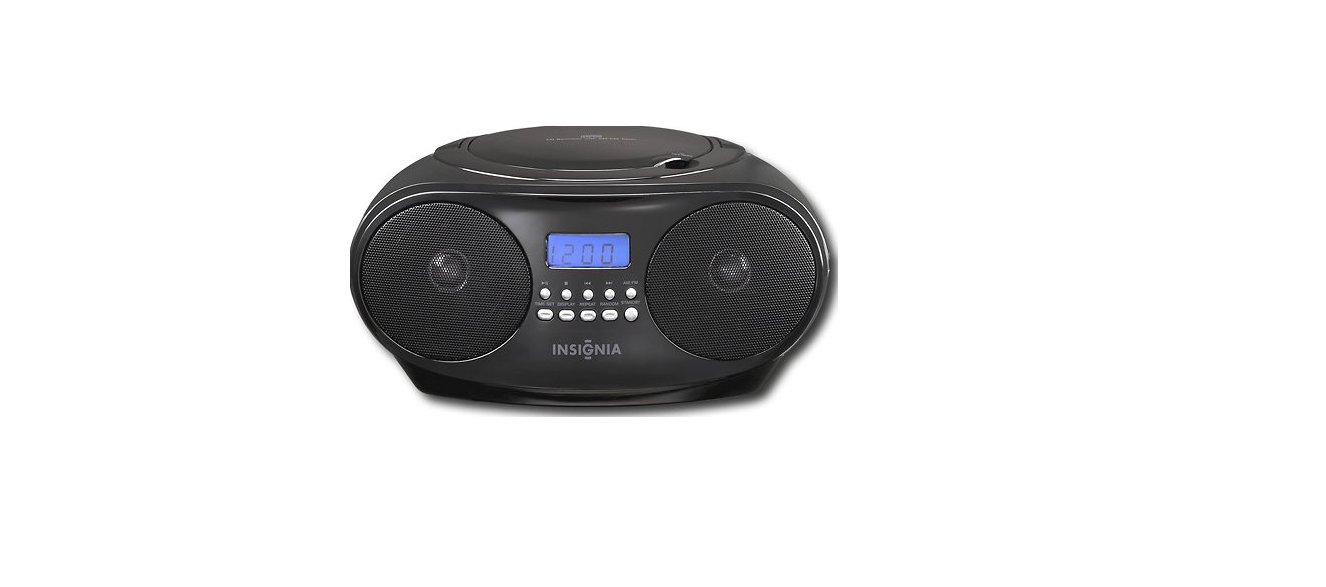
Insignia NS-B4111 CD Boombox User Manual

PACKAGE CONTENTS
- CD boombox
- AC power cord
- Quick Setup Guide
FEATURES
Top

| 1 | Handle |
| 2 | CD door |
| 3 | Volume control |
| 4 | FM antenna |
| 5 | CD door open |
Back

| 1 | AUX IN jack |
| 2 | Battery compartment |
| 3 | Headphone jack |
| 4 | AC input |
Front

| # | Item | CD Function | AM/FM Function | |
| 1 | Pause/Play | Auto scan | ||
| 2 | Previous | Previous | ||
| 3 | Next | Next | ||
| 4 | LCD screen | Displays source and audio information | ||
| 5 | ◀◀ | Rewind | Tune down | |
| 6 | LED | Lights red when in Standby mode | ||
| 7 | ▶▶ | Fast-forward | Tune-up | |
| 8 | Stop | N/A | ||
| 9 | REPEAT | Repeat | N/A | |
| 10 | PROG/MEM | Program | Station Storage | |
| 11 | ||||
| 12 | Standby/On | Standby/On | ||
| 13 | Speakers | Plays audio from your boombox | ||
IMPORTANT SAFETY INSTRUCTIONS
- Read these instructions.
- Keep these instructions.
- Heed all warnings.
- Follow all instructions.
- Do not use this apparatus near water.
- Clean only with a dry cloth.
- Do not block any ventilation openings. Install in accordance with the manufacturer’s instructions.
- Do not install near any heat sources such as radiators, heat registers, stoves, or other apparatus (including amplifiers) that produce heat.
- Do not defeat the safety purpose of the polarized or grounding-type plug. A polarized plug has two blades one wider than the other. A grounding-type plug has two blades and a third grounding prong. The wide blade or the third prong is provided for your safety. If the provided plug does not fit into your outlet, consult an electrician for the replacement of the obsolete outlet.
- Protect the power cord from being walked on or pinched particularly at plugs, convenience receptacles, and the point where they exit from the apparatus.
- Only use attachments/accessories specified by the manufacturer.
SETTING UP YOUR CD PLAYER
Connecting AC power
Note: Batteries are not needed when connecting to AC power.
- Connect the AC power cord (included) to the AC input socket on the CD player.
- Plug the cord into a standard AC wall out
Installing batteries
- Insert eight C alkaline batteries (not included) into the battery compartment as indicated on the diagram in the compartment.
- Securely close the battery compartment cover.
Notes:
- Battery power is used only when AC power is disconnected.
- Replace all batteries at the same time with the same battery type. Do not mix battery types.
- When the CD player is stored unused for a long time, remove the batteries to prevent damage.
USING YOUR CD PLAYER
Warning: Use of any controls, adjustments, or procedures other than those specified may result in hazardous radiation exposure. Using the FM/AM Radio
- Press SOURCE repeatedly to select the FM/AM function. “FM/AM” appears in the upper right of the LCD screen.
- Find the station you want to listen to:
- Press
 repeatedly to tune to a station manually.
 - Press
 to select saved (preset) stations. Note: To save the current station to memory. Press PROG/MEM, then press / to select a preset number you want to save, and then press PROG/MEM again to complete the process. If you press PROG/MEM after three seconds without pressing PROG/MEM again, the station storage mode is canceled.
 - Press and hold for two seconds to automatically scan and store stations. Each station found during the scan will be saved to memory from the lowest to the highest frequencies.
- For optimum FM reception, make sure that the FM (telescopic) antenna is fully extended and vertical.
- For optimum AM reception, rotate the CD player to orient its built-in antenna until you get the strongest signal.
- Press
Using the CD player
The CD player can play standard audio CDs and audio CDs created on a computer’s CD-R/CD-RW drive.
- Lift the CD door and insert a CD with the label facing up. Mount the CD on the spindle and push it down to lock it in place.
Controlling CD playback
| To play the CD | Press |
| To pause playback | Press |
| To stop playback | Press |
| To skip tracks | Press |
| To repeat tracks | Press REPEAT to repeat the current track. “1” appears in the upper-right of the LCD screen. Press REPEAT twice to repeat the entire disc (continuous play). |
| To play tracks in the programmed order | 1 Press , then press PROG/MEM “prog” appears in the upper-middle of the screen. “P01” (the tracking number in programmed order) flashes for two seconds, followed by “01” (Track number in the disc order). Press / to choose another track, then press PROG/MEM again to confirm. “P02” flashes for two seconds, followed by “01”. Repeat the operation to confirm the second track in programmed order. After you have selected the tracks you want, press to start playing in programmed order. 2 Press to stop playback. Press stop again to exit. “Prog” disappears from the upper middle of the LCD screen. |
Listening to an external audio source%
- Connect the external audio device to the AUX IN jack on the back panel of your CD player using a 3.5 mm cable (not included).
- Start playing music from your external audio device. Audio plays through your CD player’s speakers.
- Use your external audio source to control playback. Note: Make sure your audio device is not muted and the volume is turned up to an adequate level.
MAINTAINING YOUR CDS
- Handle CDs only by their edges. Never allow your fingers to contact the reflective, unprinted side of the CD.
- Do not attach things such as adhesive tape and stickers to your audio CDs.
- Periodically clean your CDs with a soft, lint-free, dry cloth. Never use detergents or adhesive cleaners to clean the disc. If necessary, use a CD cleaning kit.
- If the CD skips or gets stuck on a section of the disc, it is probably dirty or damaged (scratched).
- When cleaning CDs, wipe in straight lines from the center of the CD to the outside edge. Never wipe in circular motions.
SPECIFICATIONS
| Power | AC: AC120V ~ 60Hz 10W Batteries: DC 12V (8 C batteries) |
| Radio frequency coverage | FM: 87.5~107.9 MHz AM: 520~1710 KHz |
| GENERAL CD PLAYER | Speaker: 2 × 8 ohms Pick Up: 3-beam, semiconductor laser, 1-bit DA converter Encoding: 8-time oversampling |
LEGAL NOTICES
FCC Part 15 This device complies with Part 15 of the FCC Rules. Operation of this product is subject to the following two conditions: (1) this device may not cause harmful interference, and (2) this device must accept any interference received, including interference that may cause undesired operation.
This equipment has been tested and found to comply with the limits for a class B digital device, pursuant to Part 15 of the FCC Rules. These limits are designed to provide reasonable protection against harmful interference in a residential installation. This equipment generates, uses, and can radiate radio frequency energy and, if not installed and used in accordance with the instructions, may cause harmful interference to radio communications.
- Reorient or relocate the receiving antenna.
- Increase the separation between the equipment and the receiver.
- Connect the equipment to an outlet on a circuit different from that to which the receiver is connected.
- Consult the dealer or an experienced technician for help.
ONE-YEAR LIMITED WARRANTY
Visit www.insigniaproducts.com for details.
CONTACT INSIGNIA
For customer service, call 1-877-467-4289 (U.S. and Canada) or 01-800-926-3000 (Mexico) www.insigniaproducts.com.
INSIGNIA is a trademark of Best Buy and its affiliated companies. Distributed by Best Buy Purchasing, LLC ©2015 Best Buy. All rights reserved. Made in China Dispose of batteries in the proper manner, according to federal, state, and local regulations.
REFERENCE LINK
https://www.insigniaproducts.com/pdp/NS-B4111/9183279


 Afrikaans
 Albanian
 Amharic
 Arabic
 Armenian
 Azerbaijani
 Basque
 Belarusian
 Bengali
 Bosnian
 Bulgarian
 Catalan
 Cebuano
 Chichewa
 Chinese (Simplified)
 Chinese (Traditional)
 Corsican
 Croatian
 Czech
Czech Danish
 Dutch
Dutch English
 Esperanto
 Estonian
 Filipino
 Finnish
 French
 Frisian
 Galician
 Georgian
 German
 Greek
Greek Gujarati
 Haitian Creole
 Hausa
Hausa Hawaiian
 Hebrew
 Hindi
Hindi Hmong
Hmong Hungarian
 Icelandic
 Igbo
Igbo Indonesian
 Irish
Irish Italian
 Japanese
 Javanese
 Kannada
 Kazakh
 Khmer
Khmer Korean
 Kurdish (Kurmanji)
 Kyrgyz
 Lao
Lao Latin
Latin Latvian
 Lithuanian
 Luxembourgish
 Macedonian
 Malagasy
 Malay
Malay Malayalam
 Maltese
 Maori
Maori Marathi
 Mongolian
 Myanmar (Burmese)
 Nepali
 Norwegian
 Pashto
 Persian
 Polish
 Portuguese
 Punjabi
 Romanian
 Russian
 Samoan
 Scottish Gaelic
 Serbian
 Sesotho
 Shona
Shona Sindhi
 Sinhala
 Slovak
 Slovenian
 Somali
 Spanish
 Sundanese
 Swahili
 Swedish
 Tajik
Tajik Tamil
Tamil Telugu
 Thai
Thai Turkish
 Ukrainian
 Urdu
Urdu Uzbek
Uzbek Vietnamese
 Welsh
Welsh Xhosa
Xhosa Yiddish
 Yoruba
 Zulu
Zulu