
SCA RC51 ”Dynamic Guideline Reverse Camera Kit User Manual

WARNING
To avoid personal injury and/or property damage, please read and follow ALL of these instructions before assembling and operating.
PRODUCT OVERVIEW
Thank you for purchasing the SCA-RC51 Dynamic guideline reversing camera kit. The dynamic guidelines show the intended motion of the vehicle while reversing. This product is designed for easy DIY installation but does require some specific tools, and may require a qualified technician to install.
PACKAGE COMPONENTS
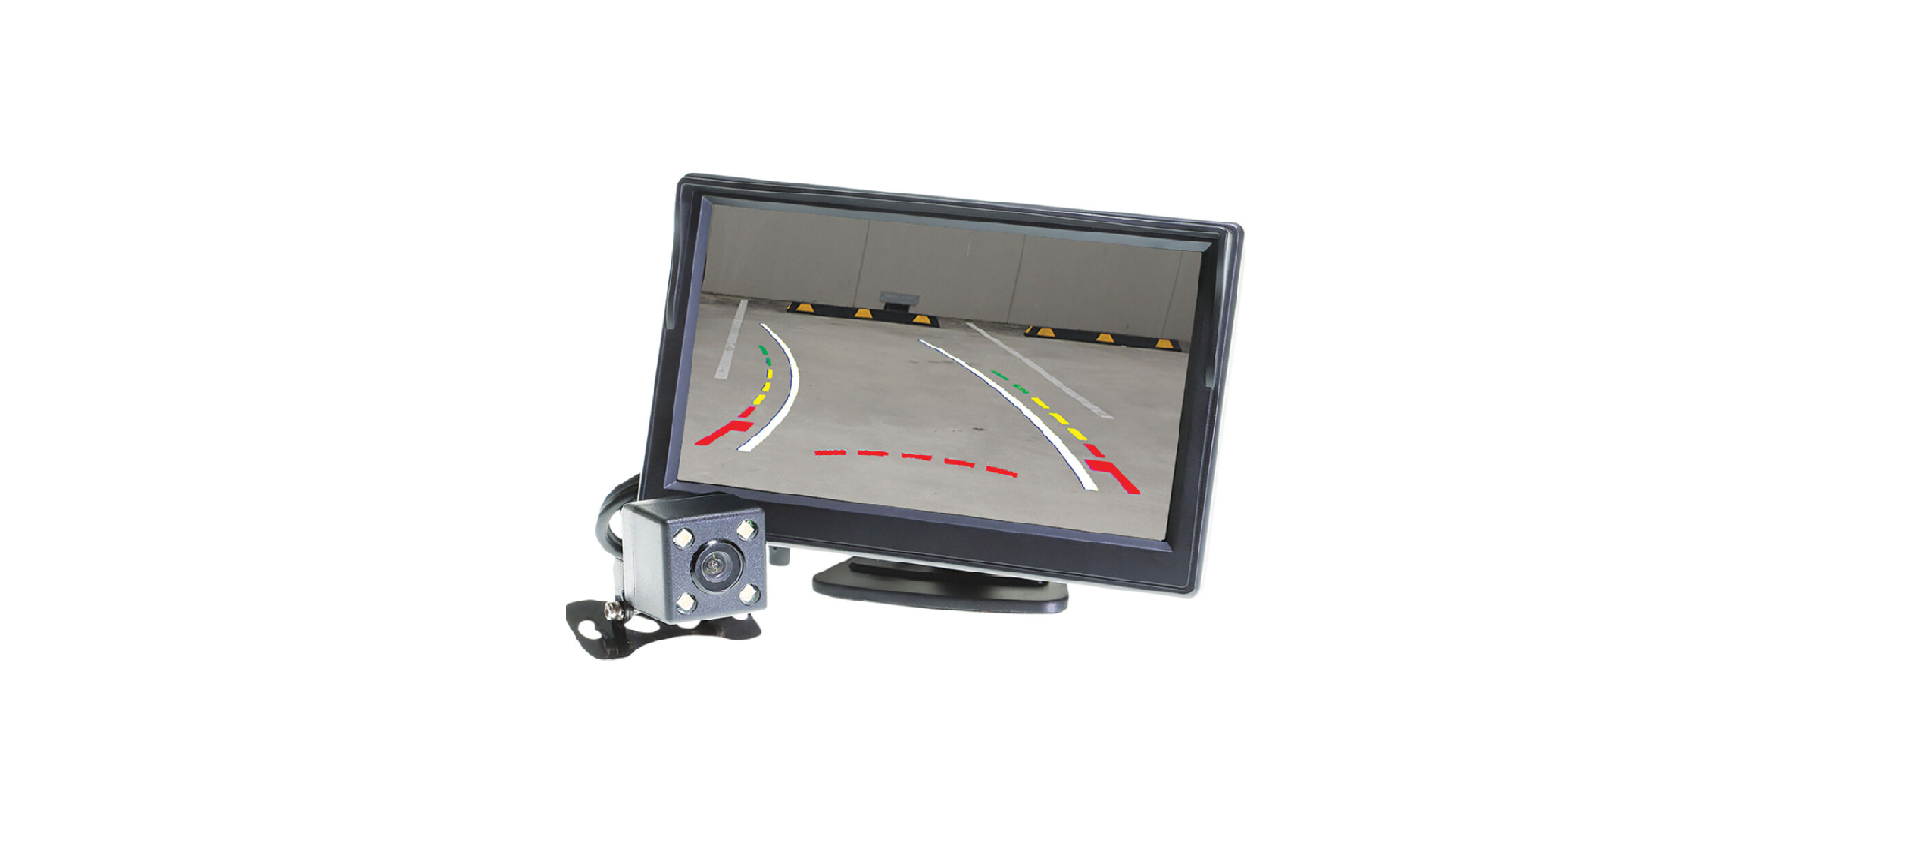
- Monitor (Labelled 1)
- Reverse camera signal harness (Labelled 2)
- Monitor power harness (Labelled 3)
- Video extension cable (Labelled 4)
- Camera power harness (Labelled 5)
- Reverse camera (Labelled 6)
- Adhesive mount
- Suction mount
WIRING INSTALL DIAGRAM

The video signal is transferred from the camera to a monitor via an RCA cable that will need to be run from the boot, through the passenger compartment to the monitors wiring loom. From there the video signal is sent directly to the monitor. At the rear of the car the camera is powered directly from the reversing tail lamp. Check the priority input on the monitor as it has 2 inputs.
WIRING DIAGRAM


INSTALLATION
When mounting the camera, make sure that the camera does not cover any part of the license plate. Choose a position that does not impede the access/operation of the boot release or tailgate latch. For easy DIY installation, the cables for this product are numbered 1 to 6. This corresponds to the wiring diagrams on page 4 and 5 of this manual.
STEP 1. Mounting the Monitor
- Check the mounting position of the Monitor and camera first before installation.
- Ensure windscreen or dash is clean and free of debris. Use an alcohol wipe to enhance adhesion.
- Remove backing off 3M tape off mount and press & hold firmly to the surface for 60 seconds.
- Fix where the drivers vision is not blocked. Do not install the device on airbag or within its working range.
STEP 2. Connect Monitor Input Harness
Connect signal output cable of the monitor to the RCA input cable.
STEP 3. Connect Monitor Power Harness
Recommended Power Connection: The end of the monitor power harness cable connects to the red power input cable connector. This connection splits into two wires, a red and a black wire. Connect the red wire (+12V) to a wire that is powered when the vehicles accessories or ignition is turned on. Connect the black wire, using a suitable ring terminal to vehicle chassis. Alternative Power Connection: The monitor can also be powered from the reverse light in the vehicle. Connect the red wire (+12V) from the red power input cable connector to the red wire on the RCA video lead at the display monitor end of the cable. At the camera end of the cable, connect the red wire to positive (+12V) at the reverse light in the vehicle. Connect the black wire from the monitor harness, using a suitable ring terminal to vehicle chassis.
NOTE: if you power the monitor with this method, the start up screen on the display will appear every time you select reverse, which will delay the reverse image from appearing.
STEP 4. Connect Video Extension Cable
Connect one end of the video extension RCA cable to the RCA socket from the camera power harness, then run the RCA cable to the front under side of the driver side dash board to connect to Monitors video input RCA (Yellow AV1).
NOTE: There may be multiple video inputs for different monitors. (ie AV1 or AV2). When using both inputs, when triggerred AV1 becomes priority.
To do this you may need to remove the rear seat and or floor scuff panels to run the extension cable along the side of the vehicle. The RCA cable will be hidden when you replace the scuff panels.
STEP 5. Connect Camera Power Harness
Connect the RED wire of the camera power harness to the wire that supplies power to the reversing lamp (the wire that is powered only when
the car is put into reverse). Before making the electrical connection, temporarily disconnect the camera harness from the power plug whilst making the connection to the reversing lamp. Use a suitable splicing/crimp connector (scotch lock type) or strip connector. This connection can also be soldered, making sure to insulate the joint with electrical insulation when done. The camera power harness has two wires to connect (positive (+) to reverse lamp and (-) to chassis.
STEP 6. Connect Camera Harness
Connect the camera power harness to the camera harness. Mount the camera to vehicle
NOTES: CAN BUS
In the event that the cars reversing lights are driven by CAN BUS the above wiring system may not trigger the system correctly. It may even create a globe fault warning. In this case a CAN BUS module (sold separately) may need to be installed. However, just because the vehicle has a CAN BUS system does not necessarily mean that it will require such a module to work. In fact the opposite is true. Most vehicles do not require an additional module. If a CAN BUS module is required we recommend seeking advice from a professional installer. Some cars that switch negative, run LED or digital data controlled lighting systems may not deliver correct voltage to run the camera, or could cause
flicker with the image. If the voltage at the reversing wire light is less than 12 volts it may be necessary to use a relay to supply power to the camera harness from the wiring in the front of the car. In this case the reversing light only needs to trigger the relay. Use a multimeter to test this.
TESTING THE REVERSING CAMERA
- Engage the park brake and turn the ignition key to the on position. DO NOT START THE VEHICLE.
- Select reverse gear with the gear shift. The monitor will trigger and turn on automatically when it receives the camera video signal.
MENU FUNCTIONS
Function buttons located on the back of monitor
- Press continuously the Menu button to scroll through settings
- Press the + or – button to increase & decrease the settings
- The menu settings on the monitor will save and disappear from the display after 3 seconds
- Brightness: Adjusts screen brightness (50 – 100)
- Contrast: Adjusts screen contrast (50 – 100)
- Saturation: Adjusts screen saturation (50 – 100)
- Language: Select menu language
- Mode: Changes display between 16:9 & 4:3 ratio
- Reset: Resets all settings back to factory default
PRODUCT SPECIFICATIONS

WARRANTY
This product is guaranteed against defects for a period of 12 months from date of purchase. This warranty is provided by SRGS Pty Ltd ABN: 23 113 230 050 (Supercheap Auto) of 6 Coulthards Avenue, Strathpine, Queensland 4500, Australia. Ph (07) 3482 7500. Supercheap Auto will offer a repair, replacement product or store credit if the product is assessed as being defective during the warranty period. To claim under this warranty, take this product to the Front Service Desk of your nearest Supercheap Auto store. For store locations, visit www.supercheapauto.com.au (AUS) or www.supercheapauto.co.nz (NZ).
You will need your receipt or proof of purchase. Additional information may be requested of you to process your claim. Should you not be able to provide proof of purchase with a receipt or a bank statement, identification showing your name, address and signature may be required to process your claim. This product may need to be sent to the manufacturer to assess the defect before determining any claim. Faults or defects caused by product modification, misuse and abuse, normal wear and tear or failure to follow user instructions are not covered under this warranty. Our goods come with guarantees that cannot be excluded under the Australian Consumer Law.
You are entitled to a replacement or refund for a major failure and for compensation for any other reasonably foreseeable loss or damage. You are also entitled to have the goods repaired or replaced if the goods fail to be of acceptable quality and the failure does not amount to a major failure. Any expenses incurred relating to the return of this product to store will normally have to be paid by you. For more information contact your nearest Supercheap Auto store. The benefits to the consumer given by this warranty are in addition to other rights and remedies of the Australian Consumer Law in relation to the goods and services to which this warranty relates.
REFRENCE LINK


