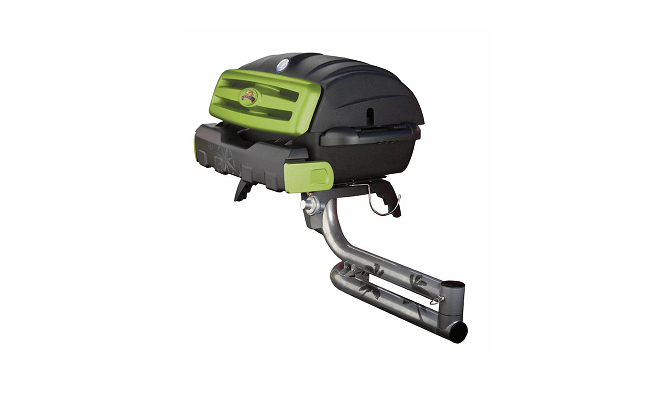
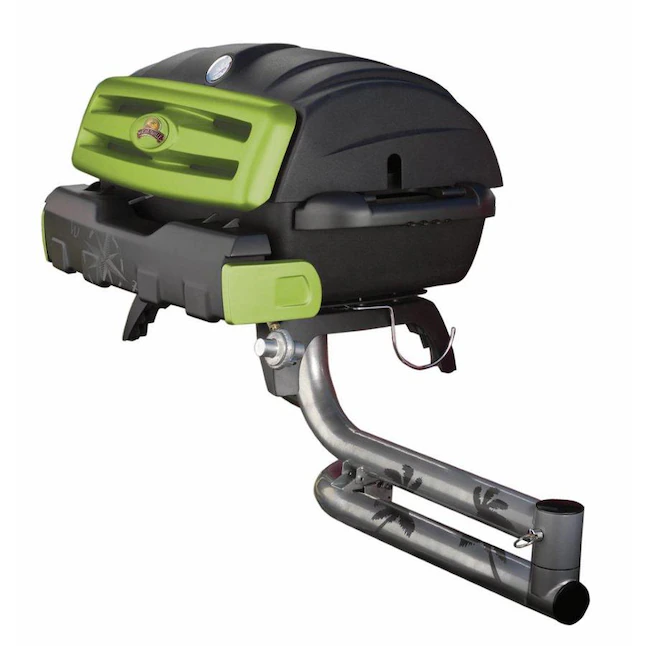
Margaritaville Tailgating Tabletop Grill
General Safety Information
This manual contains important information about the assembly, operation and maintenance of this product and system. General safety information is presented in these first few pages and is also located throughout the manual. Particular attention should be paid to information accompanied by the safety alert symbols: “ DANGER”, “ WARNING”, “ CAUTION”.
Keep this manual for future reference and to educate new users of this product. This manual should be read in conjunction with the labeling on the product.
Safety precautions are essential when any mechanical or propane fueled equipment is involved. These precautions are necessary when using, storing, transporting, and servicing. Using this equipment with the respect and caution demanded will reduce the possibilities of death, personal injury or property damage.
The following symbols shown next are used extensively throughout this manual. Always heed these precautions, as they are essential when using any mechanical or fueled equipment.
SERVICE SAFETY
- Keep all connections and fittings clean. Inspect propane cylinder and grill propane connections for damage before attaching.
- During set up, check all connections and fittings for leaks using soapy water. Never use a flame. Bubbles indicate a leak. Check that the connection is not cross-threaded and that it is tight. Perform another leak check. If there is still a leak, remove the cylinder and contact Jarden Consumer Solutions for service or repairs.
- Use as a cooking appliance only. Never alter in any way or use with any device or part not expressly approved by Jarden Consumer Solutions.
- Clean grill frequently to avoid grease accumulation and possible grease fires.
- Only use the pressure regulator and hose assembly provided with the unit. Replacement pressure regulators and hose assemblies must be those specified by by Jarden Consumer Solutions (see replacement parts /accessories)
Portable L.P. (Propane) Gas Barbecue Cylinders
Liquefied Petroleum Gas (abbreviated L.P. gas or propane) is highly flammable. It becomes liquid when stored under high pressure inside a cylinder and vaporizes when released. L.P. gas is heavier than air and tends to collect in low areas. It is important that there are no leaking connections on your gas grill that could cause a fire or explosion (see the section titled “LEAK CHECK”).
Operating INSTRUCTIONS
To light the grill:
Refer to the Lighting instructions in this owner’s manual and printed on the control panel of your grill. Never light the grill without first folding out the side tables.
To preheat the grill:
Light the grill according to the lighting instructions in this owner’s manual. Close the lid and turn the burner control knob to Start/Hi. Preheat the grill for 5-10 minutes (depending on conditions such as air temperature and wind). Once the grill is preheated, set the burner control knob to the setting specified in the recipe.
Note: Wind and weather may require adjustment of the burner control knob to obtain the correct cooking temperature. If the burner goes out during cooking, open the lid, turn off the burner, and wait five minutes before relighting.
Drippings and grease:
Excess drippings and grease will collect in the disposable drip pan. (Located on the underside of the grill). Use a new pan before each use and dispose of used pans properly.
Grill Performance:
The burners are located toward the back of the grill. For indirect heat to keep food warm or cook slower, move food toward the front of the grill.
Check for gas leaks
- WARNINGS
You should check for gas leaks every time you disconnect and reconnect a gas fitting. - Note: All factory-made connections have been thoroughly checked for gas leaks. The burners have been flame tested.
As a safety precaution check all fittings for leaks before using your Grill. Shipping and handling may have loosened or damaged a gas fitting. - Perform these leak checks even though your grill has been pre-assembled.
- Do not ignite burner while checking for leaks.
Check connections
- Regulator to propane cylinder connection.
- WARNING: If there is a leak at connection, remove propane cylinder. Do not operate grill. Use a different propane cylinder and recheck for leaks with soap and water solution. If a leak persists after retightening the propane cylinder, turn OFF the gas.
- DO NOT OPERATE THE GRILL.
- Valve-to-regulator connections.
- WARNINGS
If there is a leak at the valve-to-regulator connection turn OFF the gas. DO NOT OPERATE THE GRILL.
When leak checks are complete, turn gas supply OFF at the source and rinse connections with water. - DANGER Do not use an open flame to check for gas leaks.
- DANGER Be sure there are no sparks or open flames in the area while you check for leaks. Sparks or flames may result in a fire or explosion, which can cause serious bodily injury or death, and damage to property. DANGER Do not store a spare L.P. gas cylinder under or near this appliance. 1 lb. cylinders are not refillable. If the instructions are not followed exactly, a fire causing death or serious injury may occur.
- WARNINGS
LIGHTING
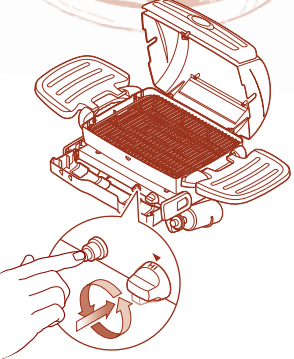
A summary of the lighting instructions is printed on the control panel.
- Fold down the condiment holder to expose the burner control knob and electronic igniter button.
- Make sure the burner control knob is turned OFF.(Push control knob in and turn clockwise to ensure that it is in the OFF position.)
- Open the lid.
- Unfold the side tables.
- Push control knob in and turn counterclockwise to START/HI. (Figure below).
- Push the electronic igniter button (you should hear a clicking sound). Burner should ignite.
- Check that the burner is lit by looking down through the cooking grate. You should see a flame. WARNING: If the burner does not light, turn the burner control knob to OFF and wait 5 minutes to let the gas clear before you try again or try to light with a match.
Manual Lighting:
DANGER Failure to open the lid while igniting the grill’s burner, or not waiting 5 minutes to allow the gas to clear if the grill does not light, may result in an explosive flame-up, which can cause serious bodily injury or death.
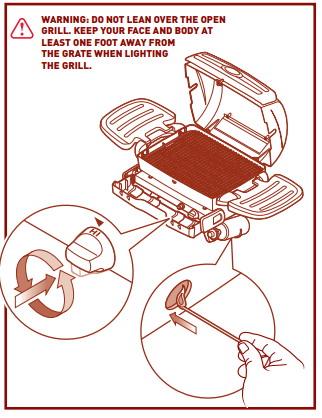
- Fold down condiment holder to expose burner control knob.
- Open the lid.
- Unfold the side tables.

- Make sure the burner control knob is turned OFF.
- Strike a match and put the flame into the matchlight hole on the right side of the lower grill basin.
- Push burner control knob in and turn to START/HI.
- Check that the burner is lit by looking down through the cooking grate. You should see a flame.
CLEANING
For availability of replacement cooking grate go to margaritavillecargo.com or call Margaritaville® Cargo directly at 1-877-689-2737.
Outside surfaces: Use a warm soapy water solution to clean, then rinse with water.
Cooking grate: Clean with a soft brass bristle brush. As needed, remove from grill and wash with warm soapy water then rinse with water.
- Drip pan: A disposable drip pan is included with the grill. Foil pot pie pans (4 3/8”) are available at most grocery stores or replacements can be ordered at margaritavillecargo.com or call 1-877-689-2737. To clean the tray, wash with warm soapy water, then rinse.
- Inside grill basin: Wash inside of grill basin with warm soapy water and a water rinse.
- Inside Lid: While lid is warm, wipe inside with paper towel to prevent grease build-up.
- Fold out side tables: Wash with a soft cloth and a soap and water solution. Do not use cleaners that contain acid or mineral spirits. Rinse well after cleaning.
- Fold out side tables are not to be used as cutting boards.
Annual Maintenance
After a period of nonuse, we recommend that you perform the following maintenance procedures for your safety. Inspect and clean the burner tube. Inspect the burner for correct flame pattern. Clean if necessary, following the procedures outlined in the “General Maintenance” section of this manual. Check all gas fittings for leaks following the instructions listed in this manual under “Check for gas Leaks”.
Inspection and cleaning of Burner Tube:
Your grill, as well as any outdoor gas appliance, is a target for spiders and other insects. They can nest in the venturi section of the burner tube. This blocks the normal gas flow, and can cause the gas to flow back out of the air shutter. This could result in a fire in and around the air shutter, causing serious damage to your grill.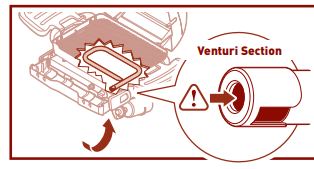
Air Mixture Adjustment:
The air mixer sleeve for the burner has been pre-set at the factory for gas conditions at sea level. However, if the burner flame is too yellow (this may occur at higher altitudes) open the air mix sleeve slightly until the flame turns blue.
GENERAL MAINTENANCE
Main Burner Cleaning Procedure:
Turn off the gas supply. Remove the burner. (See below) Look inside the burner with a flashlight. Clean the inside of the burner with a wire. (A straightened-out coat hanger will work) Check and clean the opening at the end of the burner. Check and clean the valve orifice at the base of the valve. Use a Steel bristle brush to clean outside of burner. This is to make sure all the burner ports are fully open.
Ignition System Operations:
This appliance has an electronic igniter that uses a triple A battery (AAA – V.), (battery should be checked periodically). The grill can also be lit using a match, via the flame view window. Follow the lighting instructions exactly when lighting the grill.
Battery Check:
The battery compartment is located behind the electronic igniter push button on the control panel. Rotate the push button counter-clockwise to expose the battery compartment. When replacing the battery be sure to attach positive and negative ends correctly. Check the igniter by pressing the button. You should hear a “clicking spark” sound.
Storage, Transport and/ or Non – use
When the grill is not in use or is being transported, the propane cylinder must be DISCONNECTED and the propane cylinder stored in a well-ventilated space.
DO NOT DRIVE WITH THE CYLINDER ATTACHED!
The grill should be checked for gas leaks and any obstructions in the burner tubes before using.
(See Sections: “General Maintenance and Annual Maintenance.”) The burner tube should also be checked for any obstructions. (See Section: “Annual Maintenance.”)
If grill is to be stored for a long time, remove battery from electronic igniter.
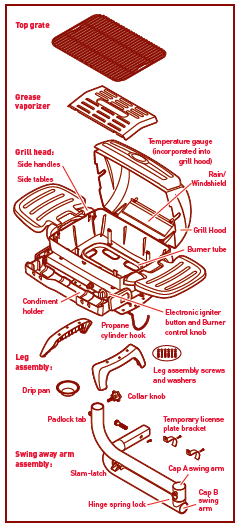
REPLACEMENT PARTS LIST
| DESCRIPTION | PART # |
| Instruction Manual | 134912 |
| Top Cooking Grate | 134891 |
| Grease Vaporizer | 134893 |
| Grill Hood | 134910 |
| Temperature Gauge Set | 134894 |
| Rain/Wind Shield | 134895 |
| Side Shelf/Table (2) | 134902 |
| Side Handle Assembly (2) | 134903 |
| SS Burner Tube Assembly | 134897 |
| Condiment Holder | 134904 |
| Electronic Igniter Electrode Set | 134892 |
| Burner Control Knob | 134898 |
| Propane Cylinder Hook | 134899 |
| Grill Legs (2) | 134906 |
| Drip Pan | 134896 |
| Collar Knob | 134900 |
| Stabilizer Bolt and Cotter Pin | 134907 |
| License Plate Bracket Assembly | 134901 |
| Plastic End Cap – A Swing Arm | 134908 |
| Plastic End Cap – B Support Arm | 134909 |
| Swing Away Arm Assembly | 136562 |
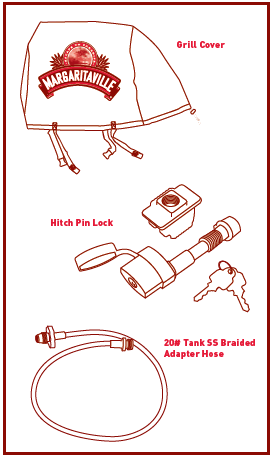
Description Part #
- Grill Cover 134905
- Hitch Pin Lock 26130
- 20# Tank SS Braided Adapter Hose 100714-A00
3 Year Limited Warranty
Sunbeam Products, Inc., doing business as Jarden Consumer Solutions or if in Canada, Sunbeam Corporation (Canada) Limited doing business as Jarden Consumer Solutions (collectively “Jarden Consumer Solutions”) warrants that for a period of three years from the date of purchase, this product will be free from defects in material and workmanship. Jarden Consumer Solutions, at its option, will repair or replace this product or any component of the product found to be defective during the warranty period. Replacement will be made with a new or remanufactured product or component. If the product is no longer available, a replacement may be made with a similar product of equal or greater value. This is your exclusive warranty.

