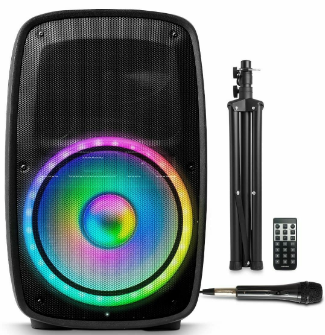
Ion Audio Total PA Glow Max Bluetooth Speaker User Instructions

Important Safety Instructions
- Read these instructions. Keep these instructions. Heed all warnings. Follow all Instructions.
- Do not use this apparatus near water.
- Do not block any ventilation openings (if applicable). Install in accordance with the manufacturer’s instructions. Do not install this equipment in a confined.
- Only use attachment/accessories specified by the manufacturer.
- Do not defeat the safety purpose of the polarized or grounding-type plug (if applicable).
Features
A. Display: This screen shows information relevant to Total PA™ Glow Max’s current operation. The Display comes with a plastic protector on it. Carefully remove this for optimal viewing. See the full User Guide to learn more.
B. Control Knob: Push this knob to select and make adjustments to the mic 1 volume, the mic 2 volume, source volume The volume of Total PA™ Glow Max does not affect your Bluetooth device volume.
C. Next: Press this button to tune in a radio station or go to the next track on a Bluetooth connected device, SD card, or USB drive. Press and hold in radio mode to seek.
D. Play/Pause: Play/pause the USB, SD, or Bluetooth source. In USB/SD mode, double-press this button to stop playback and return to the beginning of the list of files.
E. Previous: Press this button to tune in a radio station or go to the previous track on a Bluetooth connected device, SD card, or USB drive. Press and hold in radio mode to seek.
F. Repeat: In USB or SD mode, press this button to repeat a single track, folder.
G. Mode: Press this button to select the audio source to use: USB, SD, FM radio, Aux, or Bluetooth.
H. Lights: Press this button to toggle between three modes for the lights on the front panel.
I. USB Port: Connect a USB flash drive here to play supported audio files.
J. SD Card slot: Insert an SD card here to play supported audio files.
K. Mic Inputs 1/4” / XLR): Connect a microphone or mic-level source to these inputs.
L. Aux Inputs (1/8” stereo / XLR line-level): These inputs can be used to connect a CD player, MP3 player.
M. Mix Output (XLR): Connect this output to a speaker, mixer, or recorder.
N. Clip LED: The Clip LED will flash red if the signal from the input jacks or media panel audio source is clipping. If this happens, decrease the main volume using the Control Knob or the source, or the mic volume
O. Power Switch (not shown): Flip this switch to toggle the speaker’s power on or off.
App Control
IMPORTANT: To ensure the best possible experience with the app, use the most current Android OS or iOS on your device. Follow these steps to download the free app on your device:
- Open the Apple App Store or Google Play on your device.
- Follow the on-screen instructions to download and install the app.
- Connect your device to Total PA™ Glow Max via Bluetooth.
- Open the ION Sound XP™ app and tap to select Add A Product on the screen. The app will scan and find Total PA™ Glow Max.
- Select the Total PA™ Glow Max icon to go to the next screen, where you can control the speaker settings from your device.
Bluetooth Connecting with Total PA™ Glow Max
Connecting to One Total PA™ Glow Max:
- Power on the Total PA™ Glow Max by flipping the on/off switch. Total PA™ Glow Max will automatically enter Bluetooth pairing mode.
- Navigate to your device’s Bluetooth setup screen, find Total PA Glow Max, and connect.
- To disconnect, turn off Bluetooth from your device’s Bluetooth settings.
Linking Two Compatible Speakers (Stereo-Link 2.0™):
- Power on both Total PA™ Glow Max speakers by flipping their on/off switches. Make sure they are in Bluetooth pairing mode and not connected to a device.
- Press and hold the Repeat/Link button on one speaker to enter Stereo Link mode.
- Connect to the primary speaker via Bluetooth. To disconnect, double press the Repeat/Link button.
Remote Control
Aim the remote straight at the front of the speaker woofer. Room lighting and battery life can affect the operating range of the remote control.
DOWNLOAD PDF
Ion Audio Total PA Glow Max Bluetooth Speaker User Instructions


