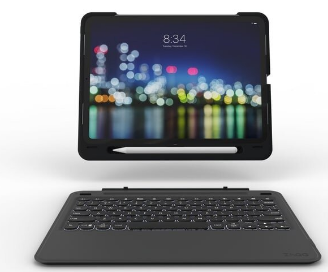
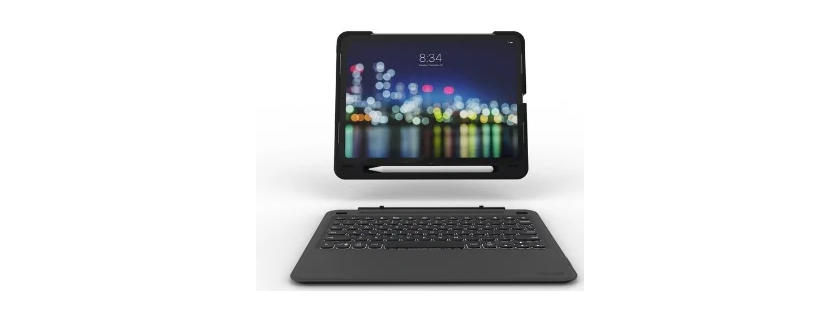
ZAGG Slim Book Go Ultra-Slim Keyboard User Guide

INTRODUCTION
Congratulations on purchasing the Zagg Slim Cover – the premier tablet keyboard and case for the Microsoft Surface™ Pro 3 and 4. Your new Zagg Slim Cover operates seamlessly with your Surface Pro 3 and 4 to give you more functionality, an easier typing experience, and added protection. Read these instructions completely and keep them in a safe place for future reference; and now, get ready to experience mobile typing that’s as versatile as you are.
POWERING ON AND OFF
Your Slim Cover keyboard pairs to your Surface via Bluetooth® 3.0. That means you can type on your keyboard without it being connected physically to your Surface. As an added feature, your Slim Cover keyboard can pair with two Microsoft devices at once for ultimate convenience. If the connection between your Surface and Slim Cover is ever lost, repeat these steps.
- Access the Bluetooth settings on your Surface.
- On your Slim Cover, press and hold for three seconds or depending on which one you want associated with your Surface. A blue LED will begin flashing, indicating your Slim Cover is in pairing mode.
- Your Surface will display “ZAGG Slim Cover” as an available device. Choose it and then click Pair.
- Repeat steps 2-3 to pair your Slim Cover to other devices. When paired with other devices, simply press or to toggle between them. Turning your Slim Cover Keyboard on is easy. Just press the Fn + (Delete) keys. A green LED will light, indicating your keyboard is on. To turn your Slim Cover Keyboard off, press the fn + (Delete) keys for two seconds. A red LED will flash indicating your keyboard is off.
CHARGING
Your Slim Cover keyboard features a battery that delivers up to three months of typing per charge*; and because the battery operates independent of your Surface, you can type on the Slim Cover even when it’s not physically connected to your Surface. Here’s how to charge your Slim Cover Keyboard:
- Plug the micro USB end of the included charging cable into the Slim Cover’s charging port – located on the right side.
- Plug the USB end of the included charging cable into any USB charging outlet.
- The LED will light red and stay lit until your Slim Cover is fully charged.
- When the red LED goes off, your Slim Cover is fully charged. Unplug the charging cable and enjoy up to three months of the most spacious, natural typing available for your Surface.
Based on one hour of use per day. Using the backlit feature will reduce battery life and require more frequent charging.
CHECKING BATTERY LIFE
Your Slim Cover can provide up to three months of regular typing per charge. Checking how much battery life it has left is easy – here’s how:
- Press Fn + CTRL (also the battery key). The LED will light one of three ways.
- Three green flashes indicate a full battery.
- Three yellow flashes indicate approximately half battery life remaining.
- Three red flashes indicate low battery life. When your Slim Cover reaches critical battery level the LED will flash red once every five minutes.
To help preserve battery life, your Slim Cover Keyboard will enter sleep mode if left on but not used for several minutes. To wake it, press any key. Also, the Slim Cover’s battery has no memory and may be charged whenever you wish.
SPECIAL FUNCTION KEYS
Your Slim Cover offers all the special function keys you’re used to for Windows 8 and 10 that help you get more done faster. Here is a list of some important keyboard shortcuts:
- BLUETOOTH 1: Pairs your Slim Cover with your preferred device. If you have paired with a second device (see below) press to instantly switch to that device.
- BLUETOOTH 2: Pairs your Slim Cover to a second device. If you have paired your Slim Cover with a device using , press that key to instantly switch to the device associated with that key.
- LOCK: Locks your Surface. You will need to enter your password again when you unlock it.
- APPS: Displays the apps you currently have open on your Surface. Note: This key won’t do anything unless you have at least one app open.
- SETTINGS: Opens your Windows® charms if you’re running Windows 8. If you’re running Windows 10, it opens your tablet’s settings. Your Slim Cover is set to work with Windows 10 by default. To change it to Windows 8, press Fn + w + 8. To change back to Windows 10, press fn + w + 0.
- EMAIL: Opens your default email service.
- TRACK BACK: Tracks backward on your open music playlist. Note: This key won’t do anything unless you have a music playlist open.
- PLAY/PAUSE: Plays and pauses your current playlist.
- TRACK FORWARD: Tracks forward on your selected playlist. Note: This key won’t do anything unless you have a music playlist open.
- MUTE: Mutes your Surface’s audio.
- VOLUME DOWN: Decreases your Surface’s volume output.
- VOLUME UP: Increases your Surface’s volume output.
- DELETE: Deletes copy from left to right.
- Fn + DELETE: Turns your Slim Cover on and off.
- Fn + SPACE: Toggles between international keyboards (when activated in your Surface’s settings).
- Fn + RIGHT CTRL: Toggles the backlights on and off.
- Fn + LEFT CTRL: Triggers the LED to display your Slim Cover’s remaining battery life
TRACKPAD FUNCTIONS
Your Slim Cover keyboard includes a convenient trackpad so you can easily navigate even when you don’t have a mouse connected. The trackpad functions just like a traditional trackpad for Windows 8 and 10. Here are some basic controls:
- NAVIGATE: Use your finger or a stylus on the trackpad to navigate just like you would with a mouse connected.
- LEFT CLICK: Press the bottom left of the trackpad quickly to perform a left click.
- RIGHT CLICK: Press the bottom right of the trackpad quickly to perform a right click.
- TWO FINGER SCROLL: Use two fingers side by side on your trackpad to scroll through a document or page.
- ZOOM IN: Place two fingers together on the trackpad and, while still touching the trackpad, spread your fingers.
- ZOOM OUT: Place two fingers spread apart on the trackpad and, while still touching the trackpad, pinch your fingers closer together.
TROUBLESHOOTING
If your Surface does not respond to your Slim Cover, there may be a simple explanation such as a dead battery or an unsuccessful pairing. Please use the following to help troubleshoot your situation. If none of the following solve your issue, then please contact Zagg Customer Service and one of our trained professionals will be happy to assist you.
- Restart your Surface.
- Turn your Slim Cover off and back on. You should see the LED illuminate briefly; if not, charge your Slim Cover.
- After charging, turn your Slim Cover on. If the LED does not illuminate, and your keyboard doesn’t operate correctly, please contact Zagg’s customer service.
- If your Slim Cover cannot establish or maintain a Bluetooth connection, reset the Bluetooth module by charging your keyboard.
- Forget and re-pair your Slim Cover.
- Push one of the Pair keys on your Slim Cover and watch for the LED to flash blue.
- Your Surface should display “ZAGG Slim Cover” as an available device. Select it, and then choose Pair.
- If your tablet gives you an error message, repeat the pairing process.
FCC INTERFERENCE STATEMENT
This device complies with Part 15 of the FCC Rules. Operation is subject to the following two conditions:
- This device may not cause harmful interference
- This device must accept any interference received, including interference that may cause undesired operation.
This equipment has been tested and found to comply with the limits for a Class B digital device, pursuant to Part 15 of the FCC Rules. These limits are designed to provide reasonable protection against harmful interference in a residential installation. This equipment generates, uses, and can radiate radio frequency energy and, if not installed and used in accordance with the instructions, may cause harmful interference to radio communications. However, there is no guarantee that interference will not occur in a particular installation.
- Reorient or relocate the receiving antenna.
- Increase the separation between the equipment and receiver


