Table of contents
show
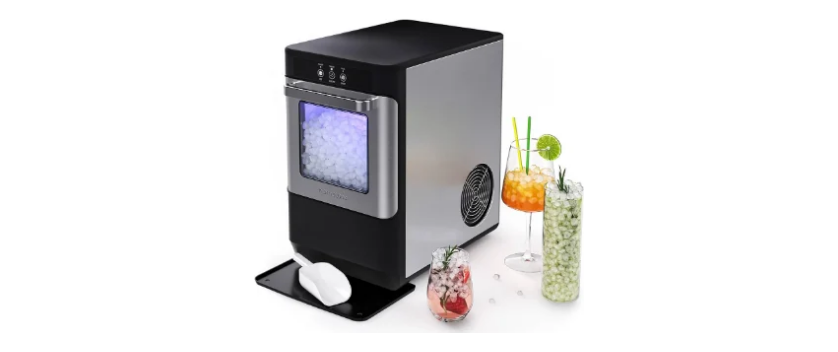
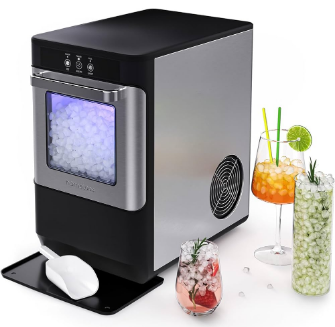
Homelabs Countertop Nugget Ice Maker Stainless Steel User Guide
Important Safeguards
When using your hOmeLabs Ice Maker (appliance), basic safety precautions should always be followed to reduce the risk of fire, electrical shock, and/or injury to persons. Incorrect operation due to ignoring instructions may cause harm or damage.
WARNING:
- All safety messages will tell you what the potential hazard is, how to reduce the chance of injury, and tell you what can happen if the instructions are not followed.
- Do not operate this or any other appliance with a damaged cord.
- The appliance must be positioned so that the plug is accessible.
- Connect plug to properly polarized outlets only.
- Do not run the power cord over carpeting or other heat insulators. Do not cover the cord. Keep the cord away from traffic areas, and do not submerge in water or any other liquid.
- We do not recommend the use of an extension cord, as it may overheat and become a fire risk.
PARTS OVERVIEW

- Ice Scoop
- Full Sensor – Detects ice levels
- Ice Basket
- Water Tank – Located under Ice Basket
- Top Cover with Transparent Window
- Air Outlet
- Water Drain Cap – Located at the front bottom side of the appliance
- MAXIMUM WATER LEVEL – Remove the Ice Basket, to see the water level mark
CONTROL PANEL FUNCTIONALITY
- ON/OFF BUTTON: The POWER LED will illuminate when you turn on the appliance with this button.
- SELECT SIZE BUTTON: Click on this button to cycle through options and select the desired ice size (LEDs: S-SMALL or L-LARGE).
- WATER LED: Illuminates when there is a water shortage in the tank.
- FULL LED: Indicates when your Ice Basket is full.

CONTROL PANEL DETAILS

Operating Procedures & Maintenance
BEFORE FIRST USE
- Remove all packaging materials from interior of the Ice Maker. Confirm Ice Basket and Ice Scoop are inside. If any parts are missing, please contact Customer Service at homelabs.com/
- Remove the tape holding the Ice Shovel, Ice Basket, and Ice Scoop to the appliance.
- Clean the Tank and Ice Basket with warm soap and water. Allow parts to dry completely.
- Place the Ice Maker on a flat, even surface without direct sunlight and/or other sources of heat. For proper ventilation, ensure there is at least a 4 inch (101 mm) gap between the appliance exterior and any surfaces nearby.
- Wait one hour for the refrigeration fluid to settle, then plug in the appliance.
- Leave appliance upright for 24 hours before initial power up.
IMPORTANT POWER NOTICES
This appliance should be properly grounded for your safety. The power cord of this appliance is equipped with a three-prong plug which couples with standard three prong wall outlets to minimize the possibility of electric shock.
- Plug your appliance into a secure, properly installed, grounded wall outlet. Do not under any circumstances, cut or remove the third (ground) prong from the power cord. Any questions concerning power and/or grounding should be directed toward a certified electrician.
- This appliance requires a standard 110–120 V, 60 Hz electrical outlet with three-prong ground.
USING YOUR ICE MAKER
Ensure your Ice Maker is clean before making any ice.
- Open the cover, remove the Ice Basket and pour water into the Tank. Keep water level below the water level mark (See > Page 9) for location.
- Press the “POWER” button on the control panel to begin the ice making cycle.
- Select the ice cube size by pressing the “SELECT SIZE” button. If the room temperature is lower than 60°F (15°C), it is recommended to select small in order to avoid ice sticking together.
- The ice making cycle lasts approx. 6 to 13 minutes, depending on selection of ice cube size and the room temperature. The recommended room temperature is 50°F to 105°F (10°C to 40°C).
- If water pump can’t inject water, the appliance will stop automatically, and the “WATER” shortage indicator will turn on. Press “POWER” button, fill water up to the max water level mark and press “POWER” button again to turn on the appliance. Allow the refrigerant liquid inside the compressor to settle for at least 3 minutes before restarting.
- The appliance stops when the Ice Basket is full and the ice “FULL” indicator is on.
- Change water in the Water Tank every 24 hours to to limit mold and bacteria growth. If the appliance won’t be used for an extended period to be used, drain all the water from the appliance and ughly to avoid damage to the appliance.
CLEANING AND MAINTAINING YOUR ICE
- Remove the Ice Basket from the appliance.
- Clean the interior of the appliance with diluted detergent, warm water and a soft cloth.
- Use the water to rinse the inside parts, and drain out the water by unplugging the drain cap on front bottom of the appliance.
- Dry the interior and exterior of the appliance with a clean, soft cloth.
- When the appliance is not in use for an extended period of time, drain water completely and dry the interior of the appliance.
- With the power off, use a soft dry brush to gently remove any build-up from the vents.
- This ice maker does not have a cleaning function. If using a standard ice maker or freezer cleaning solution, follow the instructions provided by the cleaning solution’s manufacturer.
Troubleshooting
| PROBLEM | POSSIBLE CAUSE | SOLUTION |
| WATER shortage indicator is on. | Lack of Water. | Stop the appliance, by pressing the “ON/ OFF” button. Fill Tank with water, and press “ON/OFF” button again to restart the appliance. |
| FULL indicator is on. | Basket is full of ice. | Remove ice from ice basket. Continuously hold “SELECT SIZE” button for 5 seconds, the appliance can make 10 even cycles of ice even when “FULL” indicator is on. |
| Ice cubes are sticking together. | The ice making cycle is too long. | Stop the appliance by pressing the “ON/O button, and restart it when the ice blocks melt. Select the small size ice cube select |
| Water temperature in inner tank is too low. | Replace the water. Temperature of water recommended at 40°F–90°F (4°C–32°C). | |
| Ice making cycle is normal but no ice is being formed. | Room temperature or water temperature in inner tank is too high. | The room temperature should be: 50°F–105°F (10°C–40°C), The water temperature should be: 40°F–90°F (4°C–32°C) |
| Refrigerant in cooling system is leaking. | Contact hOmeLabs Customer Service at 1-(800)-898-3002 | |
| Pipe in the cooling system is blocked. | Contact hOmeLabs Customer Service at 1-(800)-898-3002 | |
| Mold | Various causes | Use room temperature water and mild detergent with a soft cloth to clean all inside surfaces, rinse with water and then run 3 cycles of ice making with new water each time, discarding the ice. Ideally also use professional ice
|
| Water leakage | Drain Cap is not in place. | Ensure the Water Drain Cap (front bottom of unit) is in place. |


