Alpha Digital LD353 vehicle Blackbox DVR User Manual
Foreword
Alpha Digital LD353 vehicle Blackbox DVR user manual is for today’s lifestyle. It is designed to provide hard evidence of a situation. It can be applied to meeting records,monitoring evidence, location shooting, video and other evidence where
proof is required.This product combines the industry-leading HDR high dynamic camera, WDR wide dynamic camera never missing second. It has seamless looping video,ultra-wide-angle shooting, ultra-high-definition camera, real-time playback, motion detection, lane deviation shift and so on much latest technology in one. Unique
and stylish, streamlined design to today’s needs. This manual will detail how to install and operate.Please read before use and keep it with you. We hope this product will meet your needs.Specifications may vary due to upgrades, updates and other reasons, please prevail in kind, without notice. Manufactures reserved the right to directly change technology without prior notice.
Infringement of copyright/Privacy
Notice Please note this product is for personal use. Its use must not violate national or international copyright/Privacy laws. That is the recorded image for personal use only and may not freely publicly spread; in addition the use of video performances, exhibitions, or commercial activities recorded by this product, in some case may infringe someone else’s copyright or legal rights.
Installation Instructions
Installation of this product should be close to the mirror to get the best view.Make sure the lens is within the scope of the windshield wipers to ensure good vision. Even in the rainy conditions, effects are good. Do not touch the lens with your fingers, because the oil from your fingers may be left on the lens, resulting in that recording or photography is not clear, so please periodically clean the lens.
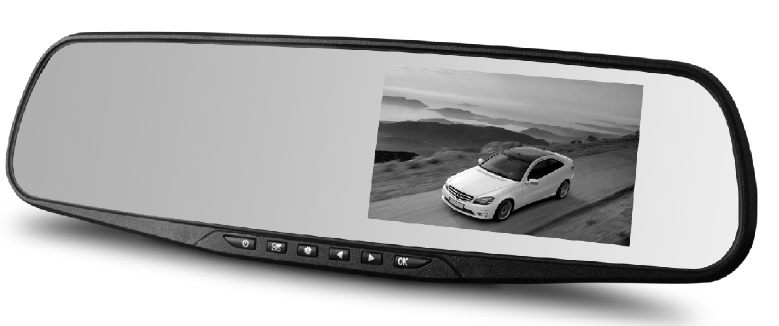
Product Overview
The structure of FIG

Host keys and interface description Number Icon
| Number | Icon | Name | Operating instructions |
| 1 | Switch button | Turn on or turn off the system | |
|
2 | Menu Key/ Emergency button | Under the standby mode, press the menu key to bring up the feature set; Quickly press the camera button on the unit showing current state of the video file locking, covering not be recycled; | |
| 3 | Mode | For inter camera mode key / camera /playback switch | |
| 4 | Down keys | In the menu options, select the function key down; standby or video, night vision lights turn on or off | |
| 5 | On the turn key | Menu options, select the function keys up; standby or recording status, open or closed recordings |
| Number | Icon | Name | Operating instructions |
| 6 | OK | Ok button | Camera/camera/confirm the short press to start the camera down key, camera mode, press again to stop recording; Short press to camera mode to take picture; the menu mode to confirm the key |
| 7 | Display | 4.3 inch TFT with HD display screen | |
| 8 |
| USB Port | For connecting a PC to transfer data; Power connector, supplies power |
| 9 |
| AV input port | AV cable is used to connect the video output to AV equipment |
| 10 | MicroSD card slot | MicroSD memory card slot, install the correct direct direction tips | |
| 11 | Reset button | System restart the reset button | |
| 12 | Microphone | Recording receiving port | |
| 13 | Shot | Image acquisition |
Memory Installation
- Insert a memory card
Insert the memory card on the device memory card correctly in accordance with the direction of the gap prompt, press the card until a click is heard.Use a high-speed card (CLASS6 above).
Note: The first time you use your new card with this unit to format the card to. - Remove the memory card: press the memory card out of the slot
Note: When the device is in the boot state, do not remove or insert a memory card in order to avoid damaging the memory card. - Bundle the Vehicle DVR to the current rearview mirror on your car with using provided velcro tape, and make sure it is tied solid.
- Connect the power
Please use the original factory standard charger, the boot device as well as the built-in battery. The end of the car charger is connected to the device’s USB port and the other end of the card charger is plugged into the car port, car engine once launched the device automatically boot.

Initial user settings
Set the date and time:
- Because the machine has switched the camera’s automatic functions, you need to press the OK button click, the device enters the standby state.
- Then press the M button twice, at <time/date>by pressing or to select <date/time>, then press the ok button to enter the setting.
- By press the or keys to adjust the value, press the OK button to enter another field.Until the completion date and time settings, press M to exit.
Recorder Recording Operations
- When the car engine is started, the device is automatically turned on and start recording. When
the engine stalled, then it will automatically stop recording. Or press the OK button. Way manually
stop recording. - Note: some vehicles powered car charger interface is often when the engine stalled, the power supply will continue to work. If you encounter such a situation, take the following steps: Open the manual way on/of the device, or the car charger from a car cigarette lighter port unplugged.
- Other types of camera: Press the OK button, then start recording; press the O button again, then stop recording.
Note: (1)1,2,3,4,5,10 minutes every camera, it will save time, please refer to the circulation camera menu.(2)The equipment will be saved in the camera memory card, if a memory card is full, the oldest file is automatically overwritten memory card.
Emergency camera
Note: if you start a gravity sensor, and detect a collision, the device will automatically lock the current record video will not be overwritten.
Recorder camera operate
- Short press M to switch to camera mode, camera icon in the upper left corner of the screen display.
- Press the OK button to take pictures, take pictures of the screen flashes once to indicate camera complete. Video/photo playback operations.
A. As in the camera mode, you need to press the OK button to stop the recording.
B. Press the M button to switch to playback mode, the upper left corner of the screen to display the playback icon. - Press or key up or down to select the file.
- Press the OK button to play the selected video file; short press again to pause playback.
Special features of Alpha Digital LD353 vehicle Blackbox DVR user manual
Gravity sensor function
When the gravity acceleration starts, the machine will automatically save the video when the incident occurred and will not delete the file.Gravity sensor can be adjusted in the menu high-medium-low-off, the factory default is medium.
Parking mode feature
After stop mode is turned on, when the vehicle stalled, tachograph will enter into dormant status.When car body feels vibration from outside, tachograph will open the camera to do record. After the vibration gone, the DVR automatically shuts down after a record 10-15 seconds. When the body is detected again after the shock, again start camera function.Parking for guarding video camera 1080p 15 frames/sec, and the file is automatically locked.
Note: the parking guard function must only work in the case of tach graph automatic shutdown, manual
startup or shutdown, the parking guard does not work.
Motion detection function
If the motion detection feature turns on, quickly press OK to start recording.The camera automatically switches to a 10 second, motion detection standby mode. If the recorder in front of the screen still, not moving object, the machine automatically enters stop recording state. When detecting an object moves, the recorder start recording, the recorder screen jumps to the video, the red recording light starts blinking. Default: motion detection off.
USB mode
Connect the USB cable to the computer, theUSB menu will appear with the following options;
Memory
In this mode, the video file can be accessed.
Camera
Select this mode will bring up the USB video device, can be real-time network camera or video chat as a PC camera.
Definition video interface icon

Settings Menu
| Menu Options | Explanation | Available options |
| Resolution | Set the video resolution | 1080P HD, 1080P, 720P,WVGA, VGA |
|
Loop recording | When setting up each video file length | 1 minute, 2 minutes, 3 minutes, 5 minutes, 10 minutes, off, if you choose to close the case, the card will not automatically cycle full coverage |
| Exposure compensation | Underexposed, dim the screen, you need to fill light | +0.0, -1/3, -2/3, -10, -4/3, -5/3, -2.0, +2.0,+5/3, +4/3, +10, +2/3, -1/3- |
| Motions Detection | In standby mode, when the screen has moved to the detection of automatic video |
On, Off |
| Recording Audio | Recording function is turned on or off | On, Off |
| Date Label | Camera video watermark date | On, Off |
| G-sensor | Collision generated video never be covered | High, medium, low,off |
| Lane shift | When the vehicle travel lane shift will alarm | Function switch, models, sensitivity, area selection, start speed |
|
Stop mode | After parking stall, body if you receive external vibration generated by the tachograph will automatically turn the camera |
On, Off |
| Date / Time | Date and time | You can set the year, month, day hour minute, second |
| Menu Options | Explanation | Available options |
| Automatic shutdown | No automatic shutdown operating state | 1 minute, 3 minutes |
| Screen Saver | Recorder automatically turns off the display work | 10 seconds, 30 seconds, 1 minute |
| Beep | During operation, the key is with sound | On, Off |
| Language Settings | Language operation menu | Traditional, Simplified Chinese, Russian, Japanese, French, Italian, German, Spanish, English, Korean |
| TV mode | Connected TV system | NTSC, PAL |
| Light frequency | Lights flicker frequency | 50HZ, 60HZ |
| Fill light | Use in low-light environments | On, Off |
| Format | You can delete memory card data above | SD card |
| Default setting | Restore factory settings | Cancel, OK |
| Version | Software version shipped | Version number |
Product Specifications
| Product name | HD tachograph |
| Product features | Extremely wide angle of 170 degrees, 1080P full HD |
| G-sensor | Built-in ( under the car accident case of emergency save, not to be deleted) |
| LCD screen size | 4.3inch high-resolution LCD screen |
| Shot | A+ grade high-resolution 170 degree ultra-wide-angle lens |
| Language | Russian, English, Chinese, Japanese, etc |
| File format | MJPEG AVI |
| Video resolution | 1920X1080P, 1280X720P |
| Recording video format | Audio, AAC |
| Color effects | Standard |
| Continuous loop recording | Seamless loop recording, no leakage seconds |
| Truck switch machine | Support auto ignition on, turn off shutdown |
| Motion detection function | Support |
| Division date | Support |
| Vector Media | Support built-in memory ( Total amount:1024MB) |
| Camera mode | 1200M |
| Photo format | JPEG |
| Memory card | MicroSD card (Max support 32GB) |
| Micphone | Support |
| Built-in stereo | Support |
| IR | Support |
| Video format | PAL / NTSC |
| Current frequency | 50Hz / 60Hz |
| USB functionality | 1: USB disk, 2: PC camera |
| Power interface | 5V 1A |
| Battery | Built-in 200mAh |
Troubleshooting
Under normal operating conditions, such as abnormal products, please refer to the solution: Unable to boot:
Check the recorder and car charger connected correctly, if you manually turned on, check the battery level is too low needs recharging. As a result of procedural questions by pressing the RESET button to restore to factory settings.
When the camera automatically stops recording, or do not cycle the camera. Due to the huge high-definition video data, it is possible because the memory card reader could not keep pace. Make sure the gravity sensor function is closed, and memory is formatted. Each time the camera and set the cycle is not the same.Check to see if motion detection function, because the camera motion detection state length of time, depending on the screen there is no movement.
Please check whether the stolen camera, finger print. Please clean the Lens before using the camera.
It is important to keep the lens clean.Camera effects and lighting conditions will affect the quality of the video.Images have streaks interference. This is due to the wrong setting “light frequency” produced under the fluorescent lights, the domestic flat rate “50Hz”.When the machine briefly press the “RESET” the reset button to restore restart.