Avantek D-3B Wireless Doorbell Kit User Manual
Introduction
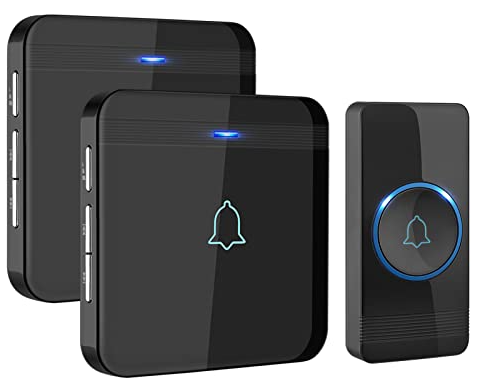
This wireless doorbell kit includes one CR2032 Lithium battery operated transmitter and two plug-in receivers. It features 52 classic melodies with an adjustable volume control to meet your needs. This wireless doorbell kit is a great addition to any home as it is easy to set up and operate.
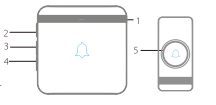
Product Profile
- LED on the receiver
- Volume button
- Previous button
- Next button
- LED on the push button (Transmitter)
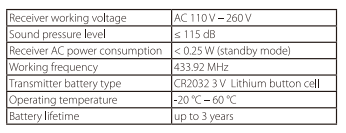
Technical Specifications
Features
- Extreme low power consumption and a three years super long battery life (10 – 15 times uses a day).
- Easy to set up; press and hold the Volume button on the receiver for 3 seconds and the LED will blink; press the button on the transmitter to complete paring.
- 52 optional melodies; easy to choose between next and previous; built-in 40 mm stereo speaker delivers rich and crisp sound.
- Uses a power chip from American Power Integrations, offering a reliable maximum of 250 mA current.
- Provides a massive 400 m wireless distance range (depending on the operating environment).
- Custom encoded software communication method ensures better privacy and no interference from other devices.
- The transmitter is IP55 dust-proof and water-resistant, fit for various outdoor environments.
- Memory function adds convenience. Every time you turn on the device after a power outage, it will still maintain your last set melody and volume level.
Installation
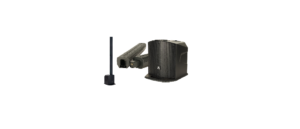
Transmitter battery installation
The battery is pre-installed in the transmitter. Insert the key into the allotted slot. Twist the key clockwise to open. Peel off the insulating film on the button cell then close the cover.
Note: please notice the polarity of the button cell when replacing the battery.
Transmitter installation
- Adhesive tape: apply the double-sided adhesive tape on the back of the transmitter. Remove the outer side of the tape and attach the transmitter in the desired location on the wall and press hard for 30 seconds.
- Screws and anchors: there are screw locator knockouts on the back of the transmitter; punch these out to allow the screws to pass through and fix the transmitter with the anchors in the desired location on the wall.
Operating Instructions
Pairing method
- Plug the receiver into the power socket.
- Press and hold the Volume button on the receiver for 3 seconds to enter pairing mode. The indicator will blink.
- Press the transmitter and the receiver will chime “ding dong” to indicate the pairing is complete.
Notes
- Press any button on the receiver or wait for 60 seconds to exit the pairing mode.
- The receiver has two indication lights. One blue and one red. The blue is the default light and will illuminate in the first pairing. The red will illuminate in the second pairing. The two colors will alternate along with the pairings.
Melody selection
There are 52 melodies for the doorbell kit. Press the Next button for the next melody and the Previous button for the last one. You can easily choose your favorite chime tone.
Volume adjustment
There are five volume levels in total and the minimum volume level is silent. Press the Volume button to select a lower volume level. When the volume reaches its minimum, press the button again it would turn to the maximum volume.
Notice
- Please do not place this transmitter in areas close to metals.
- The working distance varies with the blockage from different
ambient environments. - Use this product properly to prolong its lifespan.
- Never repair the interior circuit to prevent destroying the inside electronic components.
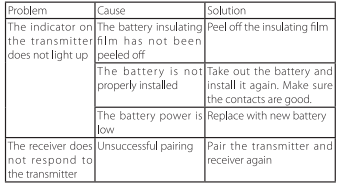
Troubleshooting
DOWNLOAD PDF
Avantek D-3B Wireless Doorbell Kit User Manual