Bowers & Wilkins CT 700 Series Loudspeakers User Manual

Dear customer,
Thank you for choosing Bowers & Wilkins. Please read this manual fully before unpacking and installing the product. It will help you to optimize its performance. B&W maintains a network of dedicated distributors in over 60 countries who will be able to help you should you have any problems your dealer cannot resolve.
Environmental Information
All B&W products are designed to comply with international directives on the Restriction of Hazardous Substances (RoHS) in electrical and electronic equipment and the disposal of Waste Electrical and Electronic Equipment (WEEE). These symbols indicate compliance and that the products must be appropriately recycled or processed in accordance with these directives. Consult your local waste disposal authority for guidance.
Carton Contents
Check in the carton for:
- 4 Adhesive rubber feet
- 2 Adhesive rubber spacers
- 2 Port plugs
- 1 Speakon® plug
- 2 Wall brackets
- 4 M6 bolts
Speaker Installation
If the speakers are to be installed within a cabinet it is important to ensure that it is capable of carrying their weight and that it is structurally sound. Significant vibration of the cabinet panels may seriously affect the subjective performance of the speakers. Adhesive rubber feet are supplied for attachment to the underside of the speakers in order both to protect the cabinet finish and to reduce vibration. Attach one adhesive foot at each underside corner of the speakers.
Use carefully cut pieces of upholstery or acoustic foam to fill the gaps as far back as is practical and flush with the front panel of the speaker. Only use foam with an appropriate fire safety rating. CT700 Series speakers can also be wall-mounted using one of two methods.
Wall Brackets:
The speakers incorporate 4 M6 tapped inserts in their back panels for attachment of the two brackets supplied. Always use both brackets. Use the supplied M6 bolts to attach the brackets to the back of the speaker. The two supplied adhesive rubber spacers can be used to cushion the speaker against the wall. Figure 3 illustrates the use of the brackets. Before using the brackets ensure that the wall and fixings are capable of supporting the weight of the speaker. B&W can accept no liability for any failure of walls and/or fixings.
Speaker Positioning
CT700 Series speakers used for the front left and right channels in a home theatre system should be positioned one either side of the screen on the horizontal centre-line. They should be within approximately 0.5m (20 in) of the sides of the screen to help keep the sound image in scale with the visual image.
See Figures 1 and 2. A CT700 Series speaker used for the center channel in a home theatre system should be positioned centrally either directly above or below the screen. In the case of acoustically transparent screens, the center channel speaker should be positioned centrally behind the screen. CT700 Series speakers used for the surround channels in a home theatre system should be positioned above and to either side or behind the listening position.
Ball-joint Brackets:
The speakers incorporate 4 M6 tapped inserts in their undersides that enable the speakers to be wallmounted using adjustable ball-joint style mounting brackets designed for 127mm x 69.9mm (5 in x 2.75 in) mounting hole centres. Your dealer or local B&W distributor will be able to advise you on the selection of appropriate brackets. To attach a ball-joint style bracket to a CT700 Series speaker first securely attach the socket plate to the underside of the speaker.
Figure 4 illustrates this procedure. Once the socket plate is attached to the speaker, the assembly may be connected to the ball component attached to the wall. Ensure that the manufacturer’s instructions for attaching the bracket to the wall are followed correctly and that the wall and fixings are capable of supporting the weight of the speaker. B&W can accept no liability for any failure of walls and/or fixings.
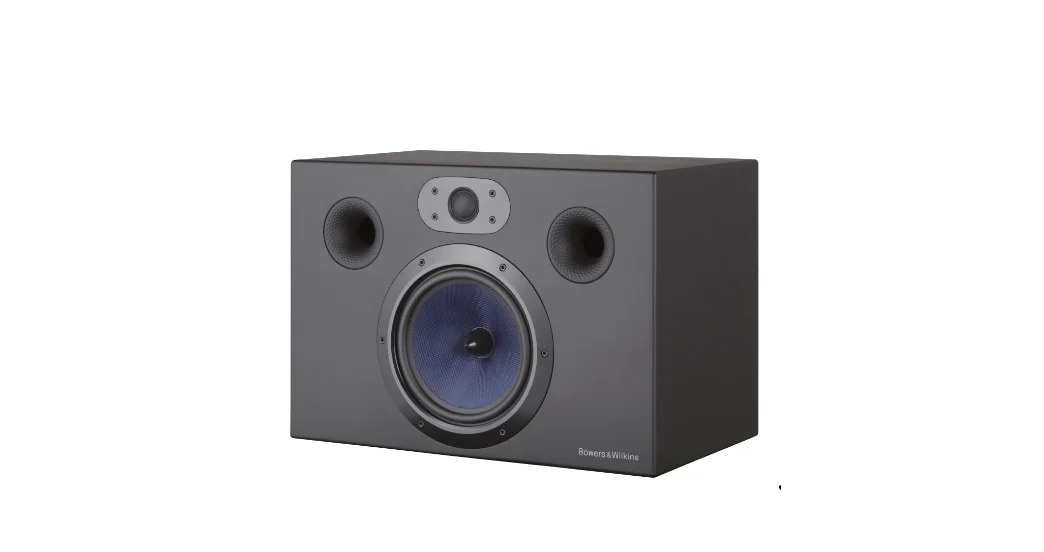
Regardless of the style of installation take care when lifting the speakers into position. They are unwieldy and heavy and best handled by two people working together. The black fabric grilles are attached by magnets and may be removed if desired. Take care not to touch the drive units when removing or replacing the grilles.
Stray Magnetic Fields
The speaker drive units create stray magnetic fields that extend beyond the boundaries of the cabinet. We recommend you keep magnetically sensitive articles (CRT television and computer screens, computer discs, audio and video tapes, swipe cards, and the like) at least 0.5m (20 in) from the speaker. LCD and plasma screens are not affected by magnetic fields.
Connections
All connections should be made with the equipment switched off. CT700 Series speakers have a pair of binding post connection terminals and one Neutrik® Speakon® connection socket on their rear panels. The binding post terminals provide quick and easy connection of stripped wires while the Speakon socket provides a more secure and reliable connection method.
If the binding post terminals are to be used, connect the positive cable to the red terminal and the negative cable to the black terminal. Incorrect connection can result in poor imaging and loss of bass. Figure 5a illustrates the use of the binding post terminals If the Speakon® option is to be used, disassemble the Speakon® plug as shown in Figure 5b, and connect the positive cable to the terminal marked +1 and the negative cable to the terminal marked -1. Incorrect connection can result in poor imaging and loss of bass.
Once the plug is reassembled it can be inserted into the socket and locked by twisting clockwise. Ask your dealer for advice when selecting speaker cable. Keep its total impedance below the maximum recommended in the speaker specification and use a low inductance cable to avoid attenuation of high frequencies. Neutrik® and the names of Neutrik® products referenced herein are either trademarks and/or service marks of Neutrik®.
Fine Tuning
Before fine-tuning, make sure that all the connections in the installation are correct and secure. If the bass seems uneven with frequency this will most probably be due to resonance modes in the listening room. Even small changes in the listening position can have a profound effect on how these resonances affect the sound. Try moving the listening position.
If the sound is too bright, increasing the amount of soft furnishing in the room (heavier curtains for example) may help balance the sound. Conversely, reducing the amount of soft furnishing may help brighten a dull sound. Some rooms suffer from “flutter echoes” – echoes that “bounce” between parallel room boundaries. Flutter echoes can color the sound of the speakers in the room. Test for flutter echoes by standing in the middle of the room and clapping your hands. Running-in Period The performance of the speaker will change subtly during the initial listening period.
Aftercare
The cabinet surfaces usually only require dusting. Spray aerosols onto the cleaning cloth, not directly onto the product. Test a small area first, as some cleaning products may damage some of the surfaces. Avoid products that are abrasive, or contain acid, alkali or anti-bacterial agents. Do not use cleaning agents on the drive units. The grille fabric may be cleaned with a normal clothes brush whilst the grille is detached from the cabinet.
Limited Warranty
This product has been designed and manufactured to the highest quality standards. limited warranty is valid for a period of five years from the date of purchase or two years for electronics including amplified loudspeakers.
Terms and Conditions
- The warranty is limited to the repair of the equipment. This warranty is only valid for the original owner. It is not transferable.
- This warranty will not be applicable in cases other than defects in materials and/or workmanship at the time of purchase and will not be applicable:
- for damages caused by incorrect installation, connection or packing,
- b. for damages caused by any use other than correct use described in the user manual, negligence, modifications, or use of parts that are not made or authorized by B&W,
- c. for damages caused by faulty or unsuitable ancillary equipment,
- d. for damages caused by accidents, lightning, water, fire heat, war, public disturbances, or any other cause beyond the reasonable control of B&W and its appointed distributors,
- e. for products whose serial number has been altered, deleted, removed, or made illegible,
- f. if repairs or modifications have been executed by an unauthorized person.
How to claim repairs under warranty
- If the equipment is being used in the country of purchase, you should contact the B&W authorized dealer from whom the equipment was purchased.
- If the equipment is being used outside the country of purchase, you should contact the B&W national distributor in the country of residence who will advise where the equipment can be serviced. You can call B&W in the UK or visit our website to get the contact details of your local distributor.
Alternatively, you will need the original sales invoice or other proof of ownership and date of purchase.


