Cobra 75 All Road Wireless CB Radio User Guide

Product Features
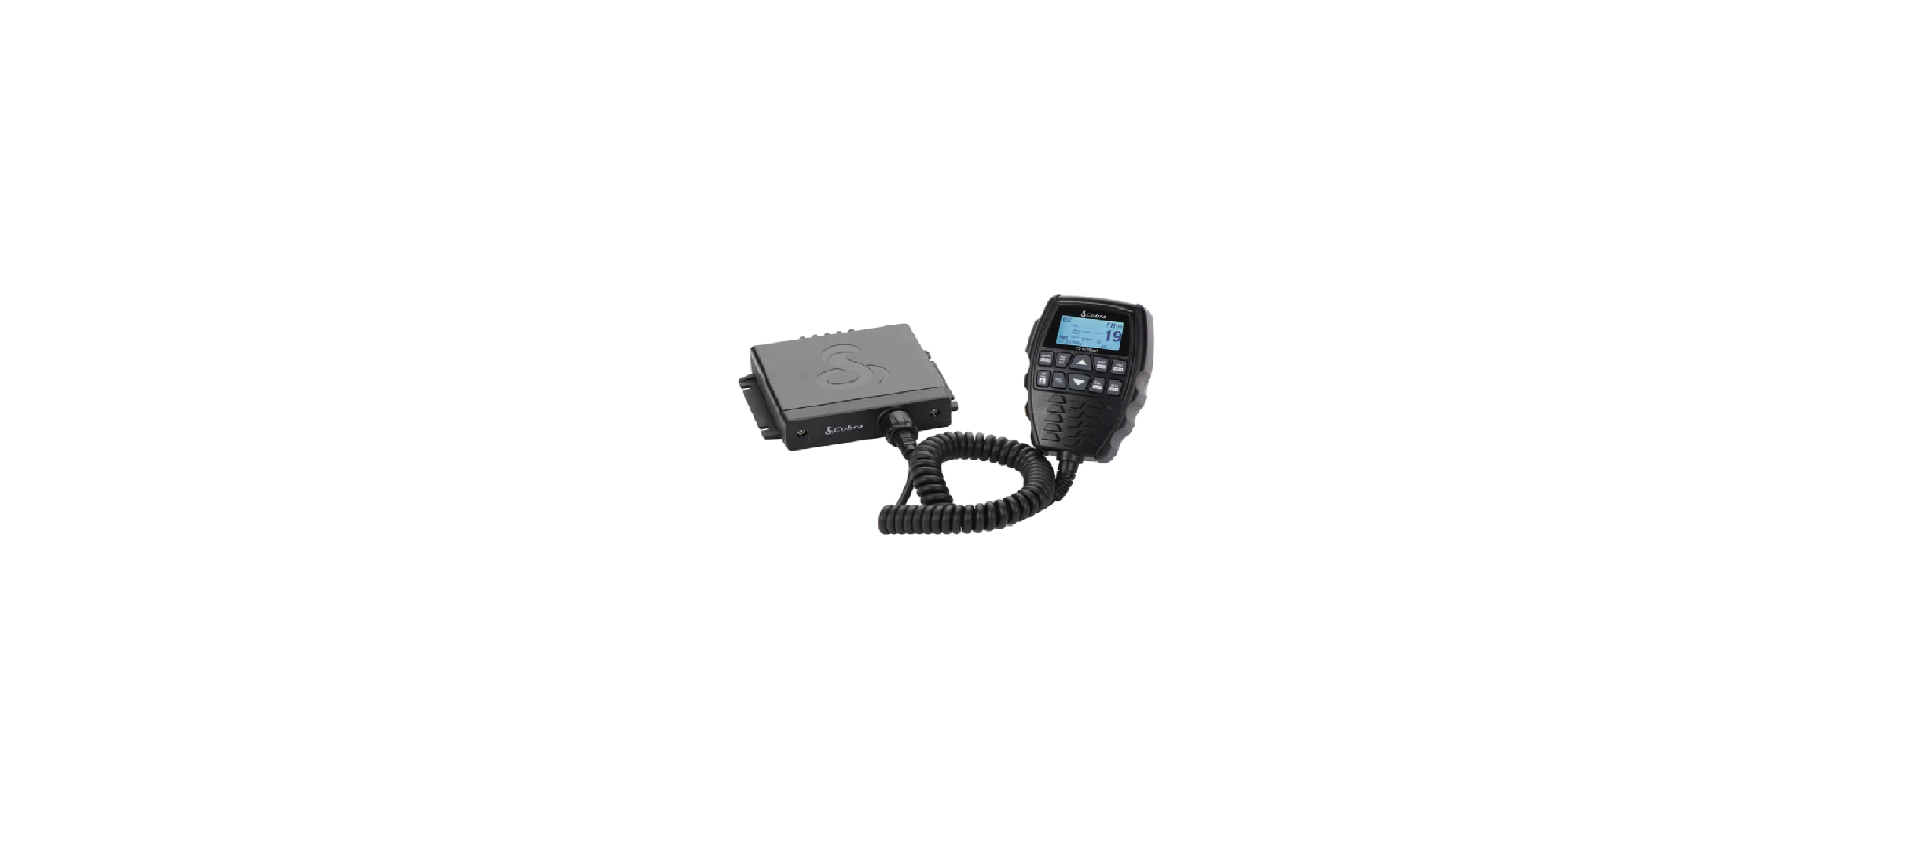
Handset

Transceiver (CB Radio)

A. LCD Display
B. Push-To-Talk (PTT)
C. AM/FM
D. NB/ANL/LO-DX
E. CB/Weather/Lock
F. Volume
G. Up / Down Buttons
H. Enter/Menu
I. Escape / Memory
J. Channel 9/19/Scan
K. Squelch/Auto Squelch
L. Microphone
M. Removable Hanger Post
N. Mounting Tabs
O. USB Port with Waterproof Cover
P. External Speaker Port with Waterproof Cover
Q. Antenna Port
Included in the Package

IP Rating, Installation and Start-Up
IP Rating
The 75 All Road components are IP66 rated, which means they are waterproof and dustproof when the handset and transceiver are connected and locked When the handset is disconnected from the transceiver, be sure to seal and protect the USB port with the waterproof cover that comes included. **

WARNING: If the USB port on the transceiver is left unprotected and is exposed to water or dirt, the unit is at risk of permanent damage and/or failure.
![]() ** Lost the USB port cover? Find a replacement waterproof cover on the CB Accessories page on cobra.com
** Lost the USB port cover? Find a replacement waterproof cover on the CB Accessories page on cobra.com
Planning the 75 All Road Installation
The 75 All Road CB includes an all-in-one handset, which allows you to communicate, change settings and operate the CB. It also includes the CB transceiver, which connects wirelessly via Bluetooth® to the handset. This provides flexible powering, mounting, and communication options, so you can mount your 75 All Road CB radio anywhere inside your vehicle. Before installing the 75 All Road CB, consider the power source you plan to use for the handset before selecting an installation location:
- Handset to CB (transceiver)
- Handset connected to the vehicle USB port
- Handset connected to the power adapter (included) for connection with the vehicle’s 12V power port
The handset is powered with a 5V USB connector, which can be plugged in and powered directly from any USB Type A port inside the vehicle or from the USB output on the front of the transceiver. This provides flexible powering options.

If you plan to connect the handset directly to the CB, you will need to consider a location closer to the handset. By mounting the handset away from the transceiver, you can install the transceiver under a seat, in the trunk, or anywhere inside the vehicle.
NOTE: Do not mount under the hood, near heat ducts, in direct line of the car’s heater or near gas and brake pedals.

Installation and Start-Up
Mounting the CB Transceiver (Black Box)
- Hold the Cobra 75 All Road black box in the exact location desired for mounting.
- Using it as a template, mark the location for the mounting screws (included).
NOTE: Make certain that nothing will interfere with the installation of the mounting screws before drilling holes.
- Drill and mount the black box as shown.
NOTE: Mounting the CB transceiver (Black Box) closer to the antenna will provide a better signal to the radio.
Connecting Wires
Using the 75 All Road CB requires antenna and hardwire installation.
- Connect the antenna cable plug (see Installing an Antenna before connecting).
- Install the provided hardwire.
- Connect the red wire (+) directly to the positive side of the battery or to a connection on the fuse box that is always on.
- Connect the black wire (—) to the negative side of the car, usually the chassis. Any other location with good electrical contact (paint removed) will also work.
NOTE: You must use a CB antenna (sold separately) with this radio. Antenna options are available on cobra.com. Please check your vehicle’s owner manual before installing and connecting the antenna and CB cables.

Installing the Handset Hanger
- Hold the microphone hanger in the location desired for mounting.
NOTE: Make certain that nothing will interfere with the hanger’s installation.
- Using it as a template, mark the location for the mounting screws (included).
- Drill and mount the microphone hanger.

CB Antenna
Since the maximum allowable power output of the transmitter is limited by the FCC, the antenna is critical to maximize transmission distance. Only a properly matched antenna system will allow maximum power output. Cobra loaded type antenna models are highly recommended for most installations. Consult your Cobra dealer for further details, or call 800-543-1608 and speak to a Cobra representative. A standard antenna connector is provided on the transceiver for easy connection. For optimum performance in passenger vehicles, the ideal antenna location is on the center of the roof. The second-best choice is on the center of the trunk (if available). Because many newer trucks feature fiberglass door skins, the outside mirror must be grounded to the chassis via a ground strap when the antenna is mounted on the mirror bracket. 3-way combination antennas are also available which allow operation of all three bands (AM-FM & CB), using a single antenna. However, this type of antenna usually results in less than normal transmit and receive range when compared to a standard-type “Single Band”. Cobra offers CB antenna and mounting solutions that can be purchased online. Please visit www.cobra.com, or if you’d like to speak with an expert, please call 800-543-1608 and our Customer Care Group can assist.
Installing An Antenna
Be sure the antenna is properly connected to the radio before transmitting. Prolonged transmitting without an antenna, or use of a poorly matched antenna, could cause damage to the CB. For the most reliable operation and maximum range, Cobra recommends using a vertically polarized, quarter wavelength whip antenna. Shorter, loaded-type whips are adequate when maximum range is not required.
NOTE: Mobile installations (cars, trucks, boats, etc) should be made only with a non-directional antenna system.
- A standard antenna connector (Type SO-239) is provided on the black box for easy connection to a standard PL-259 cable termination.
- Cobra antenna models are recommended; order directly from Cobra at www.cobra.com or contact your local Cobra dealer.
- For maximum efficiency in boat installations, a ground plane is required, unless the vessel has a steel hull. Consult your CB dealer for information regarding an adequate grounding system.

Installing an External Speaker
- Mount external speaker in desired location.
- Plug into the back of the CB transceiver. The external speaker should have 4-8 Ohms impedance and be able to handle at least 4 Watts.
NOTE: The external speaker is a Bridge Tied Load (BTL) design. Do not short the speaker wires to ground as it may damage the speaker amplifier.
Operation
Display

- DX / LO
- NB, ANL, NB / ANL
- VOX
- AM / FM
- Bluetooth Connection Indicator*
- RX / TX Meter**
- Auto Squelch
- Weather Alert Icon
- Key Lock Icon
- DSP enabled ON
- Channel Frequency
- SWR Meter
- Channel Scan Activated
- Audio Path
- Wireless PTT Button enabled
- Memory Channel Indicator
- Channel Number
Getting Started:
Powering the CB On and Off
- To turn on your radio, press and release the POWER button on the handset. Wait for the handset to establish the wireless connection with the black box.
- To power off the radio, press and hold the POWER button until the LCD display turns off.
Channel Control
- Press the UP key to increase the channel number.
- Press the DOWN key to decrease the channel number.
- Push and hold the UP▲ or DOWN ▼ key to quickly scroll through the channel selection.
Volume Control
- Press and release the VOL (Volume) button.
- Use the UP ▲ or DOWN ▼ to adjust the volume.
Squelch Control (Levels OFF – 34)
The squelch control filters out weaker radio signals that cause noise, and only allows stronger signals to be heard.
- To adjust the squelch level, press and release the SQ/ASQ button.
- Use the UP ▲ or DOWN ▼ arrow keys to adjust Squelch Level.
Digital Noise Cancellation
Your 75 All Road CB has Digital Signal Processing (DSP) that reduces background noise and produces clear sound while communicating. This is pre-set to Level 01 (max noise reduction) and shows as NR on the LCD display in both RX and TX transmit modes. DSP can be adjusted in the Menu Settings:
- Press and hold the Menu button.
- Scroll Menu options and select TX NR to adjust noise reduction level when in transmit mode or RX NR to adjust the noise reduction level while in receive mode.
- Use the UP ▲ or DOWN ▼ arrows to adjust the DSP level (Levels 01 – 05, level 05 provides max noise reduction). You can also select OFF if DSP is not desired.
Keypad Functions

For additional setting options & defaults please download the electronic manual from www.cobra.com
Menus
Bluetooth®
The Bluetooth® Menu option is selected when you need to pair an optional wireless headset or the All Road PTT Button, or to view or change the audio path.
Pairing a Bluetooth® Headset:
While optional, wearing a compatible headset when driving and using the 75 All Road will further enhance it’s noise canceling feature.
Instructions:
- Disable Bluetooth® on your phone then put your Bluetooth® headset into pairing mode (refer to your headset instructions).
- Scan for a new Bluetooth® device in the 75 All Road Handset MENU>>BLUETOOTH>>PAIR>>HEADSET>>SCAN DEVICE.
- A pop-up window appears displaying “SEEKING HEADSET”.
- The Bluetooth® headset will automatically pair to the 75 All Road CB.
NOTE: Re-enable Bluetooth® on your phone for use with the headset for incoming/outgoing calls.
Transmitting options while using your Bluetooth® headset:
- Through the 75 All Road Handset (use the PTT button and speak into the headset microphone), or
- With the All Road Wireless Push-to-Talk Button (sold separately). The All Road Wireless Push-to-Talk Button can be purchased online at cobra.com.
NOTE: The 75 All Road does not pair to a smartphone. If you want to use your Bluetooth® headset with both a smartphone and the 75 All Road CB, your headset must support “multi-point” (or pair with two devices at one time).
NOTE: Your 75 All Road is connected via Bluetooth® with the handset and transceiver (black box) and paired out of the box. It will not need to be re-paired unless you need to reconnect the handset or reset the connection.

Pairing All Road Wireless PTT Button:
The 75 All Road is designed to work with the Cobra All Road Wireless Pushto- Talk Button (sold separately) to communicate while wearing a Bluetooth® headset. It can also be a hands-free option while using the CB. A velcro strap is included for convenient mounting.
Pairing Instructions:
- Push and release the PTT Button to initiate the pairing process.
- Connect to the PTT button from the All Road Handset: MENU>>BLUETOOTH>> PAIR>>WIRELESS PTT>>PAIR.
- A pop-up window displays “Pair to Wireless PTT” when in range.
- The wireless PTT button will automatically pair to the 75 All Road CB.
NOTE: Only the All Road Wireless PTT Button will work with the 75 All Road CB for a handsfree or remote PTT solution. Questions or Need Help? Please call Cobra Customer Care at 800-543-1608.

Audio Path
AUDIO PATH shows the Bluetooth® connection of the device the audio is being routed to. There are two audio paths in which sound can be routed from the All Road:
- Handset
- Headset
The audio path which the radio is operating can easily be identified on the display: Out of the box, the audio source will be coming from the connected All Road handset and you will see an “HD” icon on the display under the Channel number. If you connect the All Road to a wireless headset, this changes the audio path and you will see an Headset icon appear under the Channel number. To view, change or verify which audio path you are operating:
- Press and hold the ENT/MENU button on the All Road handset to active the MENU
- Select BLUETOOTH>>AUDIO PATH from the Menu options by pressing ENT
- You will see a “check mark” to the left of the audio path connected
NOTE: There may be an instance you will need to change the audio path. To do so, use the UP or DOWN arrow buttons to change the audio path and press ENT to select.

VOX (ON/OFF)
VOX enables voice activated transmission and hands-free usage.* When VOX is enabled, the 75 All Road will automatically start transmitting when your voice is heard and will stop when you finish talking. VOX is useful while driving to communicate without needing to hold the All Road handset or in situations where you need to keep both hands on the wheel. To enable/disable VOX:
- Press and hold the MENU button
- Select VOX from the MENU options
- Use the UP or DOWN arrow to enable VOX ON or to turn VOX OFF
- Use the ESC button to get back to the home screen or go VOX LEVEL and VOX DELAY Menu options to adjust the VOX trigger and hang time levels. * Requires the All Road Wireless PTT Button (sold separately) to talk hands-free
NOTE: VOX can be triggered from high background noise levels. In this case, use normal PTT (from the handset or All Road Wireless PTT Button) to control transmission.
NOTE: VOX will not work with a wireless headset and can only be used with the All Road handset.

VOX Level (Level 01 – 09)
VOX Level sets the trigger point for VOX. The higher the level, the louder your voice needs to be to trigger VOX. To set the VOX level:
- Enable VOX (see “VOX” instructions)
- Press and hold the ENT/MENU button on the All Road handset to active the MENU
- Use the DOWN arrow key to select VOX LEVEL from the Menu Options
- Use the ESC button to get back to the home screen

VOX Delay (Level 01 – 09)
VOX Delay sets the transmitter ON or “hang time” after the user stops speaking into the microphone. This setting is measured in seconds and can be tailored to adjust the amount of time the transmitter hangs in between speaking. The higher the setting, the longer the hang time. To adjust VOX DELAY:
- Enable VOX (see “VOX” instructions)
- Press and hold the ENT/MENU button on the All Road handset to active the MENU
- Use the DOWN arrow key to select VOX DELAY from the Menu Options
- Adjust VOX DELAY (01 – 09) using the UP or DOWN arrow keys and select ENT (Enter) to select
- Use the ESC button to get back to the home screen

WX Alert (ON / OFF)
When WX (or Weather) Alert is enabled, it will make an alert sound when it picks up a 1050 Hz tone from the National Weather Service. The weather receiver must be set to an active weather station for the 1050 Hz tone to sound. To enable/disable Weather Alerts: Instructions:
- Press the WX button on the handset to go into Weather Mode and select an active (local) weather station
- Press and hold the ENT/MENU button on the All Road handset to active the MENU
- Use the DOWN arrow to select WX ALERT from the Menu options
- Use the UP or DOWN arrow to select ON or OFF, press ENT to enable
- Go back to CB Mode by pressing ESC until you get to the home screen, then press the CB/WX button on the handset to change between CB and Weather (WX) modes

WX Alert Scan (ON / OFF)
WX AUTO SCAN when enabled will look for and lock on to the strongest weather station signal. This happens in the background and is useful for cross-country travel. How it works: WX AUTO SCAN locks onto a local NWS and can be accessed when you switch over to WX mode (by press the CB/WS button on the handset). To enable/disable Weather Alert Scanning:
- Press and hold the ENT/MENU button on the All Road handset to active the MENU
- Select WX ALERT SCAN from the Menu Options
- Use the UP or DOWN arrow to select ON or OFF, press ENT to select
- Press the ESC button to get back to the home scree

Time Out Timer (OFF – Level 10)
The transmitter Time Out Timer sets the amount of time in minutes that the transmitter is allowed to operate continuously. This feature helps to minimize interference to the CB channel in the event of an unintended transmission such as a ‘stuck’ PTT switch. Setting Time Out Timer:
- Press and hold the ENT/MENU button on the All Road handset to active the MENU
- Use the DOWN arrow to select TIME OUT TIMER from the Menu options
- Adjust TIME OUT TIMER (OFF – 10) using the UP or DOWN arrows and select ENT (Enter) to select
- Use the ESC button to get back to the home screen

WX Auto Scan (ON / OFF)
WX AUTO SCAN when enabled will look for and lock on to the strongest weather station signal. This happens in the background and is useful for cross-country travel. To enable/disable WX AUTO SCAN:
- Press and hold the ENT/MENU button on the All Road handset to active the MENU
- Select WX AUTO SCAN from the Menu Options
- Use the UP or DOWN arrow to select ON or OFF, press ENT to select
- Press the ESC button to get back to the home screen

Display MHz (ON / OFF)
Displays the frequency of the current CB or weather channel. To turn DISPLAY MHz ON or OFF:
- Press and hold the ENT/MENU button on the All Road handset to active the MENU
- Use the DOWN arrow to DISPLAY MHZ from the Menu Options
- Use the UP or DOWN arrow to select ON or OFF, press ENT to select
- Press the ESC button to get back to the home screen

Auto Power (ON / OFF)
When Auto Power is enabled, it allows the radio to turn itself on when power is restored from the vehicle. When AUTO POWER is set to OFF, the radio will need to be manually powered ON when the vehicle is started up. To adjust the AUTO POWER setting:
- Press and hold the ENT/MENU button on the All Road handset to active the MENU
- Use the DOWN arrow to select AUTO POWER from the Menu Options
- Use the UP or DOWN arrow to select ON or OFF, press ENT to select
- Press the ESC button to get back to the home screen
NOTE: This feature only works if the radio is left ON when the vehicle is turned off. If the radio is OFF when power is cut from the radio (when you turn your vehicle off), your radio will not automatically turn ON, even when AUTO POWER is enabled.

Backlight (OFF – High)
The purpose of display backlight is to increase readability. To adjust the backlight:
- Press and hold the ENT/MENU button on the All Road handset to active the MENU
- Use the DOWN arrow to select BACKLIGHT from the Menu Options
- Use the UP or DOWN arrow to increase or decrease the backlight, press ENT to select
- Press the ESC button to get back to the home screen

Contrast (OFF – High)
Contrast adjusts the brightness of the backlight. To find the right contrast setting:
- Press and hold the ENT/MENU button on the All Road handset to active the MEN.
- Use the DOWN arrow to select CONTRAST from the Menu Options
- Use the UP or DOWN arrow to increase or decrease the contrast, press ENT to select
- Press the ESC button to get back to the home screen

Key Tone (ON / OFF)
KEY TONE is an option to have key tone sounds when the buttons are pressed. To enable/disable: Instructions:
- Press and hold the ENT/MENU button on the All Road handset to active the MENU
- Use the DOWN arrow to select KEY TONE from the Menu Options
- Use the UP or DOWN arrow to turn ON or OFF, press ENT to select
- Press the ESC button to get back to the home screen

Audio Routing
AUDIO ROUTING determines where receiver audio can be heard. There are 3 options:
- BT SPK ONLY – sound will come from the handset or wireless headset
- EXT SPK ONLY – sound will come from an optional external speaker (sold separately and requires additional installation)
- BT & EXT – sound will be routed from the handset or wireless headset + an external speaker (at the same time)
You will only change this setting for options 2 and 3 (your All Road defaults to option 1). To change audio routing:
- Press and hold the ENT/MENU button on the All Road handset to active the MENU
- Use the DOWN arrow to select AUDIO ROUTING from the Menu Options
- Use the UP or DOWN buttons select the audio path, press ENT to select
- Press the ESC button to get back to the home screen

TX NR (OFF – Level 05)
TX NR stands for Transmitter Noise Reduction and is a Digital Signal Processing feature of this radio. Enabling this feature will help further reduce background noise that the Handset microphone will pick up in a typical moving vehicle and send to the person on the other end. For the person on the receiving end, they will be able to hear your voice transmission more clearly from the All Road. For transmit noise reduction, the higher the level the greater the noise reduction. This should be used depending on the environment (noise level inside the vehicle). In a quiet environment, TX NR (or DSP) is not needed. To adjust Transmit DSP:
- Press and hold the ENT/MENU button on the All Road handset to active the MENU
- Use the UP button to select TX NR from the Menu Options
- Use the UP or DOWN buttons select the Transmit DSP level, press ENT to select
- Press the ESC button to get back to the home screen
NOTE: Use TX NR setting to help reduce the background noise for better speech intelligibility at the other CB radio station.

RX NR (OFF – Level 05)
RX NR stands for Receiver Noise Reduction. Enabling this feature will help to reduce radio noise sources picked up by the All Road receiver and improve the ability to clearly hear the voice of the person transmitting from the other end. RX NR works differently than TX NR where RX noise is environmentally created as a result of band conditions resulting in a lower signal-to-noise ratio, reducing speech intellibility. Adjusting RX NR or Receiver DSP will help to improve speech intelligibility and increase the signal to noise ratio that can greatly enhance the CB radio two-way communications experience. To adjust RX DSP:
- Press and hold the ENT/MENU button on the All Road handset to active the MENU
- Use the UP button to select RX NR from the Menu Options
- Use the UP or DOWN buttons select the Receive DSP level, press ENT to select
- Press the ESC button to get back to the home screen
NOTE: The level of DSP selected is based on personal preferences. Start on level 1 setting and listen to the current activity on the selected CB channel. If needed, increase the DSP level until an optimum setting is achieved or as desired. There are times when the CB band is fairly quiet. In those instances it may be more desirable to disable RX NR.

Reset (YES / NO)
RESET restores the 75 All Road factory to default settings. To reset the 75 All Road:
- Press and hold the ENT/MENU button on the All Road handset to active the MENU
- Use the UP button to select RESET from the Menu Options
- Select YES using the UP or DOWN button, press ENT to select
- “RESET CB” appears. Select YES using the UP or DOWN arrow button, press ENT to select
- “RESET CB PLEASE WAIT” appears and the 75 All Road CB is reset to its original settings

Frequency Ranges
This unit features advanced Phase Lock Loop (PLL) circuitry providing complete coverage of all 40 CB channels

NOTE: All 40 channels support AM and FM operating modes.
Specifications

Maintenance/Adjustment & FAQ
Your Cobra CB transceiver is specifically designed for the environment encountered in mobile installations. The use of all solid state circuitry and its light weight result in high reliability. Should a failure occur, however, review the following, then if necessary, replace parts with identical parts. Substitution is not recommended. If you have questions, please call Cobra Customer Care at 800-543-1608 (hours are listed on the Cobra.com website).
- Check connections to the source of power and make sure it is the 13.8 VDC required to operate your radio.
- Check Bluetooth® connection and be sure handset and transceiver are paired.
- Check the fuses in the DC power cord and in the 12V accessory power plug.The main power lead (red) has a 2 Amp fuse – type F2AL 125V – UL rated in its holder. Use only the above specified type and size fuse for maximum protection. Failure to do so will void the warranty.
- Make certain the microphone is properly plugged in.
- Make certain the antenna is properly assembled and connected. If you are unable to correct the problem, please contact Cobra customer service.
Troubleshooting

NOTE: A full list of Frequently Asked Questions can be found on the 75 All Road product page on cobra.com.
Regulatory and Warning Statements
THIS DEVICE COMPLIES WITH PART 15 OF THE FCC RULES. OPERATION IS SUBJECT TO THE FOLLOWING TWO CONDITIONS: (1) THIS DEVICE MAY NOT CAUSE HARMFUL INTERFERENCE, AND (2) THIS DEVICE MUST ACCEPT ANY INTERFERENCE RECEIVED, INCLUDING INTERFERENCE THAT MAY CAUSE UNDESIRED OPERATION. This radio transmitter (identify the device by certification number, or model number if Category II) has been approved by Industry Canada to operate with the antenna types listed below with the maximum permissible gain and required antenna impedance for each antenna type indicated. Antenna types not included in this list, having a gain greater than the maximum gain indicated for that type, are strictly prohibited for use with this device. Immediately following the above notice, the manufacturer shall provide a list of all antenna types approved for use with the transmitter, indicating the maximum permissible antenna gain (in dBi) and required impedance for each.
Limited Two-Year Warranty
Cobra warrants your product against all defects in materials and workmanship for a period of two (2) years from the date of original purchase. Cobra, at our sole discretion, will repair or replace your product (with the same or comparable product) free of charge. Cobra will not pay shipping charges that you incur for sending your product to us. Products received COD will be refused. To make a warranty claim, we will require proof or purchase in the form of an invoice or receipt. No proof of purchase is required for factory direct purchases.
Replacement Parts & Accessories

Need Help?
If you have any questions about operation or installing your new Cobra product, PLEASE CONTACT COBRA FIRST…do not return this product to any retail store. The contact information for Cobra will vary depending on the country in which you purchased and utilize the product. For the latest contact information, please go to: www.cobra.com/support. For products purchased in the U.S.A. you may call 800-543-1608. For products purchased in the U.S.A., if your product should require factory service, please go to www.cobra.com/support and follow the instructions for returning your product to the Cobra Factory Service Department for service. Should there be any problems with this product or further information is needed on its features please visit www.cobra.com for support, frequently asked questions, Declarations of Conformity, and full manuals. For Products Purchased Outside the U.S.A. or Canada Please contact your local dealer for product service information.
DOWNLOAD PDF LINK


