
Table of contents
show
Escort Passport 8500ci Plus Radar Detector User Guide
Important Installation Notes
Please read both sides of these instructions before starting your installation. For the easiest trouble-free installation, install the Interface first, and wire it to a12-volt switched circuit.
- Installation of this system requires some experience and expertise in automotive electronics. Car Audio specialists and many new car dealers can install this for you.
- If you choose to install it yourself without expertise in automotive electronics, please note that it can cause personal injury or damage to your vehicle.
- If your vehicle is damaged during installation, its safety systems may be compromised and could cause personal injury or property damage.
- Improper installation may also void PASSPORT’s warranty
Features

A.Front Radar/Laser Receiver
- Determine the best location for the Radar/Laser Receiver. The best location is typically under the bumper, or inside the front grill of the vehicle. For the best performance, install the Receiver horizontally, with a clear “view” of the road.
- Using the built-in mounting holes on the Receiver, or the supplied right-angle mounting bracket, mark the hole locations. Drill pilot holes in the vehicle if necessary.
- Mount the Receiver using the supplied
hardware.
B.Receiver Cable
- Connect the receiver cable to the receiver.
- Route cable through the firewall, and secure with zip-ties (included).
- Route receiver cable into the vehicle’s interior. If there is not a suitable opening, drill a 13/32″ or 7/16″ hole.
- Pull cable through firewall, and plug connector into the jack labeled “Antenna” on the Interface.
- Pull cable through the firewall and seal the hole as needed. Use silicone sealant if necessary.
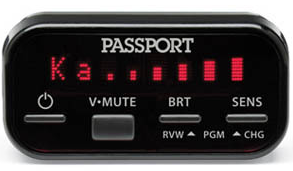
C.Display Controller
- Determine the best location for the Display Controller in the vehicle’s interior.
- Remove paper backing on the backside of the display and apply to a clean dry surface.
- Route display cable and plug into jack marked “Display” on the Interface.
D.Interface
- Install Interface under the dash using supplied zip-ties. DO NOT MOUNT IN ENGINE COMPARTMENT.
- Connect black wire (–) to ground, and red-striped wire (+) to a switched 12-volt supply. Use blue 3M connector (provided) to tap into existing circuit if needed.
- Receiver and Display Controller plug into the Interface. Be sure to plug all cables into the correct jacks.
E.Concealed LED Display (Optional)
If a more discreet display is preferred the included LED can be installed:
- Drill a 1/4″ hole, and install the LED clip.
- Snap LED into clip from behind.
- Plug the modular connector into PASSPORT’s Interface marked “LED.”
Front Radar/Laser Receiver
- Miniature weather-proof Radar/Laser Receiver
- Universal mounting bracket with stainless steel hardware
- Built-in 16 foot shielded cable with water proof connector
- 12 nylon wire ties to secure cable
Miniature Display Controller
- Display Controller mounts easily to instrument pod, dashboard or console
- Optional hidden display included
Interface
- Central module connects to switched 12-volt power and ground
- All components plug directly in using modular connections
- 3M connector taps into existing vehicle wiring


