Forever MLP-100 LED Video Projector User Manual
General Information
LED projector developed using an LCD matrix. It can also be an independent multimedia player thanks to a built-in speaker, USB port and memory card reader. An additional advantage is the Android system enabling Wi-Fi connection, which allows supporting devices in a manner comparable to the functions known from SMART TV. Due to its compactness and small weight, it is perfect for operating as a mobile device.
Set includes
- 1x projector
- 1x power cable
- 1x AV cable
- 1x remote control
- 1x manual
Names of parts
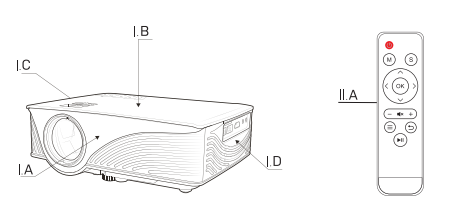
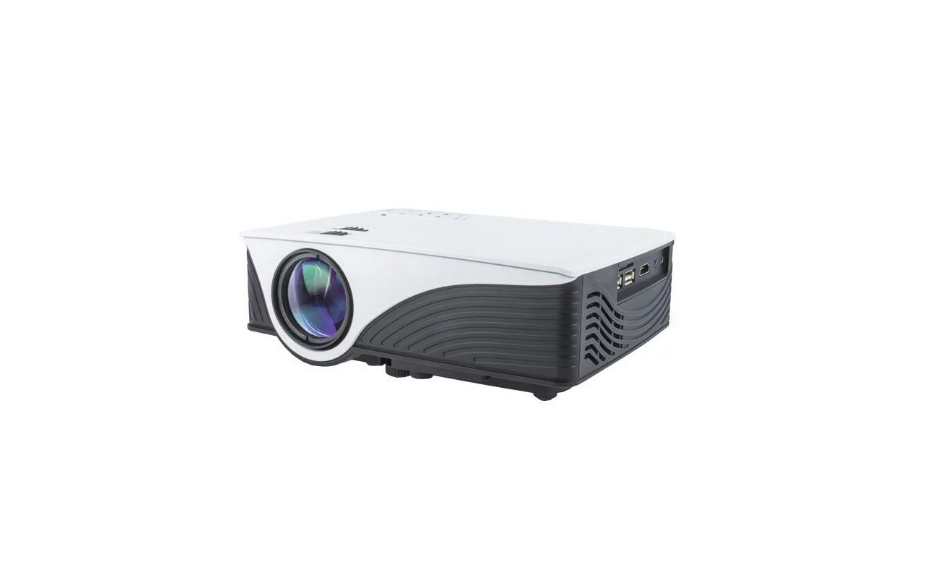
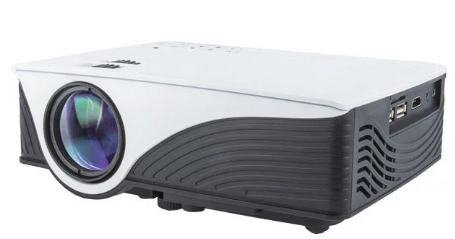
I Projector
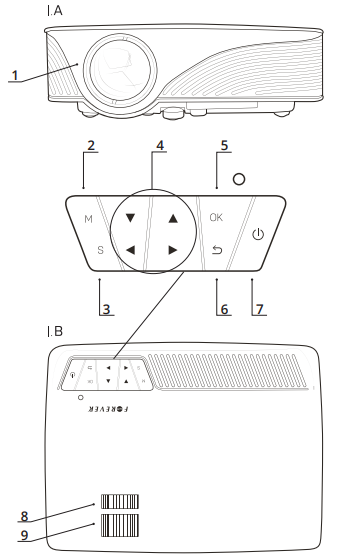
- Lens
- MENU key
- Signal selection key
- Arrow keys
- OK key
- Return key
- On/Off switch
- Keystone effect correction
- Focus setting
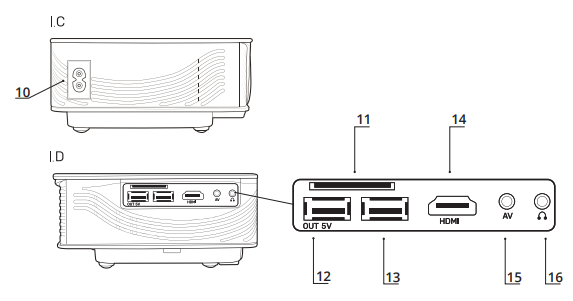
- Power input
- External SD memory card slot
- USB output 5 V 500 mA
- USB port
- HDMI slot
- AV input
- Audio output
II. Remote
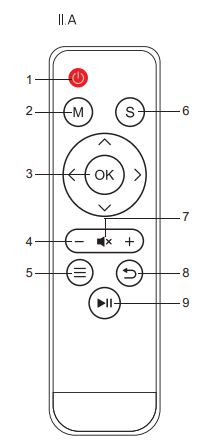
- On/Off switch
- Menu key – access to application options
- Arrow keys „+” confirm OK key
- Volume control (up/down)
- Properties key
- Signal source selection (AV/HDMI/SD)
- Muting
- Exit key – application exit
- Multimedia control
Multifunctional LED projector
Start-up and correct set-up
The projector enables obtaining images in sizes from 30 to 120 inches. The image size depends on the distance of the projector from the plane of the displayed image.
Start-up and set-up sequence:
- Connect the power cable to the mains socket.
- Start-up the projector using the on/off switch on the projector or the remote control.
- Place the projector in the correct distance to obtain the expected diagonal screen size.
- Adjust the image focus using the knob on the projector’s object lens. To obtain the lowest possible diagonal size, adjust the knob all the way to the right.
- If necessary, adjust the keystone effect using the second knob aside from the focus adjustment. Ultimately, the obtained image will have a rectangular shape instead of a trapezoid.
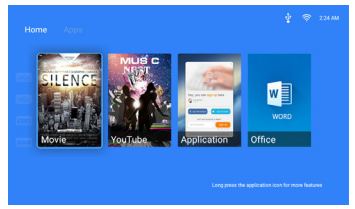
- After first projector start-up, the start-up screen will look as follows.
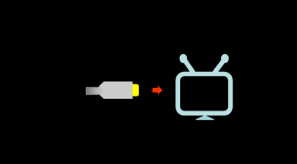
Signal source selection
As standard, the device is started up with the Android operating system on the start-up screen. However, the projector also supports the following signal sources:
- HDMI
- AV
- Memory card reader (SD)
- USB slot for plugging in a pen drive (USB)
After starting up the projector and plugging in signal sources, the user can select the source of the displayed image in two ways:
- Using the remote control
- Using the keys on the projector:
-
- Click the projector’s signal source selection key.
- Click the left/right key to select the required signal source.
- Confirm your selection by clicking the OK key.
- The projector is ready to display the image from the selected source. When the signal does not reach the projector, the device provides a relevant notification by displaying the following chart.
Sound volume changing
The projector includes one built-in speakers with the capacity of 2 W, which can play the sound while watching the materials. It is possible to change the volume by clicking the volume control keys. The volume level will be presented as a bar on the bottom edge of the image
Displaying multimedia materials using the memory card reader or USB port
Connect the data storage device to the projector using the card reader or USB port. Select the correct signal source. After correct reading of the data, the screen will display the multimedia browser window.

Depending on the selected filter, the window will display all audio, video files or images.
In order to display a specific file, search for the file using the up/down/left/right key and then click OK to start displaying. It may turn out that the operating system features more than one program for opening the given type of file. If so, the system will ask to select the application to open the file. Rewinding or fast-forwarding materials or switching to the next file using the remote control. Files with an extension not supported by the projector will be displayed on the list of file for selection. It may turn out that a file will have an extension supported by the project, but it will not be possible to open it. This may result from an unsupported resolution of the file or the type of codec used for compression.
Connecting the projector to the Wi-Fi network
The projector includes a built-in Wi-Fi module, which supports with the 2.4 GHz 802.11 b/g/n network types.
Connecting the projector to the Wi-Fi network:
- Start-up the projector and place it within the range of the Wi-Fi network.
- Go into the Android settings (System Setting desktop icon).
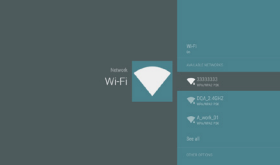
- Enable Wi-Fi connectivity in the top right corner of the Wi-Fi tab.
- The list of available networks will be displayed after enabling Wi-Fi connectivity
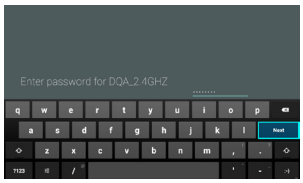
- Select the correct network from the list. The screen will display a box asking for providing the network password.
- Enter the correct password and click the “Connect” field.
- Correct connection will be signalled by the projector with a notification window displayed in the bottom right corner. The “Connected” notification will also be displayed under the network name.
Adding accounts to the Android system
To have full access to the advantages of the Android system, add (bind) the user accounts information to the system.
To bind the accounts with the projector:
- Go into the start-up screen.
- Enter the “Application” tab. The “Add a Google account” screen will be displayed
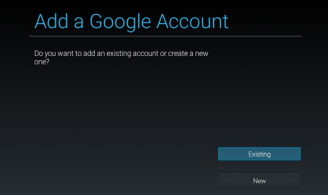 Each account requires a login and password when binding. For instance, without binding the Google account, the user will not have access to this supplier’s applications, e.g. Gmail, YouTube, Play Store, etc.
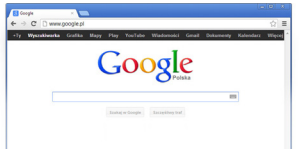
Website browsing
The projector is equipped with a pre-installed application for browsing websites. The application can be launched by clicking the red function key on the remote control or by clicking the “Browser” icon on the desktop. The start-up screen will be displayed after the application is launched.
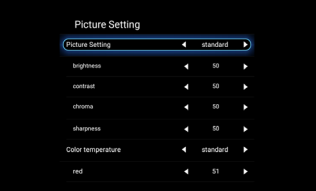
Settings – projector image correction
It is possible to change the projector image settings in several ways. The settings can be changed both in the system settings and from the start-up screen icon. This manual specifies changing the settings for the method providing the broadest possibilities and easiest to execute.
To change the displayed image settings:
- Click the “Project Setting” icon on the start-up screen. The basic settings screen will be displayed after clicking the icon.
 Click the “Picture Setting” icon to enter the advanced image settings.
Installation of additional programs
The project has a built-in Android SMART TV system, which allows installing additional software on the device using the Play Store application. The Play Store is available only for users who added their Google account to the device.
- Click the “Google Play” icon on the start-up screen.
- Enter required application name into the search field.
Note: Due to the fact that the device is a SMART TV type device, it may turn out that not all applications will be compatible. If so, Play Store will not allow installing the given application and will display a notification about lack of compliance.
Access to applications
To gain access to the applications installed on the projector, click the “My App” icon on the start-up screen or click the green function key on the remote control. The screen will display all available applications. Switch between the applications using the arrow keys. Launch the applications using the “OK” key. To exit the given application, click EXIT on the remote control or Back on the projector.

Changing the language in the operating system
- Click the “System Setting” icon on the start-up screen.
- Enter the “Language & input” tab.
- Enter the Language tab.
- Select the required language.
- Confirm using the “OK” key.
- To exit the settings, click EXIT on the remote control or Back on the projector
Factory reset
In case of encountering problems with the device or wanting to restore the default settings in the projector, it is possible to execute a FACTORY RESET.
- Click the “System Setting” icon on the start-up screen.
- Enter the “Data backup and deleting” tab.
- Enter the “Default settings” tab. Now, depending on the requirements, it is possible to empty the SD card, aside from the system data.
- After selection, click “Reset the phone”. A warning box will be displayed.
- Confirm the execution of the factory reset. Click “Reset all”. The projector will shut down. When attempting start-up, the projector will delete the data and then shut down. The next projector start-up will take slightly longer and after launching the start-up screen, the device will restore the default settings present when the device was unpacked.
USB OTG
The projector supports the OTG technology. Thanks to this, it is possible to use the USB slots to plug in devices which will be identified by the system and installed in the Plug & Play mode. A good example is the support for a keyboard and mouse after plugging them into the USB port. This facilitates using the device.
Safety regulations
- Prevent eye exposure to direct radiation from the projector.
- The device requires good ventilation for correct and safe operation. Do not enclose or cover the device.
- The maximum time of continuous operation is 12 hours in room temperature.