Table of contents
show
Forever VR-300 Car Video Recorder User Manual
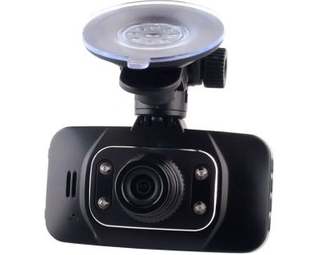
Thank you for purchasing the Forever car video recorder. Before using this product, please read this manual carefully to learn more about the functions and operating way. We hope that you will enjoy Forever’s products.
Appearance and function
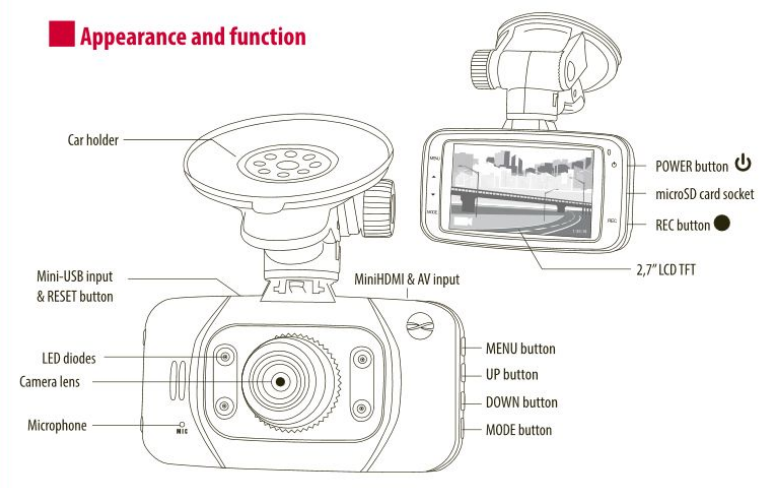
POWER SUPPLY
- a) Built-in Li-Ion battery – car video recorder can be turned on by pressing the Power button for 3 seconds and turned off in the same way. Connect the attached USB cable to the device and the power supply. Charging will start when the red diode turns on. When the red diode disappears, the device is fully charged.
- b) Connect the charger – the video recorder will automatically turn on when the car starts and turn off when the car stops.
SPECIFICATIONS
- Recording size: 1920 x 1080 / 1440 x 1080 / 1280 x 720
- Video format: avi
- Supported card: microSD up to 32GB
- Microphone: the ability to record sound
- Display: 2.7” rotating 170 degree
- Charging socket: mini-USB
- G-Sensor: 8-levels sensitivity
KEY FUNCTIONS
- Menu key: Click to select the menu inside.
- Mode key: Press once to switch into camera mode, and press twice to convert the file browser interface.
- Up key: Menu state for menu selection, playback status for browsing pictures, in state of video playback, fast forward, fast backward operation.
- Down key: Menu state for menu selection; playback status for browsing pictures; in the state of video playback, fast forward, fast backward operation.
- REC/OK key: Start/stop recording; menu state, used to confirm menu settings, video playback status, for start and pause playback.
RECORDING AND SETTINGS
Press the REC button to start recording. In the recording process, a red icon should show up on the screen. Press the REC button again to stop the camera.
- Digital zoom: press up/down key to control
- Resolution, select recording resolution: 1920*1080/30fps, 1440*1080/30fps, 1280*720/30fps
- Audio: on and off the MIC to switch sound recording
- Loop recording: set 3/5/10 minutes
- Motion detection: turned on/off motion detection function
- Volume: range from 0 (min.) to 7 (max)
- Date/clock: set the date and clock using the up and down arrow keys, press the “OK” button to confirm, and enter the next setting.
- Reset system: Yes / No
- Auto power off: 1/3/5 minutes
- TV output: NTSC/PAL
- Optical frequency 60HZ/50HZ
- Automatic off-screen: ⅓ minutes
- G-Sensor: recognizes hits and bumps and prevents the video from overwriting after collision
System reset:
use to set system parameters to original values
- Automatic shutdown: use to set to automatic shutdown when recording stops
- Frequency: used to select the frequency of the power line, if you choose the wrong light frequency, the image will appear as horizontal stripes interference
- Automatic off-screen: set the time for the screen to automatically shut off to save battery. Press and key to turn the screen back on.
Using the microSD card:
- Make sure to properly insert the card. Otherwise, you can damage the card or the video recorder.
- Please use a high-speed SD card with SDHC specifications for best performance
- Format the card before recording anything.
TROUBLESHOOTING
- Problems with saving: check if the SD card has been properly inserted
- The recorder automatically stops while recording: due to the huge amount of data in high-definition, please use an SDHC-compatible high-speed SD card
- No image displayed on high-definition television: make sure the AV/HDMI cable is properly connected to the TV. Also, make sure you’re checking the right source channel.
- Blurry photos: please check if there is a stain or any fingerprints on the lens. Clean the lens before recording.
REFERENCE LINK
https://www.tipa.eu/en/car-camera-full-hd-forever-vr-300/d-151035/