Table of contents
show
GE 44220 UltraPro 4-Device Color Changing Backlight Universal Remote User Manual

Setup
Your universal remote requires (2) AAA batteries (not included). Alkaline batteries are recommended.
Battery Installation
- On the back of the remote, pull down on the textured surface and slide battery cover downward to remove.
- Match the (+) and (-) marks on the batteries to the (+) and (-) marks inside the battery compartment, then insert (2) AAA batteries. Be sure to use fresh batteries.
- Position battery cover slightly below opening and push upward to lock into place.
NOTE: If your remote stops operating properly, replace the batteries.
Battery Precautions
- Do not mix old and new batteries.
- Do not mix alkaline, standard (carbon-zinc), or rechargeable (Ni-Cd, Ni-MH, etc.) batteries.
- Always remove old, weak or worn-out batteries promptly and recycle or dispose of them in accordance with local and national regulations.
Battery Saver
Your remote automatically turns off if the buttons are depressed more than 8 seconds. This will save your batteries should your remote get stuck in a place where the buttons remain depressed (e.g., between the sofa cushions).
Code Saver
You have up to 10 minutes to change the batteries in your remote without losing programmed codes.
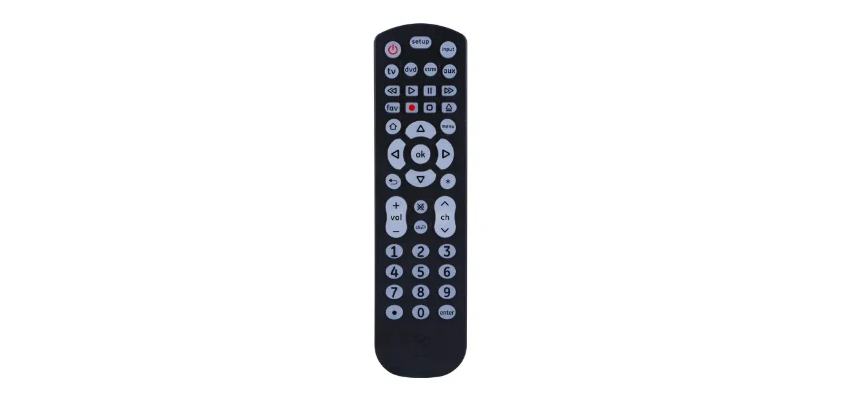
Button Functions

- Power: Turns devices ON/OFF
- Color: Select Backlit – Five backlight color options – blue, green, white, red and yellow
- Input: Selects video inputs
- TV, dvd, strm, aux: Selects the device to control
- Record, play, stop, rewind, fast forward, pause
- Setup: Used to program the remote
- DVD open/close: Open/close a player, or List features on cable/satellite receivers
- Home/guide: Easily access features on streaming devices, or channel guide on cable/satellite receivers
- Menu: Displays the on-screen menu
- Navigation arrows: Moves up, down left and right in menus
- OK: Selects menu items for the controlled device
- Exit: Exit on-screen menus
- Info: Displays on-screen show/content details
- Volume up/down: Controls audio on selected device
- Channel up/down: Scrolls through channels
- Mute: Mutes sound
- Previous channel: Returns to the previously selected channel
- Numbers: Enter numbers for direct channel selection
- Dot (•): Select, digital sub channels, e.g., 4.1
- Enter: Assists in channel selection on some devices
Programming Your Remote
Your remote is designed to control multiple audio/video devices. To use, you will need to program the remote for
your devices. There are two different methods you can use to program the remote, Direct Code Entry or Auto Code Search.
- The Direct Code Entry method is the recommended method as it is the simplest and quickest method in most cases.
- The Auto Code Search method searches through all the codes in the remote to find a code for your device.
Direct Code Entry (Recommended)
- Locate the Code List included with your remote. Find the section for the type of device you wish to control, (for example TV, dvd, strm, aux. Locate the brand of your device and circle all the remote codes for the brand.
- Press and hold down the SETUP button on the remote until the red light on the remote control turns on. Release the SETUP button. The red light will remain on.
- Press and release the device button on the remote for the type of device you wish to control. The red light will blink once and remain on.
- Use the number buttons on the remote to enter the first 4-digit remote code you circled in the Code List in Step 1.
Color-Select Backlight Feature
Choose from five color options or turn off the backlight.
- Press and release the COLOR button to cycle through five color options – blue, green, white, red and yellow.
- When the desired backlight is selected, the remote keys illuminate in that color when any button is pressed
Using Your Remote
Master Volume Feature
The Master Volume Feature allows you to select a single device that the volume buttons always control. For example, the remote can be in TV mode while the volume buttons control the volume on your audio receiver or sound bar instead of your TV.
Enabling the Master Volume Feature
- Press and hold down the SETUP button on the remote until the red light on the remote control turns on. Release the SETUP button. The red light will remain on.
- Press and release the device button (TV, dvd, strm, aux) on the remote for the device you wish to control the volume.
- Press and release the MUTE button.
- Press and release the VOL+ button.
- The red light will blink twice and turn off.
Disabling the Master Volume Feature
- Press and hold down the SETUP button on the remote until the red light on the remote control turns on. Release the SETUP button. The red light will remain on.
- Press and release the device button (TV, dvd, strm, aux) programmed to control the Master Volume Feature.
- Press and release the MUTE button.
- Press and release the VOL – button. The red light will blink twice and turn off
Reset to Factory Settings
- Press and hold down the SETUP button on the remote until the red light on the remote control turns on. Release the SETUP button. The red light will remain on.
- Press and release the MUTE button.
- Press and release the number #0 button. The red indicator light will flash twice.
Troubleshooting
Remote Does Not Operate Your Device
- Make sure the batteries are fresh and installed correctly.
- Aim the remote directly at your device, and make sure there are no obstructions between the remote and device.
- Make sure the appropriate device is selectable
- Program the remote with a different code. See Direct Code Entry section.
- Remote may not be compatible with your device.
Remote Does Not Operate Some Device Features
- A particular code might operate a few features but not all. Program the remote with a different code from the code list. See Direct Code Entry section.
- Remote may not be able to operate all features of your device or button names may be different than that of your original remotes.
FCC Statement
This device complies with Part 15 of the FCC Rules. Operation is subject to the following two conditions:
- This device may not cause harmful interference,
- This device must accept any interference received, including interference that may cause undesired operation.
FCC NOTE: The manufacturer is not responsible for any radio or TV interference caused by unauthorized modifications to this equipment. Such modifications could void the user’s authority to operate the equipment
If this equipment does cause harmful interference to radio or television reception, which can be determined by turning the equipment off and on, the user is encouraged to try to correct the interference by one or more of the following measures:
- Reorient or relocate the receiving antenna.
- Increase the separation between the equipment and receiver.
- Connect the equipment into an outlet on a circuit different from that to which the receiver is connected.


