
Holman BTX6 Indoor Bluetooth 6 Zone Controller User Manual
Downloading the App


- STEP 1: Download the app from the App Store by searching iGardener.
- STEP 2: Install a 9V battery (located under the terminal cover).
- STEP 3: Turn on your Bluetooth on your smartphone and ensure your controller is connected to power. The tap timer won’t show up in the My Devices list.
- STEP 4: On the iGardener app navigate to Irrigation and press the + button to add your controller.
- STEP 5: Wait until your controller is found. For security of your watering schedule each tap timer will only pair with one smartphone
- STEP 6: When your controller is found you are ready to set up scheduling. Select Zone Management to begin the setup. If you have multiple controllers or tap timers connected, the device highlighted within the blue bar is the one you are scheduling
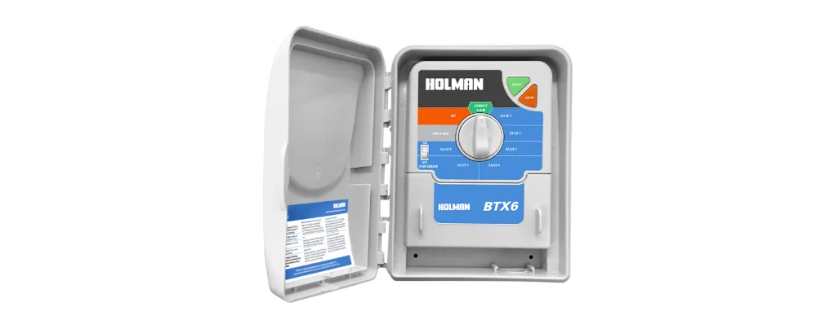
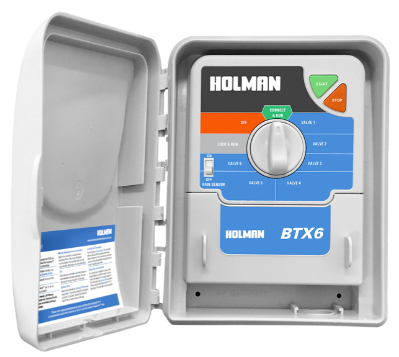
Manual Operation of the Controller

- OFF: Switching the controller to Off will postpone all scheduled automatic watering. You can still use the Manual Water function on the mobile app
- SYSTEM TEST: Switch the controller to Connect & Run and press Start. Only zones with an active watering schedule will run for the 2 minute sequential test cycle.
- MANUAL OPERATION FROM CONTROLLER: Switch the controller to required zone and press Start. The zone will water for the run time setup in the Manual Water section of the app. The default is 1 minute.
Renaming your Controller
You can rename your controller to distinguish it from other controllers you may have installed. For example, you may have a controller operating the garden and lawns at the front of your house and a separate controller for the backyard.

Unpairing the Controller
To connect the controller to a new smartphone you will first need to unpair it from the device it is currently paired to.

- VIA THE APP: Slide the menu bar to the left and press Delete. This will remove your device from the controller allowing it to be paired with another device
- MANUALLY: Turn the dial to the Lock & Run position on the controller. Press and hold the Start button for
15 seconds. The controller is now unpaired.
Locking the Controller
The BTX6 controller is automatically locked to only one device at a time. For security of your watering schedule the controller will only pair with one mobile device

- LOCKING THE CONTROLLER: Turn the dial to Lock & Run. The controller will run all automatic programs that have been loaded to it, but it cannot be accessed by any smartphone including the one it was originally paired with.
Troubleshooting
- Ensure the controller is connected to power.
- Ensure the smartphone is within the required 20m Bluetooth range.
- Ensure there is no other smartphone currently paired with the controller
Accessing the Help screen via the app

- ON HOME SCREEN: Select Help in scrolling menu.
- ON ZONE MANAGEMENT SCREEN: Select the Question Mark icon in the blue section at the top of the screen.
OPERATING THE IRRIGATION APP
Key Functions

- The numbers at the top are the zones. The one highlighted blue is the one you are scheduling. The numbers on the app correspond with the numbers on the terminal block. The controller refers to zones as valves.
- You can access the help page throughout the app.
- Select the scheduling option that best suits your required watering. The one highlighted blue is the one you have selected. You can have a different schedule per zone.
- Slide the toggle button if you want that day selected and down to de-select the day
- You can schedule up to three start times with individual run times. Select a run time for each start time.
- This allows you to turn the rain sensor on or off per zone and select an amount of days to delay the watering schedule. The rain sensor is an accessory that is not included with the controller. Installation instructions on page 13.
- MANUAL OPERATION You can manually operate the selected zone by choosing a run time then pressing start and stop. This will NOT override the automatic scheduling. If the zone is set to Cycle watering۔
- You can sync your zone start times to run sequentially. Please turn to page 10 for more information on
how to use this feature.
Features
- Zones: 6
- No. of Starts per Program: 3
- Watering Schedule: 7 Day, Interval, Odd, Even & Cycle
- Season Adjustment: No
- Permanent Memory: No
- Real Time Clock: Yes
- Current Sensing: No
- Transformer: Plug pack
- Housing Type: Outdoor with lid
- DIY Friendly/ No Electrician Necessary: Yes
- Keylockable: No
- Master Valve/Pump Station: Yes
- ON/OFF Rain Switch: Yes
- Manual Operation: System Test. Single Zone Manual Water.
7 Day Watering Schedule

- Select the zone.
- Select 7 Days.
- Select the day(s) you require.
- Select your Start Time. You have the option to schedule three start times.
- Select your Run Time
CONTROLLER INSTALLATION
Mounting the Controller
Install the controller near a 240V AC outlet. Preferably located in a house, garage, or exterior electrical cubicle. Fasten the controller using the key hole slot positioned externally on the top centre and the additional holes positioned internally under the terminal cover.
Electrical Hook-up
- Failure to do so will void the controller’s warranty.
- Do not attempt to wire any high voltage items yourself, i.e. pumps and pump contractors or hard wiring the controller power supply to the mains.

| Symptom Possible Cause Suggestion | ||
| Single zone not working | Faulty solenoid coil, or break in field wire. Check fault indicator in display. | Check solenoid coil (a good solenoid coil should read around 33Ω on a multi meter). Test field cable for continuity. Test common cable for continuity. |
| No automatic start | Programming error or blown fuse or transformer. | If unit works manually then check the programming. If not then check the fuse, wiring and transformer. |
| Buttons not responding | Short on button or programming not correct. Unit may be in sleep mode and no AC power. | Ensure programming is correct. If buttons still not responding then return panel to supplier or manufacturer. |
| More than one zone coming on at once | Possible faulty driver triac. | Check wiring and swap faulty valve wires on the controller terminal block with known working zones. |
| Pump start chattering | Faulty relay or pump contactor. | Electrician to check voltage on relay or contactor. |
|
| ||
| Pump not working on a specific zone or program | Programming error with pump enable routine. | Check programming using the manual as a reference and correct mistakes. |
WARRANTY
The manufacturer guarantees to the original purchaser that any product supplied by the manufacturer will be free from defects in materials and workmanship for a period of three years from the date of purchase.
- A copy of your original invoice.
- A description of any fault.