
Midland WR120 Emergency Weather Alert Radio User Manual
Instructions:

- Set the ON/OFF switch located on the right side of the radio to the ON position.
- Pull out antenna and extend to its full length.
- Insert 3 AA batteries (not included).
- Plug the AC adapter into the POWER jack on the back of the radio and the other end into a standard wall outlet.
- Follow the prompts on the display screen using ▲ and ▼ to move through the options and SELECT to choose the desired option.
- The radio will first display WELCOME, and then SET LANGUAGE.
- To SET LANGUAGE press the SELECT button:
- Choose your language by pressing ▲ or ▼, then SELECT.
- To SET LOCATION press the SELECT button:
- Press ▲ or ▼ until SINGLE is displayed, then press SELECT.
- To SET COUNTRY press SELECT to program your country for position 01:
- Press ▲ or ▼ to choose your country, then press SELECT.
- Press ▲ or ▼ to choose your state or province, then press SELECT.
- Press ▲ or ▼ to choose your county or area, then press SELECT.
- To SET TIME press the SELECT button:
- Set the time using ► ▲ ▼ and ◄ then press SELECT.
- To SET CHANNEL press the SELECT button:
- Tune the channel to the desired broadcast using ▲ or ▼.
- To SET VOLUME press the VOLUME UP or VOLUME DOWN buttons.
- To complete set-up, press the SELECT button.
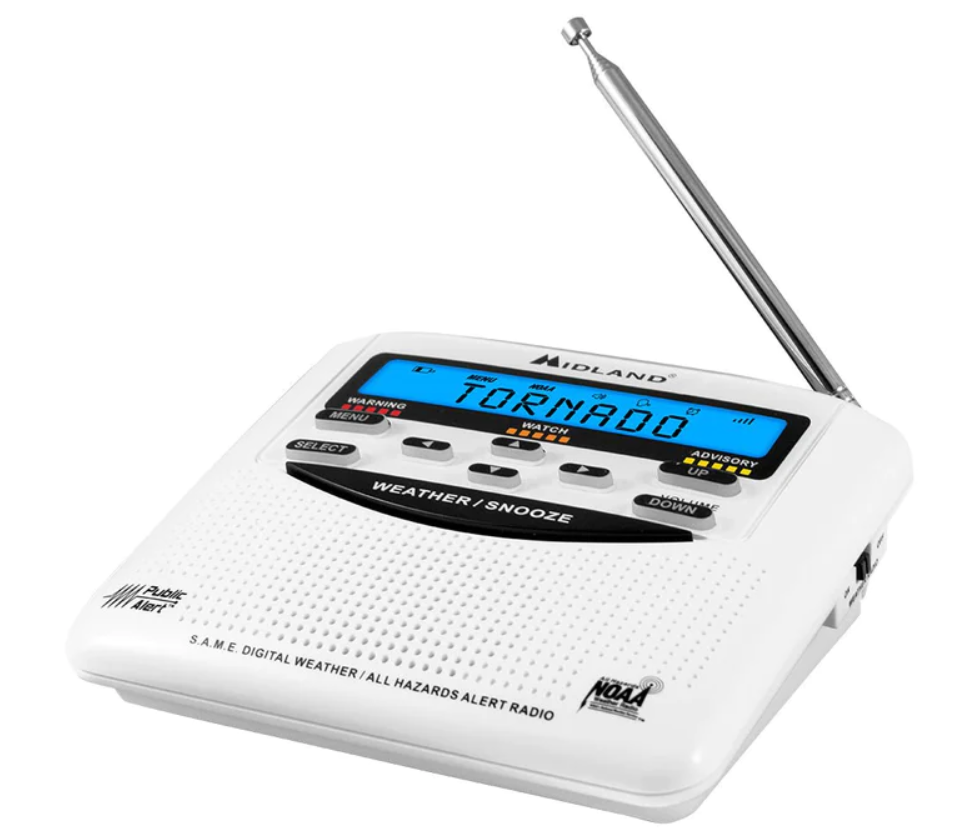
Getting to Know your Weather Radio
WR120 Features

- Select Buttom
- Menu Button
- Warning Light
- Watch Light
- Advisory Light
- ON/OFF Switch
- Volume Up Button
- Volume Down Button
Icons on the Display

Accessory Jacks

Setting up your Weather Radio
Set Time:
- Press MENU to open menu options.
- Press ▲ to scroll through menu to SET TIME.
- Press SELECT (hour option will begin flashing).
- Press ▲ until current hour is displayed.
(Note: AM/PM changes as you scroll through the hours.)
- Press ►to save current hour and advance to minute settings.
- Program both minute digits the same way.
- Press SELECT to store the current time.
- Press MENU to exit menu mode.
Set Alarm:
- Press MENU to open menu options.
- Press▲to scroll through menu to SET ALARM, then press SELECT.
- Press▲to display ON. Press SELECT.
- Press▲until the hour you want is displayed.
(Note: AM/PM changes as you scroll through the hours.)
- Press ►to save alarm hour and advance to alarm minutes. Program both minute digits the same way.
- Press SELECT to save the alarm time.
- Press MENU to exit menu mode.
Note: To snooze alarm for 8 minutes press the WEATHER / SNOOZE button. To silence the alarm for the day press the MENU button.
Set Language:
- Press MENU to open menu options.
- Press▲to scroll through menu to SET LANGUAGE then press SELECT.
- Press▲to choose ENGLISH, ESPANOL or FRANCAIS then press SELECT.
- Press MENU to exit menu mode.
Programming the radio for your area:
Your WR120 All Hazards Weather Alert Radio comes preprogrammed to receive weather and hazard alert transmissions for all S.A.M.E. codes within range of the transmitter of the selected channel. Follow these simple instructions to program your radio to receive alerts just for your county.
“Single” County Code:
- Press MENU to open menu options.
- Press ▲ to scroll through menu to SET LOCATION, then press SELECT.
- Press ▲ to SINGLE then press SELECT.
- 01 EMPTY will be displayed. Press SELECT.
- Press ▲ or ▼ to select the desired country then press SELECT.
- Press ▲ or ▼ to select the desired state/province then press SELECT.
- Press ▲ or ▼ to select the desired location then press SELECT.
- Press MENU to exit menu mode.
“Multiple” County Code:
For multiple counties, follow the above instructions. At step 3, press ▲ until MULTIPLE is displayed. The “NEARBY” counties will come up automatically to make selection easy. You can program up to 25 different location codes.
Note: To manually enter a FIPS code, press ► while ## LOCATION is displayed. However, selecting a NEARBY will be unavailable. NEARBY locations are based on weather transmitter coverage area, not geographical location.
Set Alert Type (Display, Voice or Tone):
- Press MENU to open menu options.
- Press ▲ to scroll through menu to ALERT TYPE then press SELECT.
- Press ▲ to choose VOICE, TONE or DISPLAY then press SELECT.
- Press MENU to exit menu mode.
Alert Type Description
- Display
When the DISPLAY alert type is chosen, only a text alert will scroll on the display. There will be no audible alarm. - Voice
When the VOICE alert type is chosen, the alert tone will sound for 8 seconds, then you will hear the voice of the weather broadcast for 3 minutes. - Tone
When the TONE alert type is chosen, the alert tone will sound for 3 minutes, or until you press any button.
Reviewing Recent Alerts:
You can review up to 10 stored alerts still in effect by pressing ▲ to scroll through the active alert memory on your weather radio. A double beep indicates the end of the list. “NO MESSAGE” will be displayed if no alerts are active.
Alert Test:
- Press MENU to open menu options.
- Press ▲ to scroll through menu to ALERT TEST.
- Press SELECT to sound the alert siren.
- Press MENU or WEATHER/SNOOZE to silence the siren then press MENU exit menu mode.
Note: Ensure ON/OFF switch is in the ON position.
Set Channel/Volume:
- Press MENU to open menu options.
- Press ▲ to scroll through menu to SET CHANNEL then press SELECT.
- Tune the channel to the desired broadcast by using ▲ or ▼. Find the channel for your area by visiting http://www.nws.noaa.gov/nwr/ nwrbro.htm and reviewing the corresponding frequency and channel for your area using the chart below.
- Adjust the volume to a comfortable level by using VOLUME UP or VOLUME DOWN.
- Press MENU to exit menu mode.
- Press the ► button scan to the next channel available channel
- Ensure ON/OFF switch is in the ON position
Channels Preset on the
Weather Radio
Broadcast Frequency
(MHz)
1 162.400
2 162.425
3 162.450
4 162.475
5 162.500
6 162.525
7 162.550Backlight:
Backlight:
- Press MENU to open menu options.
- Press ▲ to scroll through menu to BACKLIGHT, then press SELECT.
- Press ▲ to choose BLT NORM, BLT ON, BLT OFF then press SELECT.
- Press MENU to exit menu mode.
Backlight Type Description
- BLT NORM The backlight turns on whenever any button is pressed and will turn off after 5 seconds.
- BLT ON The backlight is always on.
- BLT OFF The backlight is always off.
Button Beeps:
- Press MENU to open menu options.
- Press ▲to scroll through menu to BUTTON BEEPS, then press SELECT.
- Press ▲to choose ON or OFF then press SELECT.
- Press MENU to exit menu mode.
Set Events:
- Press MENU to open menu options.
- Press ▲ to scroll through menu to SET EVENTS, then press SELECT.
- Press ▲ to scroll through the options ALL ON, ALL OFF, ALL DEFAULT, EDIT EVENTS then press SELECT.
- Press MENU to exit menu mode.
Description
- ALL ON Enables audible tone for all applicable alerts
- All DEFAULT Returns all alert settings to default
- ALL OFF Defeats the audible siren for all applicable alerts.
- EDIT EVENTS Allows applicable individual alert sirens to be enabled or disabled
Edit Events:
- Press MENU to open menu options.
- Press ▲ to scroll through menu to SET EVENTS, then press SELECT.
- Press ▲ to scroll to EDIT EVENTS then press SELECT.
- Press ▲ to choose the desired alert then press SELECT.
- Press ▲ to toggle ON/OFF the audible notification for the selected alert, then press SELECT to save selection.
- Press MENU to exit menu mode.
- For a complete list of selectable events, please visit our website at midlandusa.com
- Not all alerts are selectable. Non-selectable alerts do not appear on display screen.
Troubleshooting:
Problem Suggestion
- No Power Make sure the power adapter is securely plugged into the back of the weather radio and into the wall outlet.
- Make sure batteries are installed in case of a power failure.
- No Sound Check VOLUME control to ensure volume is turned up to an audible level.
- No Weather broadcast when you press the
WEATHER/SNOOZE
- Ensure the telescoping antenna is up and fully extended.
- If you are using an external antenna, ensure it is connected properly.
- Ensure the radio is set to the NWS weather channel in use in your area.
- Contact the NWS to ensure they are presently broadcasting.
- If in a metal structure, make sure you are close to a window.
- If in a weak signal area, you will need an external antenna.
- The radio is not responding properly to weather alert broadcasts
- Check to see that you have programmed in the correct S.A.M.E. code(s).
- Check that the tower nearest you is broadcasting.
CHECK RECEPTION
- Display + audible beeps
- To manually clear, reset the power by removing the batteries and power adaptor for 10 seconds. You can also move the power switch from off to on.
- Automatic reset will occur when the device recieves an alert.
LIMITED WARRANTY (United States and Canada)
Subject to the exclusions set forth below, Midland Radio Corporation will repair or replace, at its option without charge, any Midland Weather Alert Radio transceiver which fails due to a defect in material or workmanship within One Year following the initial consumer purchase. This warranty does not apply to water damage, battery leak, abuse or misuse of unauthroized accessories, unauthorized sevice or modification or altered products. Accessories have a 90 day warranty from date of purchase, including any antennas, chargers, or earphones. This warranty does not include the cost of labor for removal or re-installation of the product in a vehicle or other mounting.
REFRENCE LINK


