Nuwave 38051 Pro Smart Grill Owner Manual

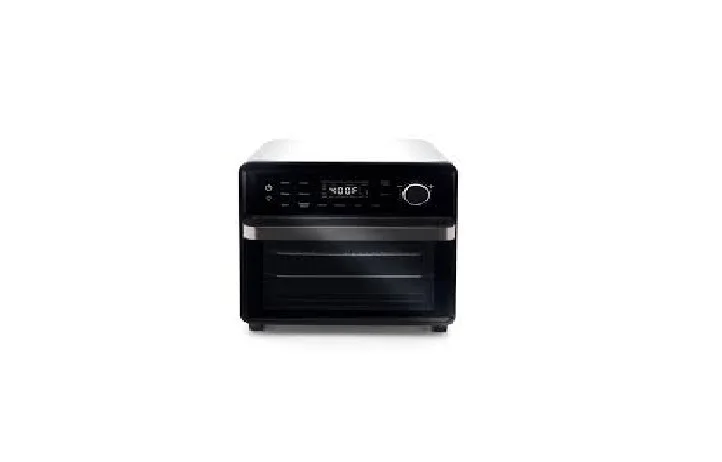
PARTS & ACCESSORIES

ASSEMBLY GUIDE
Before First Use
- Remove and discard any packaging material from the unit.
- Remove all accessories from their packaging and wash them in warm, soapy water or in the dishwasher, top rack only, except for the Probe. NEVER submerge the main unit in water.
While most of the accessories are dishwasher-safe, the Probe is not. Hand washing is,therefore, highly recommended. Frequent dishwasher cleaning may lead to premature wear.
Accessories
Plug-in Grill
For grilling steaks and roasting vegetables.Plugs into the Pro-Smart Grill from Position 1, making it self-heating.
Air Fry Basket
1-inch depth is perfect for making crispy chicken, fries, and more.
Baking and Drip Tray
Ideal for baking, roasting, and as a drip pan when air frying, protecting the bottom from dripping oils and fats.
Wire Rack
Can be used to hold cooking or baking pans, or simply place your food directly on the rack.
Temperature Probe
Eliminates the guesswork of cooking.Consult the temperature guide in the Probe section for more information.
Shelf Positions and Grill Power
The Pro-Smart Grill has 3 rack positions, with Position 1 at the bottom and Position 3 at the top, where most of your accessories can slide into the unit. Position 1 is also the level where the power coupling for the Grill is located at the back of the unit chamber. With the Grill’s plug facing into the unit, slide the Grill into Position 1, pushing until the power connection engages.

GETTING STARTED
The easy-to-use functionality of the Pro-Smart Grill is divided into Basic and Advanced functions, with the Basic offering the full cooking functionality of the unit and the Advanced giving you control over fan and heat strength and allowing you to program different cooking stages, features you will primarily use to create your own cooking Presets.
Control Panel

| In addition to functions and settings, the Pro-Smart Grill will also give you audio alerts (beeping) and, in the 100 Presets, visual reminders for any actions you need to perform to advance the cooking process. They are: | |
| FLIP | Turn the food over to cook the other side. |
| -CO- | Carryover cooking is taking place. |
| ROLL | Rotate the food onto its side. |
| BRUSH | Brush on the required oil or sauce so the food is seasoned. |
| STIR | Stir up the mixture you are cooking. |
| TURN | Halfway through cooking, turn the pan 180° |
| SHAKE | Shake the air frying ingredients so they cook evenly. |
Primary Controls
| Key(s) | Function |
|
| Turns the Pro-Smart Grill On or Off. |
| START/PAUSE | Press to start or pause cooking and turn to adjust settings or when adjusting temperature, time, and selecting Presets. |
| Temp/Time | Press Temp/Time to show the current cooking temperature and time. Turn the START/PAUSE dial to make any adjustments. (Temperature in 5°F/1°C degree increments, time in 1-minute increments). |
| Menu | Menu gives access to the unit’s Cooking Presets; preprogrammed sequences tailored to different foods. There are 100 NuWave Menu Presets and 50 user Presets. Press Menu, then turn the START/PAUSE dial to select your Preset number. |
|
Preheat/Warm | The unit automatically preheats to the set cooking temperature. It will then beep twice and go into a 10-second countdown. allowing you to insert your food and begin cooking. If no food is inserted, the unit will beep once and begin cooking regardless.
For Warm, press and hold Preheat/Warm. The default is 140°F with a range of 140°F–200°F for up to 3 hours. To deactivate Warm, press and hold Preheat/Warm. |
| Reheat | Press Reheat and then START/PAUSE (or press and hold Reheat) to warm your leftovers. The Reheat function is automatic, defaulting to 350°F for 4 minutes. Temperature and time are adjustable. |
| Set Clock | Press Preheat + Temp/Time, turn the START/PAUSE dial to set the time, then wait 3 seconds for the blinking to stop. Remember that the Clock MUST be set to use the Delay function. |
Advanced Key Functions
| KEY | FUNCTION |
|
Stage | In stage cooking, the main cooking settings are Stage 1, which defaults to 350°F for 15 minutes. Sear and Preheat are no longer stages. Press Stage once to enter Stage 1 and set the cooking temperature and time. To add another stage, press Stage again. The unit is now in Stage 2, which defaults to 350°F for 0 minutes (as do Stages 3–5). Input the cooking settings, and press Stage for the next stage, up to five stages. |
|
Sear | Pressing Sear adds the Sear function to the cooking cycle. Sear defaults to 450°F for 5 minutes. The temperature is adjustable from 50°F–450°F, and the time is adjustable up to 1-30 minutes. To just Sear, press and hold Sear and the unit will begin to sear at 450°F for 5 minutes. You can adjust the Sear temperature and time. |
|
Slow Cook | The Slow Cook function requires the Probe. Press Menu + Probe. The unit will beep twice and activate the Slow Cook function. The Slow Cook Probe target temperature defaults to 165°F, and the Slow Cook cooking temperature to 190°F. The Probe temperature range is 50°F to 212°F and the cooking temperature range is 175°F to 235°F. |
BASIC FUNCTIONS
With the basic functions and features that follow, you can meet nearly any cooking task head-on. To begin, press to turn the Pro-Smart Grill on, off, and to stop the cooking process.
START/PAUSE Dial
Turn the START/PAUSE dial to make adjustments to cooking time or temperature,or to select a cooking Preset, then press START/PAUSE to begin cooking. Press it again to pause cooking.
| Meats | Temp. | Rare | Med Rare | Med | Med Well | Well |
| Chicken, breast Turkey, breast Duck, breast | 360°F | 165°F | ||||
| Chicken, whole Turkey, whole Duck, whole | 360°F | 165°F | ||||
| Chicken, thigh Turkey, thigh Duck, thigh | 360°F | 165°F | ||||
| Steak, 1-inch thick* | 450°F | 125°F | 130°F | 135°F | 145°F | 165°F |
| Burgers, ½ lb.* | 450°F | 125°F | 130°F | 135°F | 145°F | 165°F |
| Roast Beef (bone-in)* Roast Beef (boneless)* | 350°F | 125°F | 130°F | 135°F | 145°F | 165°F |
| Lamb (bone-in)* Lamb (boneless) * | 350°F | 125°F | 135°F | 145°F | 150°F | 160°F |
| Pork (bone-in)* Pork (boneless)* | 350°F | 145°F | 150°F | 165°F | ||
| Salmon, Tuna, Halibut, Swordfish* | 450°F | 145°F | 150°F | 160°F | ||
| Fish Steaks, 1-inch thick* | 450°F | 145°F | 150°F | 160°F | ||
| Sausage | 450°F | 160°F |
Probe Errors
| Error Cause | |
|
Prb1 | 1. If the Probe is unplugged while the user pushes the Probe button, it will show “Prb1” on the screen and beep three times. 2. Under setting mode, if the user presses Probe while the Probe is unplugged, the screen will show “Prb1”; after that, the user can still push other buttons (like Temp, Time, Sear, etc.) to input other functions, but the Probe will not be activated. 3. Under cooking mode, if the Probe is unplugged and the user presses Probe, the screen will show “Prb1”; after that, the unit will keep cooking with the set time, but the Probe will not be activated. 4. At any time, unplugging the Probe will cancel the Probe function. When the Probe is unplugged, it will display “Prb1”, and “Probe” on the panel will no longer be lit. Plug the Probe in again and it will restart the Probe, function automatically. |
|
Prb2 | If the set cooking temperature is lower than the Probe target temperature when the user presses START/PAUSE, it will display a “Prb2” error message, beep three times, and will not start cooking. |
| Prb3 | The Probe has short circuited. Contact Customer Service 1-877-689-2838 or email |
| Prb4 | If the cooking temperature is less than 250°F and the Probe sensing temperature does not increase more than 5°F during first 120 minutes cooking, the unit will shut off and display a “Prb4” error notice to the user. |
| Prb5 | Attempting to use the Probe with the Delay End function will cause the unit to stop and display a “Prb5” error notice to the user. |
LIMITED WARRANTY
THE MANUFACTURER WARRANTS
The Primo, including the Power Head, Probe, Power Dome, Dome Holder, Non-Stick Grill Plate, and Base is to be free from manufacturer defects. All electrical components are warranted for 1 year from the date of purchase, under normal household use, and when operated in accordance with the Manufacturer’s written instructions. The Manufacturer will provide the necessary parts and labor to repair any part of the Primo at NuWave LLC Service Department. After the expiration of the warranty, the cost of the labor and parts will be the responsibility of the owner.
THE WARRANTY DOES NOT COVER
The Limited Warranty is voided if repairs are made by an unauthorized dealer or the serial number data plate is removed or defaced. Normal deterioration of finish due to use or exposure is not covered by this Warranty. This Limited Warranty does not cover failure, damages, or inadequate performance due to accident, acts of God (such as lightning), fluctuations in electric power, alterations, abuse, misuse, misapplications, corrosive-type atmospheres, improper installation, failure to operate in accordance with the Manufacturer’s written instructions, abnormal use or commercial use. NuWave LLC reserves the right to void the Limited Warranty, where allowable by law, for products purchased from an unauthorized dealer.
TO OBTAIN SERVICE
The owner shall have the obligation and responsibility to: pay for all services and parts not covered by the warranty; prepay the freight to and from Service Department for any part or system returned under this warranty; and carefully package the product using adequate padding material to prevent damage in transit. The original container is ideal for this purpose. Include in the package the owner’s name, address, daytime telephone number, a detailed description of the problem, and your “RGA number.” (Call 1-877-689-2838) or email help@nuwavenow.com to obtain the RGA number (Return Goods Authorization number). Provide the cooking system model & serial number and proof of date of purchase (a copy of the receipt) when making claims under this warranty.
To the maximum extent permitted by law you expressly agree to refrain from bringing or joining any claims in any representative or class-wide capacity, including but not limited to, bringing or joining any claims in any class action or classwide arbitration.
REFERENCE
https://www.nuwavenow.com/parts/brio