Philips Sonicare Cordless Power Flosser User Manual
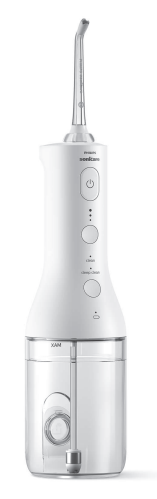
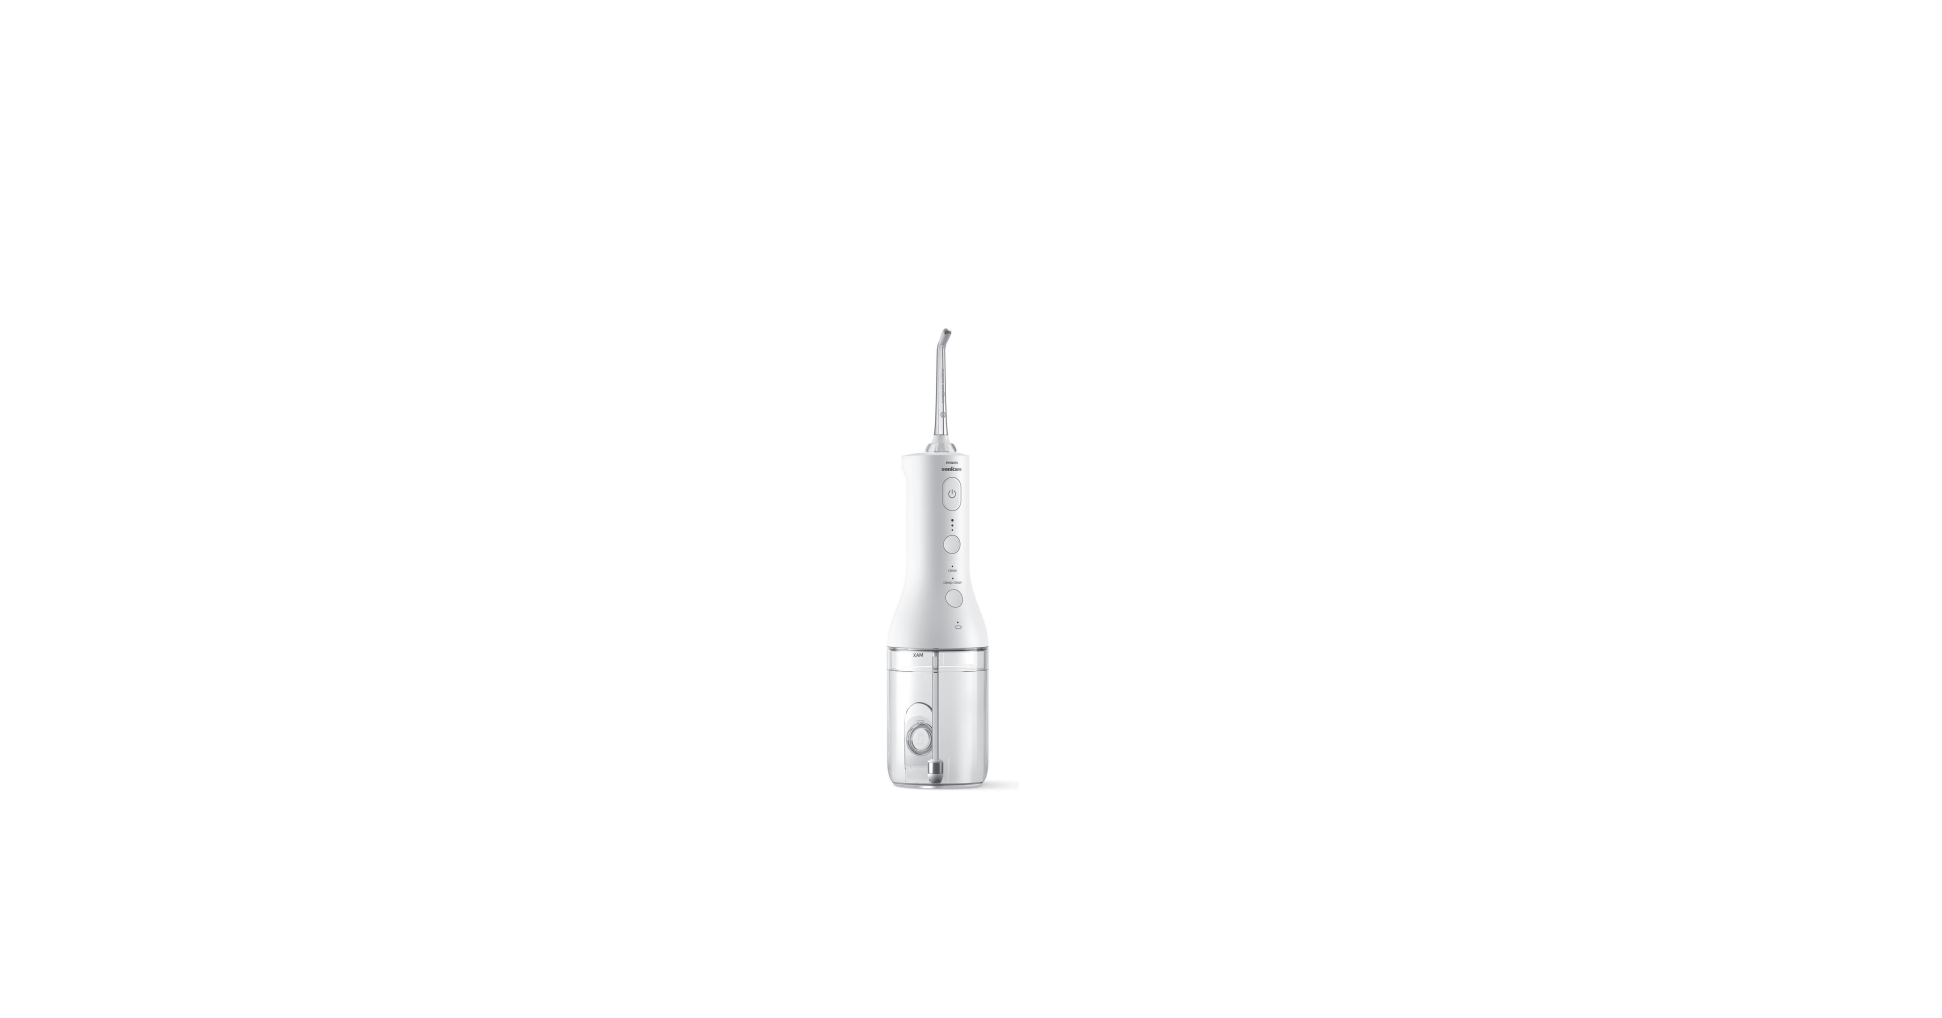
Your Philips Sonicare Power Flosser

- Nozzle
- Nozzle rotator
- Nozzle release button
- On/off button
- Intensity indicator
- Intensity button
- Mode indicator (Specific models only)
- Mode button (Specific models only)
- Battery indicator light
- Charging port/cover
- In-Reservoir Nozzle Storage
- Reservoir
- Reservoir fill door
- Nozzle case (Specific models only)
- Travel pouch (Specific models only)
- USB-A to small plug
- USB-A power adapter (Specific models only)
Note: The contents of the box may not include all items shown depending on the product configuration purchased.
After each use
- Turn off the Cordless Power Flosser.
- Detach and Empty the reservoir
- Remove the nozzle from the handle by pushing the nozzle release button on the top of the handle
- Rinse the nozzle under the tap
- Dry any excess water from the nozzle, the outside of the handle, and the reservoir
- Insert the nozzle back into the handle or utilize the inreservoir nozzle storage feature (see ‘Storage’).
Note: To facilitate drying, keep the reservoir side fill port door open or leave the Cordless Power Flosser disassembled between uses.
Charging
Battery Status
This Cordless Power Flosser is designed to provide at least 25 flossing sessions, each session lasting 1 minute.
The battery indicator shows the battery status when you complete the flossing session, or when you pause the
Power Flosser.
Note: The device will shut off after 2 minutes of use.
When the Power Flosser is charging
Battery status Battery indicator
- Full Solid green
- Charging Flashing green
Note: The battery indicator will flash until fully charged.
When it becomes fully charged while plugged in, the light will turn solid green for 30 seconds and then it will
turn off
When the Power Flosser is not charging
Battery status Battery indicator
- Full Solid green
- Medium Flashing green
- Low Flashing amber
- Empty Flashing amber for 5 seconds and the Power Flosser turns off automatically
Note: When the low battery indicator appears, the Power Flosser is designed to provide at least 3 flossing sessions,
each session lasting 1 minute.
Cleaning
The Cordless Power Flosser needs to be cleaned once a week. Clean the device and the accessories as follows.
Accessories may vary by model.
Warning: Do not clean the Cordless Power Flosser while the charging cord and adapter are attached. Unplug the device and close the charging port cover before cleaning.
Reservoir
Gently remove the reservoir from the Cordless Power Flosser by twisting. The reservoir can be hand washed with warm water and mild soap or cleaned in the top rack of the dishwasher.
Handle
When necessary, you can clean the handle by wiping with a soft cloth and mild soap.
Nozzles
- Regular cleaning: Remove the nozzle from the handle. Rinse the tip under warm water.
- Every few months, or if your nozzle becomes clogged: Soak the nozzle in a container of 2 parts water and 1 part vinegar for 5 minutes. Rinse the nozzle with warm water.