Table of contents
show
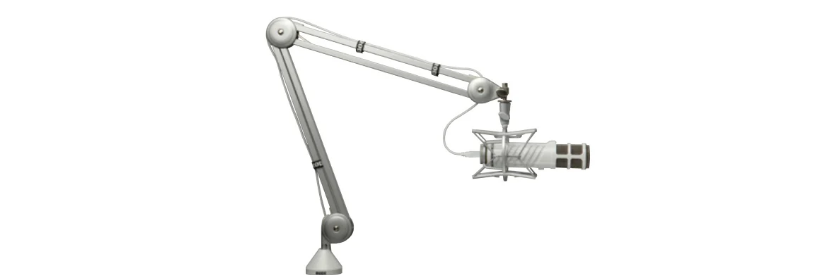
Rode PSA1 Professional Studio Boom Arm For Microphones User Instruction

Product Specifications
Approximate reach: Horizontal- 820mm (32.5”). Vertical- 840mm (33”).
Adapter: 3/8” thread adaptor. (3/8” to 5/8” adaptor included)
Weight: 1.74kg (3.84lbs) – 2.15kg (4.73lbs) boxed

- DESK INSERT
- DESK CLAMP
- ARM
- VELCRO TAGS
- ATTACHMENT PIN
- THUMB SCREWS
- LOCKING NUT
Setting up the PSA1 studio arm
The PSA1 offers a choice of two desk mounting options, using either the desk clamp or desk insert.
Mounting via the Desk Clamp
- Unscrew the clamp so that the opening is large enough to fit over the edge of your table.
- Push the clamp all the way onto the table edge for maximum security.
- If this can not be achieved, we recommend you mount the studio arm via the desk insert (refer to ‘Mounting via desk insert’).
- Test that you have mounted the clamp securely by seeing if you can pull it off the edge of the table. Tables with round edges provide less security than those with square edges. If the clamp comes off easily, try reattaching it tighter and repeat the test.
- Insert the arm into the hole at the top of the clamp. You are now ready to attach your microphone.


Mounting via the Desk Insert
- Take the time to choose the best location for your new studio arm.
- Mark the location you wish to position the desk insert and check that it meets the minimum and maximum recommended distances (refer to illustration)
- Use either a 22mm (0.87”) hole cutter and drill out a hole in the location you have marked.
- Remove the nut from the desk insert and drop it into the hole you have just made.
- Insert the arm into the hole in the top of the desk insert. You are now ready to attach your microphone.


DOWNLOAD PDF
Rode PSA1 Professional Studio Boom Arm For Microphones User Instruction


