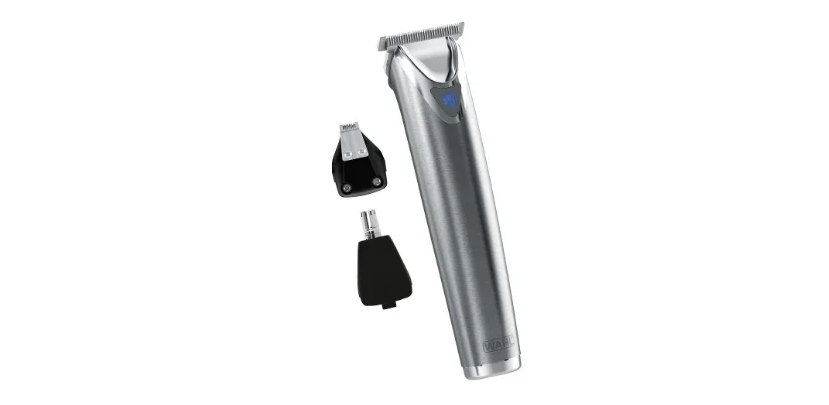

Wahl Stainless Steel Lithium-Ion Cordless Beard Trimmer User Guide

SPECIAL FEATURES:
Anywhere you may need grooming haircuts and touch ups between trips to the barber or to clean up the shape of the neck.
- A Detachable Blade System enables you to quickly change from a standard-width blade for full grooming
to a narrow-width blade for detail trimming around a mustache, goatee, or anywhere to define the hair line and clip any stray whiskers. To remove attachment, simply pull top edge of blade away from body unit.

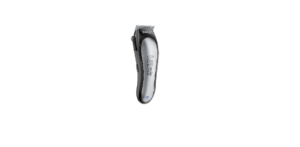
TRIMMING WITH ATTACHMENT COMBS
To use the attachments, go with the hair direction. To achieve closer looks, go against the hair direction. To attach guide combs, hold comb with the teeth up. Snap guide comb attachment firmly to the bottom of the trimmer blade.
RECHARGING & SMART LED
- Remove the trimmer, recharging transformer and accessories from the packing material.
- Connect the transformer to the trimmer.
- Plug the recharging transformer into any convenient electrical outlet at the correct voltage.
- Completely recharged means that enough charge time has elapsed and the LED stays ON.
- Insert only recharging transformer plug supplied by the manufacturer into charger receptacle.
TRIMMING AND EDGING YOUR BEARD
- Comb your beard in the direction that it grows to help reveal stray hairs that may be longer than the others.
- Attach a guide to trim and taper your beard. Begin with a guide of a long trimming length. Trim toward your chin in smooth, overlapping strokes, following the lay of your beard. If you trim against the way your beard naturally lays, the trimmer will cut the hair much shorter. Change the trimming guides to progressively shorter lengths until you reach the desired length of beard. You may wish to trim closer near the ear and down under the chin, changing to a longer guide toward the front of the face and point of your chin.
- To cut the outline of your beard, remove the trimming guide comb. Starting under your chin and working
back toward your jawbone and ears, cut the outer perimeter of your beard underneath the jawbone. Continue the line all the way up to the ears and hairline. - Accentuate your beard line by using the trimmer in a downward motion. Start at the line you’ve created and,
working from the chin back toward the ears, trim the area right under your beard line. - Define the upper part of your beard using the same technique.

DETAILING NECKLINES, SIDEBURNS
Slowly move trimmer downward on desired areas to neatly trim and shape.
TRIMMING ARM & LEG HAIR
Simply glide the trimmer over your arm or leg until desired hair length is achieved. The first time you trim the hair, start by using a longer guide comb on the trimmer, then use progressively shorter settings if a shorter length is preferred.
TRIMMING CHEST & STOMACH
Glide the trimmer over your torso region, in an upward motion until desired hair length is achieved. For tight, scratch-free trimming, use the #1/4 guide comb.
TRIMMING NOSE HAIR
Make sure the nasal passages are clean. Slowly move the ear/nose trimmer in and out of each nostril, no more than 1/4-inch deep.
TRIMMING EAR HAIR
Make sure the outer areas of the ears do not contain any wax. Hold the ear flat with one hand and carefully insert ear/nose trimmer no more than 1/4-inch into the outer ear.
TRIMMING EYEBROWS
Slowly move detailer to neatly trim stray hairs. For precise, even trimming, slowly move the detailer closer or farther away from eyebrows to achieve desired length. Do not press against brow as it may remove too much hair.
FADE CUT
- Start at the temple and cut all the way around the head to establish the ultimate location of the fade line. Always cut against the grain for the shortest cut. Don’t force the blade through the hair. Let the trimmer do the work.
- Next, cut around the head again and up the nape of the neck to the fade line, brushing away the cut hair as you go. Pull the scalp taut with the thumb for the closest cut. Turn the trimmer upside down when necessary to keep cutting against the grain. Make sure both sides of the head are even.
- For the top of the head, cut with the grain using the individual guide comb attachments. The smaller the number of the comb, the shorter the cut. Comb or brush the hair as you cut for an even end result.
- To complete the fade, blend the hair at the fade line by trimming up and out across the line and against the grain all the way around the head. Then, repeat all around, turning the trimmer upside down and cutting downward.
- To create a part, pick a spot off-center. Pull the scalp tight and with the end of the blade perpendicular to the head, move the trimmer back and forth to cut a line. Comb through it and cut again to make sure the cut is precise.
CARING FOR YOUR TRIMMER
OILING BLADES
For best results, use Wahl Clipper Oil on the blades only when necessary, or approximately once a month. When oiling your trimmer, turn the trimmer “ON – I,” hold the unit with the blades facing DOWN and squeeze three drops across the front of the blade and one drop on each side on the heel of the blade. Wipe off excess oil with soft cloth.
BLADE CARE
Trimmer blades have precision-hardened, ground and lapped cutting teeth. Clean with the included brush.
CLEANING/STORAGE
Before storing your trimmer, use the cleaning brush to whisk any loose hairs from the unit and the blades. Store unit in such a manner so that blades are protected from damage. When the trimmer is not in use, the trimmer blade guard attachment should be in place to protect the blades. This appliance should be stored in a manner where it is not subjected to crushing, heating above 100°C (212°F), or incineration.
TROUBLESHOOTING
- If the LED did not flash before the trimmer stopped running try resetting the trimmer by charging the trimmer completely until the LED stays ON.
- If the trimmer unexpectedly stopped operating try resetting the device by plugging the trimmer into the charger.
- If your trimmer does not seem to take a charge, check the following before returning it for repair:
- Check outlet to make sure it is working by plugging in another appliance.
- Make sure the outlet simply is not connected to a light switch which turns the power at the outlet off when lights are turned off.
- Be sure the trimmer is properly connected to the recharging transformer, all connections are secure and the trimmer is turned off.
- Leaving the unit plugged into a dead outlet or an unplugged charger will drain the battery.
- If trimmer does not run and it is completely charged, turn the unit “ON – I” and pinch or push the blades manually.

 Afrikaans
 Albanian
 Amharic
 Arabic
 Armenian
 Azerbaijani
 Basque
 Belarusian
 Bengali
 Bosnian
 Bulgarian
 Catalan
 Cebuano
 Chichewa
 Chinese (Simplified)
 Chinese (Traditional)
 Corsican
 Croatian
 Czech
Czech Danish
 Dutch
Dutch English
 Esperanto
 Estonian
 Filipino
 Finnish
 French
 Frisian
 Galician
 Georgian
 German
 Greek
Greek Gujarati
 Haitian Creole
 Hausa
Hausa Hawaiian
 Hebrew
 Hindi
Hindi Hmong
Hmong Hungarian
 Icelandic
 Igbo
Igbo Indonesian
 Irish
Irish Italian
 Japanese
 Javanese
 Kannada
 Kazakh
 Khmer
Khmer Korean
 Kurdish (Kurmanji)
 Kyrgyz
 Lao
Lao Latin
Latin Latvian
 Lithuanian
 Luxembourgish
 Macedonian
 Malagasy
 Malay
Malay Malayalam
 Maltese
 Maori
Maori Marathi
 Mongolian
 Myanmar (Burmese)
 Nepali
 Norwegian
 Pashto
 Persian
 Polish
 Portuguese
 Punjabi
 Romanian
 Russian
 Samoan
 Scottish Gaelic
 Serbian
 Sesotho
 Shona
Shona Sindhi
 Sinhala
 Slovak
 Slovenian
 Somali
 Spanish
 Sundanese
 Swahili
 Swedish
 Tajik
Tajik Tamil
Tamil Telugu
 Thai
Thai Turkish
 Ukrainian
 Urdu
Urdu Uzbek
Uzbek Vietnamese
 Welsh
Welsh Xhosa
Xhosa Yiddish
 Yoruba
 Zulu
Zulu