
Vevor 3L Commercial Slushy Machine User Manual
Introduction
Manufacturer
The manufacturer’s details are shown on the identification plate
0perator
Based on different applications.there are two types of persons.
User
- In accord with Health standard people trained compelete techniques,
- Know all to distribute slush have below ability after reading this manual
- Place and change slush machine
- Properly dispensing the products
- Cleaning the slush machine
- Specialized technical people
- Studied this manual and trained how to install ,use and maintain this slush machine;
- When serious fault,can repair the slush machine and know this manus well;
- Master all information of the manual and can explain the diagrams and graphs correctly;
- Know important hygienic knowledge well, prevent accident occuring, know technical and safety standard
- Have experience to serve this kind of slush machine. Master treatment measure to emergency.find separated safety device and use the machine correctly
Machine description
Usage
This machine is specially used for making slush.If used to make dairy and other foods,bowl material temperature needs to be tested and abide by the machine’s current regualtion and standard
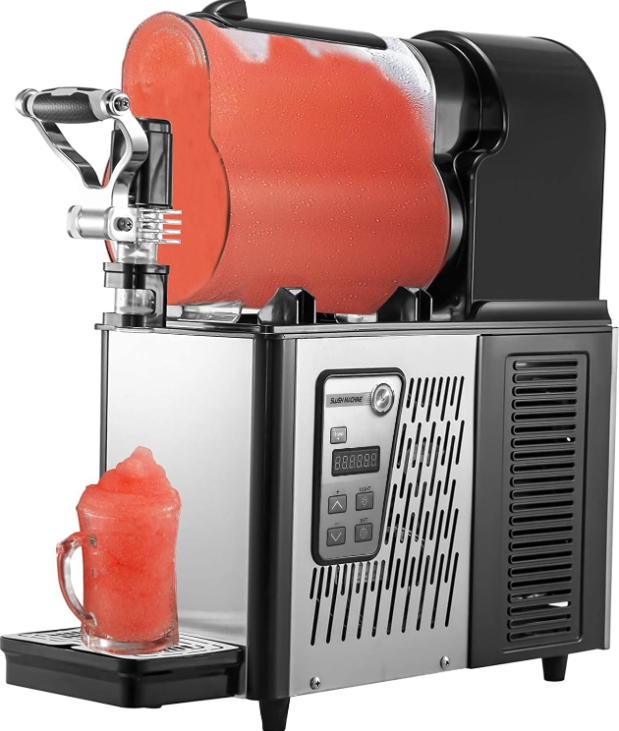
Main Component
- Bowl roof
- Bowl
- Control panel
- Water tray
- Water tray cover
- Drain hose
- Tap
- Handle
- Machine foot

Technical data
Remarks:
Capacity and weight are approximate number
Mode
XRJ3LX1/
20X50X52 18
XRJ3LX2
35X50X52 29
XRJ3LX3
52X50X52 40
Power (w)
Input (w)
Temperture
Bowl
Bowl (L)
Noise
Climate type
See nameplate
Min, 20°C/68°F
Max, 32°C/89.6°F
«<70dB
N Manufactory has right to change and will not notice specially. Any change or increase has to be approved and executed by Manufactory.

Control panel

Safety manual
- Slush machine parts and condenser’ s installation, slush machine troubleshooting. exclusion and maintenance have to be operated by manufacturer professionals or people who have related experience. Without experienced people monitoring or guiding, slush machine can not be used by disabled,sense disable mental disable people’s, lack of experience and knowledge
- Children need to be taken care when playing nearby the machine
- When machine’s wire broken, they have to be replaced by manufacturer professionals or people who have related experience.
- When machine scraped, it has to be delivered and handled by related authority institution
Transportation and storage
Packing
Carton box, contoured foam & collect.
Packing size (approximate)
XRJ3LX1|
XRJ3LX2
XRJ3LX3
Width (L)
270mm
430mm
590mm
Depth (D)
570mm
570mm
570mm
Hight (H)
570mm
570mm
570mm
Weight
27kg
39kg
52kg

Transportation
Keep upward and carried by two people at least.
Storage
Notice: please do not exceed three layers.

Installation
The slush machine has to be installed indoor with hard and plain ground under enough light and ventilation (Ground inclination can’t be more than 2 degree)
Parts list
After cleaning and disinfecting all indicated parts in manual have to be coated with lubricating oil.
Position to install
- Installation position have to planed in advance;
- Installation place have to be hard and plain
- Installation condition is enough light and ventilation and clean;
- Power socket is also needed;
- Installation distance from other objects see below fig. 6

Handling package material
Handling packing material separately under local rules and we suggest keep it to repack and ship in future.
Connect power
- Ensure slush machine is off before connecting power.
- Then plug in to connect power.
- Data can be referred from machine back nameplate.
Warning: Socket has to be placed within user touching distance in order to unplug quickly when emergency without using other tools.
Operation
Preparing material and stirring evenly

Attention
- Operate under manufactory direction;
- Dilute and stir concentrated liquor with water in a container
- Mixture sugar content should be within 10%-15% lower content will damage the augers and gear motors
- Remove the lid as below steps
- Lift the top lid;
- Pour the material into bowls
Warning: Hot liquid can not be put in(hot liquid means degree exceed 25 °C) Material level can not exceed maximum height level - Close the top lid after pouring the material
Warning :Before connecting power or starting machine, put material into bowl
- Material can not just be water.
Warning: Banning putting hand in bowl when machine is working
Starting a 1-BOWL SLUSH MACHINE
The following controls are on the panel:
- A. Main switch supply to the whole machine. LIGHT :It is used to switch on/off the power
- B. Light Switch : It is used to switch on/off the light
- C. SET switch Press : It is used to shift 3 different modes. display shows SLS that is used to switch on Slush Mode. Press again, display shows CLR that is used to switch on Cleaning Mode. Press once more, display shows OFF that is used to switch off Mixing.
- D. Slush hardness and Slush softness Switch: They are used to adjust slush thickness, in slush model ,display shows SLS, then press up or down to increase or reduce the slush thickness
Starting a 2-BOWL SLUSH MACHINE
The following controls are on the panel:
- A. Main switch :It is used to switch on/off the power supply to the whole machine. LIGHT
- B. Light Switch : It is used to switch on/off the light
- C. SET switch Press corresponding bowll press : It is used to shift 3 different modes. Firstly or bowl2 Bowl Bowl , then display shows SLS that is used to switch on Slush Mode. Press again, display shows CLR that is used to switch on Cleaning Mode. Press once more, display shows OFF that is used to switch off Mixing.
- D. Slush hardness and Slush softness Switch : They are used to adjust slush thickness, in slush model, press corresponding bowl1 Bowl or bowl2 Bowl , then press up or to increase or reduce the slush thickness. down
Starting a 3-BOWL SLUSH MACHINE
The following controls are on the panel:
- A. Main switch supply to the whole machine. :It is used to switch on/off the power
- B. Light Switch light : It is used to switch on/off the
- C. SET switch Firstly press corresponding bowll or bowl3 : It is used to shift 3 different modes. Bowl Bowl , then press , bowl2 , display shows SLS that is used to switch on Slush Mode. Press again, display shows CLR that is used to switch on Cleaning Mode. Press once more, display shows OFF that is used to switch off Mixing.
- D. Slush hardness and Slush softness Switch: They are used to adjust slush thickness, in slush model, press Bowl Bow corresponding bowll , bowl2 or bowl3 Bowl , then press up or down to increase or reduce the slush thickness.
Dispensing slush
Pull down the handle and slush will outflow from the bowl
Attention:
- if distribute slush first time or after a long stop please extrude and waste a little and then distribute customers.
- Material temperature in bowl needs to be tested with Standard thermometer timely to ensure material temperature is lower than storing temperature.
- Power can not be cut off when machine is working or there are material.
Emergency
Warning: When emergency, machine needs to be turned off by power button and cut off power
If frozen, cut off power and ask for specialized people to handle. If fire, clear nearby area and ask for professionals.
Cleaning and maintenance
- A Reture can siciantand ureteral parts, please. ensure main switch is off and unplug.
- Any cleaning or maintaining protection supplies needs to wear (gloves. glasses an so an) based on local safety standard
- When cleaning or maintaining. operate as below.
- Wear protective gloves against an accident.
- Do not use solvent or flammable substance
- Do not use tough or metal sponge to clean machine or parts
- Do not spray liquid to nearby area.
- Do not wash parts in the bow!.
- Do not dry parts in furnace or microwave oven.
- Do not immerse the machine in water
- Do not spray the water to the machine directly.
- Warm water and approximate cleaner can be used (abiding by local law and rules)
- After finishing, make sure that all protective covers and guards that have been removed or opened and sent back in place and properly secured.
- Cleanliness and hygiene have to be taken carefully and forcibly based on local standard to ensure qualified slush
- Cleanliness and hygiene have to be taken carefully and forcibly based on local standard to ensure qualified slush Bowl needs to be cleaned everyday at least and abiding by local laws and regulations And cleaning times may be added based on different products More information,
- please consult manufactories. if machine will not be used one day continuously please clean distributing taps with clean rag.
- Even though machine’ s components stainless steel, plastic and rubber are easy to clean as well as its shape, it is still necessary to prevent germs and fungi reproduction due to halfway cleaning
- When the plug is not pulled out or the total switch is in the open state. do not clean or maintenance the machine.
Empty Bowl
Before cleaning bowl, empty bowl If it is the first time to use, no need to make it empty. This manual just explains one bowl as sample Other bourls” operations are the same based on related their buttons. Please set the bowl to “clean state”, then pour material from bowl.
Disassembling the dispensing tap
Before removing the bowl, it is recommed to disassemble the tap, after cleaning, the tap must not be reapplied until the bowl has been correctly positioned in its seat. Remove fastener with a screwdriver, then disconnect the dispensing handle by pushing upward, then push the piston and spring downward, remove the O-ring. Put all spare parts in lukewarm water water temperature around 50°C) and clean as fig. 9

Do not disassemble taps when there are products or liquid in bowls
Move out bowl and cover
Move out every bowl to clean the machine. Move out the bowl as below steps:
- Lift the top cover upward and take it out. Pull the tank upward and outward to completely remove it from its seat.
- Screwing off the nut.
- Take out the stirrer and the seal of stirrer.

Clean and disinfect parts
All dismantled parts should be cleaned thoroughly
Importance: Cleaning way has to abide by local current hygiene standard..
Please operate as below instructions:
- Pour water in the container. mix sanitizer with water (Add 2% sodium hypochlorite to water)
- Sponge with sanitizer clean bowl, cover and evaporator thoroughly clean with water thoroughly
- Add sanitizer to another container.
- Put dismantled parts in sanitizer 30 minutes.
- Re clean with water thoroughly.
- Make the parts dry.
- Assemble machine under 7.5instruction. Sponge with sanitizer clean the roof and the parts touching the raw material.

Retain 30 minutes
- Clean bottom surface with water 2-3 times by the sponge.
- Put the cover at clean area and dry it by rag Ban cleaning by water or disinfecting before taking away the cover
Reset cleaned parts
All disinfected parts have to be reassembled carefully. some parts need to be lubricated to work normally. Put gasket(A) on stirrer.see Fig. 12

Importance: Check gasket in regular if broken. Please replace new one. Replace gasket(A) once at least one year Using the Vaseline provided, lubricate the seal A) see Fig. 13

Install seal (B),lubricate the entine surface with Vaseline as arrow marks,see Fig.14

Put stirrer into the tank as Fig.14.
Attention: Adjust the stirrer to appropriate location.
- Replace the seal ring. When the motor part leaks, you need to replace the seal ring Take out the motor bracket connected to the motor and then replace the head seal ring (washer of axis, seal of axis).When replacing.
- You need to add some Vaseline Then install the motor bracket connected to the motor.

Fixed the stirrer and install the cover as Fig. 15

Attention: Adjust the cover to appropriate location. Install the roof as Fig 16

- Press down top roof until its joint fit in with motor base.
Install taps as below instructions as Fig. 17
- Lubricate bolt totally with vaseline.
- Insert screw when taps are steady.

Attentin: Install all parts under figures instructions.If not lubricate with vaseline well, material may permeate
Clean step
Before using this machine, below cleaning steps are needed
- Fill bowl with water fully
- Start machine only in cleaning mode and stir for 5 minute
- Stop machine and open tap to clear container.
Cleaning drip tray
Drip tray should be emptied and cleaned everyday
Attention: All machine drip trays should be cleaned. drip tray need to be emptied and cleaned.
- Take out drip tray by lifting from top.
- Wash the tray and grid. separately with lukewarm water.Dry all Of the components. Fit the tray back in place and press down to secure it to the machine. Reposition the grid on top of the tray
- When machines stopped ,clean by wet rag and dry the parts.
Replace bulb
- Only when machine power is off and unplugged bulb can be replaced
- According to below figure, open the small back panel, replace the LED bulb, after assembled put the panel back, confirm closed well.

Clean condenser
- Only professionals can clean condenser .They know all operating steps well using approximate device and abide by local law and regulation strictly
- Condenser needs to be cleaned in regular.
Warning: Machine sharp surface may reveal after dismantling safety protection parts. Dirty condenser will weaken machine function.
- Condenser can be seen after taking out safety protection parts.
- Even though only one plate (front or back or side) is not installed the machine is also banned to use. Operators are banned to clean condenser
- Protection parts need to be positioned by Screwdrivers
Cleaning condenser of one-bowl slush machine
Safety protection parts need screwdrivers to fasten and dismantle.
- Loose side panel screw.
- Take out side panel
- Dismantle safety protection parts. Brush dust from condenser surface with dry brush as Fig21

After cleaning condenser, reposition safety protection parts
Cleaning condenser of two-bowl slush machine
According to the following instructions
- Loose 3 crews of the back plate.
- Loose 5 screws o the side plate.
- Take out the side panel.
- Dismantle safety protection parts. Brush dust from condenser surface with dry brush as below.

Scheduled maintenance
- This machine needs to be maintained by professionals in regular (at least 1 year).
- Regular maintenance can ensure machine and its parts in good safety state
- Any broken parts need to be replaced with original manufacturer When any parts of machine are malfunctioned or broken machine is banned to use. The user can not maintain the machine himself
Waste treatment
Electronic waste need to be handled according to2002/96/EC But wastes need to be dismantled and classified and useful parts should be recycled Above rubbish bin reminds people classifying rubbish. Treating wastes correctly will protect our environment.
Troubleshooting
Trouble
Can not turn on the machine
Outlet leaking
Bowl leaking
The stirrer not working
The machine not making slush
The stirrer makes noisy
No slush coming out from the outlet
Potential problems
No input power
Not pressed the switch
Solution
Insert the plug into the appropriate socket
Press the switch
Outlet without vaseline
Add vaseline on outlet
Outlet broken
Change the outlet
The bowl not be installated in suitable position Check the bowl position
No vaseline on bowl’s seal ring
Bad seal ring
Add vaseline on seal ring
Change the seal ring
Not turn on the main switch
Bowl inside freezing
Turn on the main swich
Trun off the main switch and let the ice melting
Not turn on the main switch
Turn on the main switch
Not turn to the “SLS” mode
Turn to the “SLS”mode”
The slush thickness is not suitable
Adjust the slush thickness
Condenser too dirty/ poor ventilation
Slush machine approach to the hot position
Clean the condenser
Put the machine in a cool position
Stirrer’s seal ring installation badly
No vaseline on seal ring or seal ring broken
Bowl inside freezing melting
Check and replace the seal ring
Add vaseline or change the seal ring
Trun off the main switch and let the ice
REFRENCE LINK