Victrola VPRO-2000 USB Record Player User Manual

IMPORTANT SAFETY INSTRUCTIONS
- Read these instructions – All the safety and operating instructions should be read before this product is operated.
- Keep these instructions– The safety and operating instructions should be retained for future reference.
- Heed all warnings – All warnings on the appliance and in the operating instructions should be adhered to.
- Follow all instructions – All operating and use instructions should be followed.
- Do not use this apparatus near water – The appliance should not be used near water or moisture – for example, in a wet basement or near a swimming pool, and the like.
- Clean only with dry cloth.
- Do not block any ventilation openings. Install in accordance with the manufacturer’s instructions.
- Do not install near any heat sources such as radiations, heat registers, stoves, or other apparatus (including amplifiers) that produce heat.
- Protect the power cord from being walked on or pinched particularly at the plugs, convenience receptacles, and at the point where they exit from the apparatus.
- Only use attachments/accessories specified by the manufacturer.
- Use only with the cart, stand, tripod, bracket, or table specified by the manufacturer, or sold with the apparatus. When a cart or rack is used, use caution when moving the cart/apparatus combination to avoid injury from tip-over.
- Unplug the apparatus during lighting storms or when unused for long periods of time.
- Refer all servicing to qualified personnel. Servicing is required when the apparatus has been damaged in any way, such as power supply cord or plug is damaged, liquid has been spilled or objects have fallen into the apparatus has been exposed to rain or moisture, does not operate normally, or has been dropped.
- This lightning flash with arrowhead symbol within an equilateral triangle is intended to alert the user to the presence of non-insulated “dangerous voltage” within the product’s enclosure that may be of sufficient magnitude to constitute a risk of electric shock.
- Warning: To reduce the risk of electric shock, do not remove cover (or back) as there are no user-serviceable parts inside. Refer servicing to qualified personnel.
- The exclamation point within and equilateral triangle is intended to alert the user to the presence of important operating and maintenance instructions in the literature accompanying the appliance.
- This equipment is a Class Ⅱ or double insulated electrical appliance. It has been designed in such a way that it does not require a safety connection to electrical earth.
- The mains plug is used as disconnect device, the disconnect device shall remain readily operable.
- WARNING
To reduce the risk of fire or electric shock, do not expose this apparatus to rain or moisture. The apparatus shall not be exposed to dripping or splashing and that no objects filled with liquids, such as vases, shall not be placed on apparatus. - The use of the equipment in moderate climate.
- The ventilation should not be impeded by covering the ventilation openings with items such as, newspapers, tablecloths, curtains, etc.
- No naked flame sources, such as lighted candles, should be placed on the apparatus. The symbol with Indication AC voltage.
- CAUTION: These servicing instructions are for use by qualified service personnel only. To reduce the risk of electric shock, do not perform any servicing other than that contained in the operating instructions unless you are qualified to do so.
- WARNING: Please refer the information on the bottom enclosure for electrical and safety information before installing or operating the apparatus.
- Correct Disposal of this product. This marking indicates that this product should not be disposed with other household wastes throughout the EU.
- To prevent possible harm to the environment or human health from uncontrolled waste disposal, recycle it responsibly to promote the sustainable reuse of material resources.
- To return your used device, please use the return and collection systems or contact the retailer where the product was purchased. They can take this product for environmental safe recycling.
ACCESSORIES INCLUDED:
- INSTRUCTION MANUAL
- WARRANTY
- 45 RPM ADAPTER
- SOFTWARE CD (FOR MAC & PC)
- RCA CABLE
- USB CABLE (FOR RECORDING)
- COUNTER WEIGHT
- SLIP MAT
- QUICKSTART GUIDE
- ACRYLIC DUST COVER
- DETACHABLE POWER CORD (2 PCS)
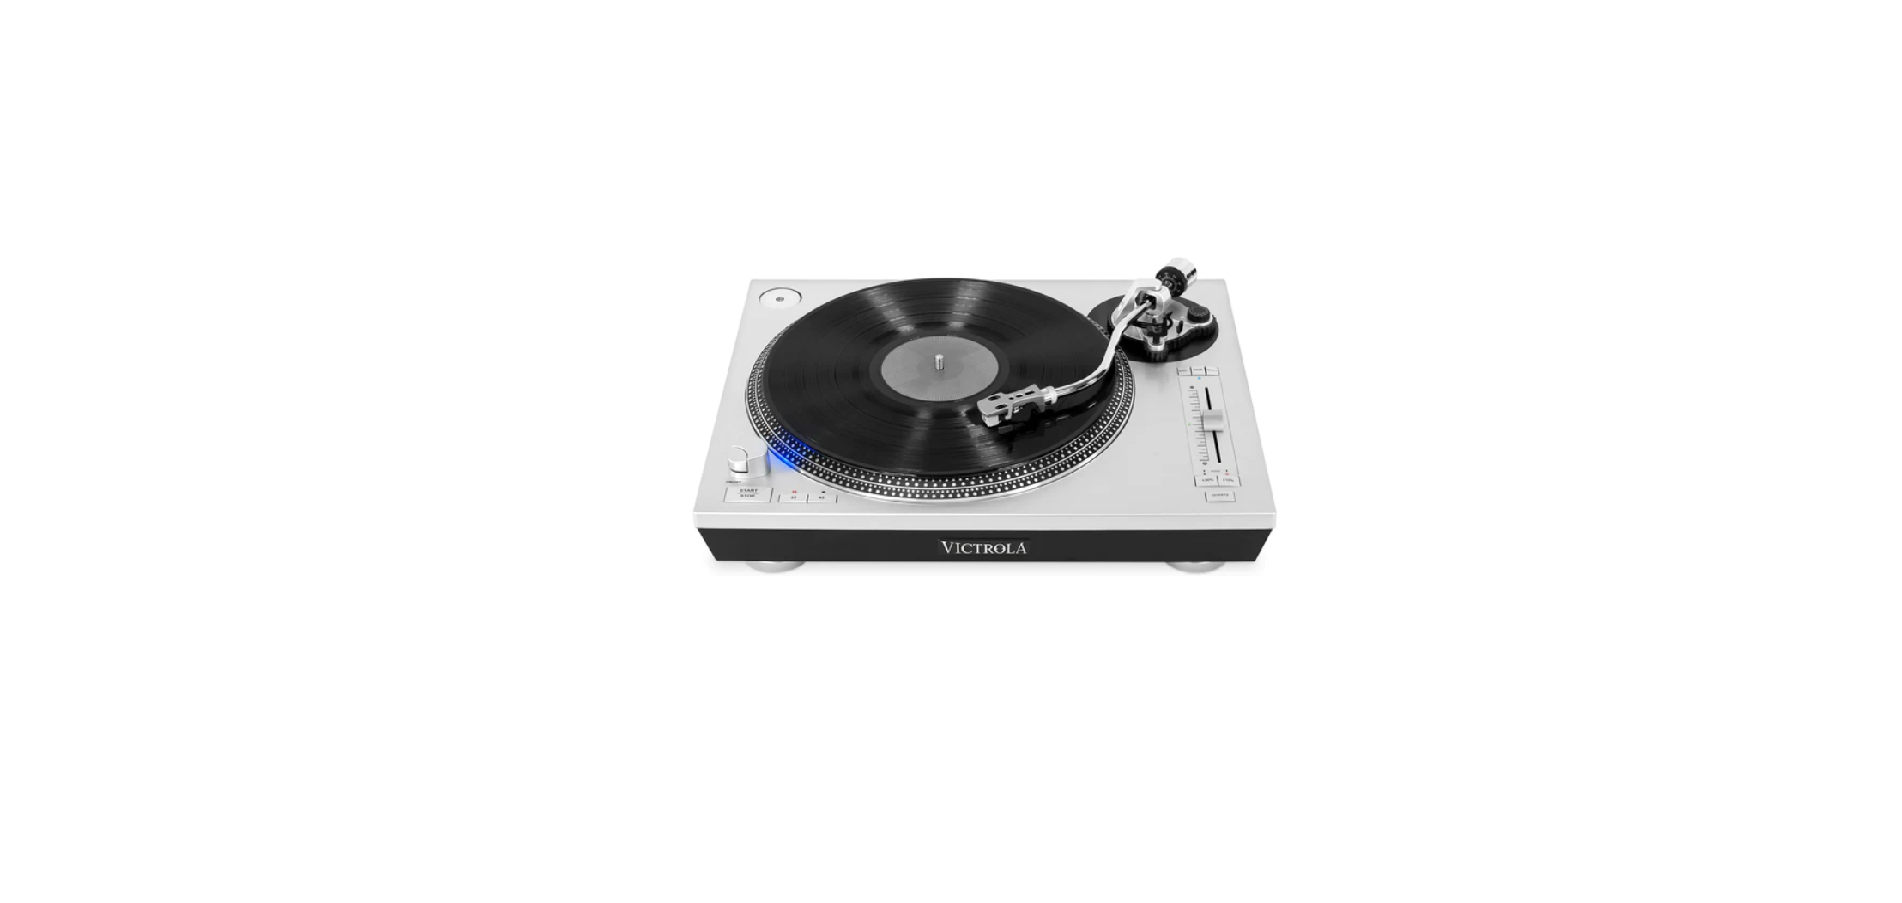
PRODUCT OVERVIEW
Front View:

- ON/OFF: Press to turn the unit on or off.
- START/STOP: Engages and disengages the belt drive in the turntable.
- SPEED INDICATOR
- TURNTABLE SPEED BUTTON: Select 33 or 45 RPM turntable speed.
(NOTE: 78 RPM is selected by pressing both 33 and 45 buttons simultaneously, both speed indicators will light up.) - STROBE DOTS (On Turntable Edge): Operate in conjunction with stroboscopic light located under the ON/OFF to provide visual indication of accurate turntable speeds.
- TURNTABLE
- SPINDLE
- 45-RPM ADAPTER
- BALANCE WEIGHT: Balances the tone arm and provides adjustment for proper downward tracking force on the stylus.
- ANTI-SKATE CONTROL: Applies a small outward force to the tone arm, counteracting the tendency of the tone arm to move inward toward the center of the record.
- CUEING LEVER
- TONE ARM REST HOLDER
- VOL-/VOL+: When streaming via Bluetooth, press to adjust the sound level.
- BLUETOOTH INDICATOR
- PAIR: In Bluetooth mode, press to connect your Bluetooth amplifier device. Press and hold to disconnect from your Bluetooth amplifier device.
- TONE ARM
- PITCH ADJUST SLIDER: Use in conjunction with Quartz Lock Button to adjust the turntable’s rotational speed. When it is centered, the quartz lock is active.
- QUARTZ LOCK LED INDICATOR
- CARTRIDGE COVER
- PITCH LED INDICATORS
- PITCH SPEED RANGE: Select +/- 10% or +/- 20% speed range.
- QUARTZ LOCK BUTTON: Press to turn the pitch control on and off.
Rear View:

- OUTPUT JACKS: Used for connecting the RCA line out cable to an external speaker device.
- PRE-AMP ON/OFF: Allows the internal stereo phono pre-amp to be bypassed when the turntable is used with equipment that has magnetic phono inputs.
- USB JACK: Used for recording Vinyl to a computer (Mac and PC software is included).
- AC POWER CORD: Connect the plug into a wall outlet. It is strongly recommended that this product should be operated only from the type of power source indicated on the rating label.
SETUP / BASIC OPERATION
- Remove any packaging materials from the unit.
- Connect the AC power cord to a wall outlet.
- Press the ON/OFF button to turn the unit on.
Standby
The main unit will switch to economic standby mode when the unit is idle for approximately 15 minutes. Once the unit is in standby mode, press the ON/OFF button to resume.
Installing the Platter Before Use:
- Take all the components from the package and make sure to place the unit on a clear stable surface.
- The belt is preinstalled on the bottom of the metal platter. Make sure the belt is NOT twisted when installed. Use your thumb to stretch the belt to the small access hole as shown in the illustration below.

- Carefully turn the platter over while continuing to hold the belt through the access hole. While keeping the belt on the platter, line up the spindle hole to the center pin located in the unit and place the platter onto the unit.
- Through the access hole, surround the belt onto the gold colored main rotation column located in the top left area under the platter. The belt will create a triangular line from the column to the platter.
Note: Make sure the belt has not fallen off of the platter after it has been placed on to the main rotation column.

- Place the turntable slip mat on the platter.
- Remove the counter weight and place it on the back of the Tone arm. See Illustration to the right – See Instructions below for proper installment.
- Remove the 45 RPM adapter from the packaging and place it in the top right corner of the record player.
Note:
- To disassemble the turntable, simply unwrap the belt from the main rotation column. Then directly grasp the platter and carefully pull it upward.
- Before using make sure to remove all safety ties and the Needle Guard.
- Before using the Record, make sure to properly set the Counter Weight, see Setting the Counter Weight Section below.

LISTENING TO A VINYL RECORD
MUST READ!!!
The Counter Weight on the tone arm MUST be properly set-up before first use!
Setting the Counter Weight

- Identify the silver counter weight at the back of the tone arm.
- With your hand, lift the tone arm up and move the tone arm away from the tone arm rest but not over the black record platter (see photo A). Be careful that the needle does not hit anything. Rotate the silver counter weight (clockwise OR counter-clockwise) until the tone arm floats naturally.
Note: the black number ring will also rotate as you turn the silver counter weight.
- With the tone arm floating and the stylus protector removed, the goal is to create a state of equilibrium in the arm by rotating the counter weight so that the tone arm is perfectly balanced with the counter weight (see photos B and C).

- Now that the tone arm is resting in a level / balanced position, you must set the proper weight for the needle on this tone arm. Identify the black number ring attached to the counter weight.
- Carefully rotate only the black number ring so that “0” is at the 12 o’clock position. Be sure to hold the silver rear portion of the counterweight to prohibit its movement. DO NOT let the silver counter weight turn, the black number dial will turn separately.
- Finally, from this “0” reference position, grasp BOTH parts of the counterweight and black number ring and rotate the weight counter-clockwise so that the “2.5” marking on the dial is in the 12 o’clock position. This will set the tone arm to 2.5 grams of downward force, the recommended tracking weight for this needle (cartridge).
Note: The counter weight adjusts the pressure of the needle. If the pressure is too much, the sound will become distorted. If the pressure is too little, track skipping will happen more frequently. At this point, turning the balance weight very slightly clockwise or counter-clockwise can make any fine-tuning adjustments.
Listening to a Vinyl Record
- Make sure the Counter Weight is Set properly before playing a record.
- Place a vinyl record on the turntable. When playing a 45 RPM record, use the included adaptor.
- Select the appropriate speed by pressing either the 33 or 45 button; the corresponding LED indicator will light up.
Note: To set the turntable speed for 78 RPM, press the 33 and 45 RPM buttons simultaneously.
- Remove the tone armrest holder to release the tone arm.
Note: Make sure to remove the White plastic needle guard.
- Move the tone arm gently to the edge of the record (or the starting point of a track). Then press the START/STOP button to start playing.
- At the end of the record, the turntable will not stop rotating unless you press the START/STOP button again. Lift and return the tone arm to the tone arm rest manually. Lock the tone armrest holder to protect the tone arm.
Note: After approximately 15 minutes, if you do not press the START/STOP button, the turntable will stop rotating automatically.
Important:
- Closing the top cover will help prevent dust from settling on the turntable.
- Always relock the tone arm clip before transporting the unit.
- Do not place anything on top of the turntable cover, especially while playing a record.
- How to Replace the Turntable Stylus (Replacement Needle # ITNP-LD1)
Please note: The stylus should last about 300 hours under normal use. It is recommended that the stylus be replaced as soon as you notice a change in sound quality. 78 RPM records may accelerate stylus wear and may have to be changed sooner.
Removing the Stylus from the Cartridge
- Set a screwdriver at the tip of the stylus and carefully push down to the direction “A”.
WARNING: When applying force to the stylus, too much may damage or break the stylus.
- Pull the stylus out toward the direction “B”.
Installing the Stylus
- Hold the tip of the stylus and insert the other edge by pressing toward direction “C”.
- Push the stylus up toward direction “D” until it locks at the tip.
Caution:
- Do not remove/bend the stylus needle and do not touch the needle to avoid injury.
- Turn off the unit’s power before you replace the stylus and keep out of reach of children.

LISTENING TO MUSIC VIA RCA LINE OUT
- Connect one end of the RCA line out cable to either the AUX-IN, LINE IN or PHONO IN sockets on your external speaker device. Connect the other end to the OUTPUT socket on the back of the unit.
- If you are connecting via PHONO IN from your external speaker system, the PRE-AMP switch should be turned OFF.
- If you are connecting via AUX-IN or LINE IN from your external speaker system, the PRE-AMP switch should be turned ON. Improper setting of PRE-AMP switch may lead to no sound or loud unwanted feedback.
Note: Be sure to connect the white plug to the white jack and the red plug to the red jack.
CONDENSATION WARNING:
When the unit is moved from a cold or warm place, or is used following a sudden temperature change, there is the danger that water vapor in the air may condense on the unit, preventing proper operation. In such cases, leave the unit for 1-2 hours after plugging it into an AC outlet to allow it to stabilize at the temperature of its surroundings.
SPECIFICATIONS
GENERAL
Power Requirements……………………………. AC 230 V ~ 50 Hz
Power Consumption…………………………….. 6 W
Dimensions (W x H x D) …………………………17.7in x 5.9in x 14.7in (approx.)
450mm x 150mm x 375mm (approx.)
Weight………………………………………………17 lbs (approx.)
7.7kgs (approx.)
RECORD PLAYER
Motor……………………………..………..………DC servo motor
Drive System………………………..…………….Belt Drive
Speeds………………………………..……………33-1/3 RPM, 45 RPM, 78 RPM
Wow Flutter………………………….…………….Less than 0.25% (WTD)
S/N Ratio…………………….…………….……… 55 dB
Cartridge Type…………………………….……… Moving Magnetic Cartridge
Stylus…………………………….………………… ITNP-LD1
RCA OUT……………….…………………………200-280 mV (5 cm/sec at 1 KHz-10dB)
Phono out……………….………………………… 3-4mv (5 cm/sec at 1 KHz-10dB)
BLUETOOTH TRANSMIT
Bluetooth Version…………….…………………..Bluetooth V4.2
Bluetooth Profiles…………….…………………..A2DP, AVRCP
Bluetooth Frequency range…………….………. 2.402GHz-2.480GHz
Operating Distance…………….…………………7 meters (30 ft.)
The maximum RF Power…………………………< 10dBm
USB
Type…………….………………………………….USB series B connector
Full-Speed…………….………………………….. USB 2.0 full speed
TROUBLESHOOTING
In case of trouble with the unit, please look at the chart below. If the issue is not listed below, please contact customer service or the supplier for more assistance.
Symptom Possible Cause Solution
GENERAL
- Power does not come on when the power switch is pressed.
- Unit is unplugged.
- Connect the unit to the AC power supply.
- No sound from the speakers.
- The volume is turned down to
MIN; The working input does not match the source input. - Adjust the volume; Reselect an input source.
- The sound is noisy.
- The unit is too close to a TV set or another similar appliance.
- Turn off the TV or other appliance, and re-locate the unit.
- The unit has no response or could not reset.
- External factors such as ESD (Electro-static discharge) affect the unit.
- Remove the power cord and all power supply devices, then re-plug in the unit after one minute.
RECORD PLAYER
- The sound is noisy when playing the record.
- The stylus is not weighted properly.
- Rebalance the stylus using the counter weight.
- The sound is noisy when used for a period of time. – The stylus is damaged. – Please change a new stylus.
BLUETOOTH
- No sound.
- The unit is not paired.
- Your device’s and/or the unit’s volume is not turned up.
- Your device is too far from the unit or there’re some obstacle between your device and the unit.
- Ensure the unit is connected.
- Move your Bluetooth device closer to unit.
- Turn up the volume on your portable device and/or the unit.
- Turn OFF your Bluetooth device and unit. Then power them both back ON.
- Sound has a lot of static.
- Your device is too far away.
- Bring your device closer to the Turntable.
- Unable to pair with a Bluetooth device.
- Your device doesn’t have Bluetooth connectivity.
- The Bluetooth pairing is not successful.
- Confirm that your device is Bluetooth compatible.
- Re-pair the unit and device again.
- Hereby, Innovative Technology Electronics, LLC, declares that this product is in compliance with the essential requirements and other relevant provisions of Directive 2014/53/EU.
- The full test of the EU declaration of conformity is available at the following internet address: www.victrola.com/eudoc
REFRENCE LINK