

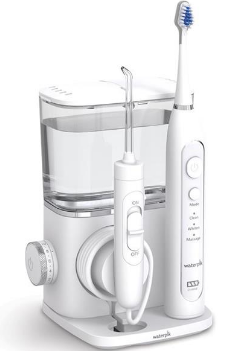
WaterPik Water Flosser Electric ToothBrush Quick Guide
™ You are now on your way
to better oral health!
Register and Save
Register your product at waterpik.com/registration to receive over $50 in savings (includes 50% off your next order of assorted tips + tip storage case).
Write a Review
Creating innovative Waterpik® products that inspire better oral health is our passion. We invite you to leave a review by sharing your thoughts on the Cordless Select Water Flosser on waterpik.com or the retailer’s website.
Save over $50!
Register at Waterpik.com/Registration to receive exclusive discount code.
We’re Here to Help
We hope you are loving your new Cordless Select Water Flosser. If for any reason you are not satis˜ied or have any product questions, please contact our fast and friendly Customer Service Team based in Fort Collins, Colorado. The Cordless Select Water Flosser is backed by a 2-year manufacturer’s warranty. Call: 1-800-525-2774 Chat or E-mail Monday-Friday service@waterpik.com 7 am – 5 pm MST
We’d Love to Hear from You!
Connect with Us
@Waterpik
Call: 1-800-525-2774
Waterpik® 14 Day Challenge App
Make water ˜ossing a habit! Try our new mobile App for the best water ˜ossing experience.
©2021 Water Pik, Inc. FN 20029794-F AB This device is compatible with voltages of 100-240 VAC, 50/60 Hz
GETTING STARTED
- Power unit OFF before charging. Plug power cord into outlet and connect the charging cord to the unit.
 Press tip ÿrmly into unit until it clicks into place. tip eject To remove tip, push the Insert button while unit is running. tip eject button.
 Disconnect charging cord from unit. Li˛ the ˜ip top on reservoir and ÿll with warm water. Reÿll as needed
 Press tip ÿrmly into unit until it clicks into place. tip eject To remove tip, push the Insert button while unit is running. tip eject button.
 Disconnect charging cord from unit. Li˛ the ˜ip top on reservoir and ÿll with warm water. Reÿll as needed
WATER FLOSS TECHNIQUE
- With unit OFF, place tip in mouth. Start on low pressure, by pressing the power button once. Press the Power button twice for high pressure.

- Lean over sink. Close lips enough to prevent splashing.Keep unit upright during use to ensure continuous water ˜ow.
 Aim water at the gumline at a 90 degree angle. Follow the gumline and pause brie˜y between teeth.
TO AVOID MESS: KEEP TIP IN MOUTH WHILE UNIT IS ON.

 Aim water at the gumline at a 90 degree angle. Follow the gumline and pause brie˜y between teeth.
NEED HELP?
VisitWaterpik.com/WelcomeWF
To watch a How To Video and ÿnd additional
product support.
Call Us! 1-800-525-2774
DOWNLOAD PDF
WaterPik Water Flosser Electric ToothBrush Quick Guide
![WaterPik WP-560 Cordless Advanced Water Flosser User Manual featured img]](https://manualsclip.com/wp-content/uploads/2023/07/WaterPik-WP-560-Cordless-Advanced-Water-Flosser-User-Manual-featured-img-300x132.png)

