Bose S1 Pro Multi-position PA System Manual
Overview
Thank you for purchasing the Bose® S1 Pro Multi-position PA system. Whether you are performing for a small
audience, hosting your own special event or entertaining at home, now you’ll always be ready to sound great. This guide provides detailed setup and operating instructions for your S1 Pro system and explains how to connect to a variety of audio sources. For additional information on using the system, including tips, techniques and frequently asked questions, please visit www.Bose.com/livesound.
Product Overview
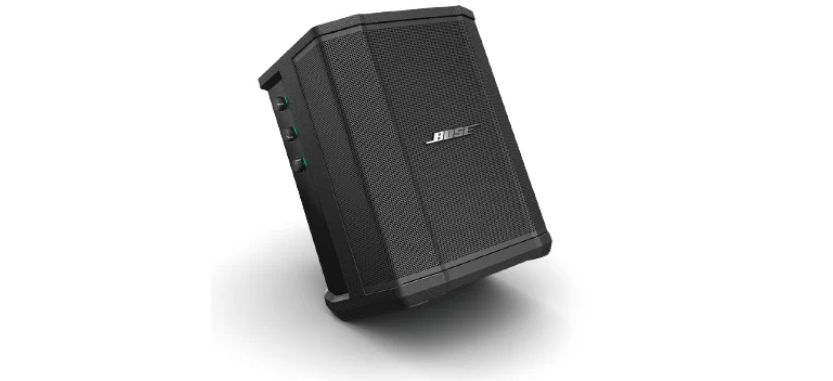
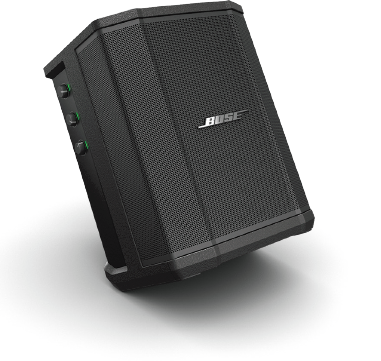
Sound great anywhere with the ultra-portable Bose S1 Pro Multi-position PA system. Designed for musicians,
DJs and general PA use, the S1 Pro is the ultimate all-in-one PA, floor monitor, practice amplifier and primary
music system. Multiple positions with Auto EQ allow the S1 Pro to be set down on the floor, up on a table, or even mounted on a speaker stand, ensuring that you always sound your best. And with a 3-channel mixer, reverb, Bluetooth® streaming and ToneMatch® processing onboard, it’s always ready to be your go-anywhere music system for nearly any occasion.
Features and Benefits
Lightweight & Portable: Weighing 15.7 lbs (7.1 kg), the rugged S1 Pro is designed to transport effortlessly from
the car to the event.
Versatility meets Simplicity:
The S1 Pro comes with a full-featured, 3-channel mixer with reverb and Bluetooth® streaming. Sound great quickly with ToneMatch® processing for microphones and acoustic guitars, while playing music wirelessly using your mobile device. Perform nearly anywhere with the included rechargeable lithium-ion battery for ultimate portability.
Adaptable:
Multiple positions give you the best coverage option for your application, while Auto EQ maintains optimum sound in any orientation. Download the Bose® Connect app to access additional options and features like Stereo Mode, so that you can wirelessly stream Bluetooth® audio to a second system for even more output.
Impressive size-to-performance ratio:
The S1 Pro delivers high-output in a small package, ready to serve as your ultimate all-in-one PA, floor monitor, practice amplifier or primary music system.
Package Contents
The S1 Pro carton contains an S1 Pro system and one AC power cord:

Optional Accessories
- S1 Pro Backpack
- S1 Slip Cover
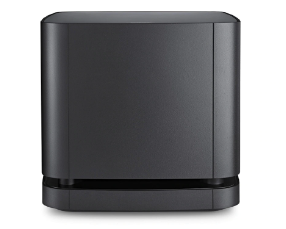
- S1 Battery Pack
For a complete list of optional equipment and accessories, please visit www.Bose.com.
System Configurations
The versatile Bose® S1 Pro system operates in four unique modes. With Auto EQ, the system automatically
updates to maintain optimum tonal balance for each position. Use the examples below to quickly identify the
best mode for your application.
Elevated Surface
Position the S1 Pro on a surface. This projects sound clearly and evenly throughout the audience, and ensures that audience members enjoy the full frequency range of the system.

Tilt-Back
For performances where your audience is close to you, tilt the S1 Pro onto its back edge. For best results, the performer should stand or sit to one side of the loudspeaker to avoid blocking sound from the audience.

Monitor
To use the S1 Pro as a personal floor monitor, place it on the ground horizontally, in front of and pointing toward the
performer. Tilt the loudspeaker onto its side edge.

Speaker Stand
Place one or two S1 Pro systems on speaker stands (sold separately) for general-purpose sound reinforcement.

System Setup
Bose® Connect App
Download the Bose® Connect app to access additional options and features like Stereo Mode, so that you can
wirelessly stream audio to a second system for even more output.
Features
Easily connect to and switch between multiple mobile devices with a single swipe. Configure your speakers to play in Party mode or Stereo mode. Compatible with most Apple and Android systems. Keep your speaker up-to-date with the latest software.

Connections and Controls
The S1 Pro control panel provides the necessary connectors, controls and indicators for operation.
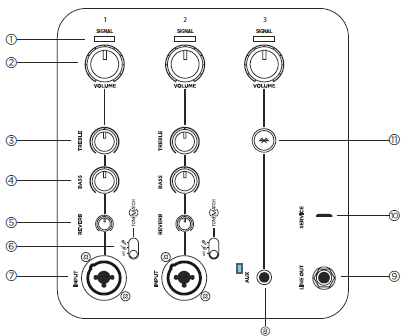
Use Channel 1 and 2 inputs for microphones and musical instruments. Integrated ToneMatch® signal
processing allows microphones and instruments to sound their best. Use Channel 3 for Bluetooth®
connectivity and line-level inputs.
- Signal/Clip indicator:
Displays the input signal status in color.
Green: Signal present
Red: Signal clipping
Note: Reduce the corresponding volume control to prevent signal clipping. - Volume control:
Adjust the volume of your microphone, instrument or audio source. - Treble control:
Adjust the high-frequency balance of your microphone or instrument. - Bass control:
Adjust the low-frequency balance of your microphone or instrument. - Reverb control:
Adjust the amount of reverb applied to your microphone or instrument. - ToneMatch switch:
Move the switch to the or position to enable the ToneMatch preset. - Channel input:
Analog input for connecting microphone (XLR) and instrument (TS unbalanced) cables. - Aux input:
Use a 3.5 mm TRS cable to connect a line-level audio source. - Line Output:
Use a ¼” TRS cable to connect the line-level output to the Channel 1 or 2 input of a second S1 Pro to create a mono, two-loudspeaker setup.
Note: Line Out is post mix. - Service port:
Micro-USB connector for Bose service use only. - Bluetooth Pair button:
Used to set up pairing with Bluetooth-capable devices, such as mobile phones, tablets and laptops.
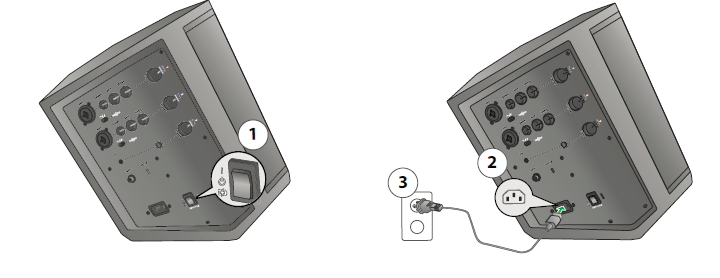
Connecting Power
- Make sure the power switch is in Standby ( ).
- Plug the power cord into the connector on the S1 Pro.
- Plug the other end of the power cord into a live electrical outlet.
Power on the system by turning the power switch to On ( ).
 Connecting Sources
 Connecting Sources
Before connecting a sound source, adjust the appropriate channel Volume control fully counterclockwise.
Channel 1 & 2 Controls
Controls 1 & 2 Channel are for use with dynamic microphones, guitars, keyboards or other instruments.
- Connect your sound source to the Channel input of either Channel 1 or 2.
- Apply a ToneMatch preset by adjusting the ToneMatch switch for the appropriate channel to for
microphones or for other instruments.
Note: ToneMatch® presets automatically optimize the sound of your microphone or instrument. - Adjust the Volume control clockwise—while speaking into the microphone or playing your instrument—
until the volume has reached the desired level. - Adjust the Treble, Bass and Reverb controls—while speaking into the microphone or playing your
instrument—until the desired effect is achieved.
3 Channel Controls
Channel 3 is for use with Bluetooth®-capable devices and line-level audio inputs.
Bluetooth Pairing
- Turn on the Bluetooth feature on your mobile device.
Note: The Bluetooth feature is usually found in the Settings menu. - Press and hold the Bluetooth Pair button for two seconds.
Note: When ready to pair, will be more flash white. - Select your Bose® S1 Pro system from the device list.
Note: When the device pairs successfully, will turn solid white.
Note: If your paired phone receives a call, any music playing will be paused and the ring will come through the
phone; no calls or notifications will come through the S1 Pro.
Aux Input
Connect a line-level sound source to the Aux input via a 3.5 mm (⅛”) cable.
Note: Anything connected via the Aux input will automatically override any paired Bluetooth device.
Charging the Battery
Anytime your S1 Pro is plugged into AC power and the system is not in use, the battery is charging.
Quick Charge
Though the battery will always charge while your S1 Pro is connected to AC power, Quick Charge enables you to
charge your battery more quickly. To enable Quick Charge, turn the power switch to ( ) when not in use.
Battery Life Indicator
The current state of the battery life is shown by the power LED, which will flash when the unit is powered on.
You can also check the battery life by double-clicking the Bluetooth® Pair button, which will cause the power
LED to flash. See the following table for charge indicators:

Care & Maintenance
Replacing the Battery
- Switch the power to Standby ( ) and disconnect the S1 Pro from the power source.
- Unscrew the two screws and remove the bottom plate.
 Remove the battery using the pull tabs.

- Insert the new battery, ensuring the connector pins line up appropriately.

- Replace the bottom plate and secure it with the two screws that were removed in Step 2.
- Plug the S1 Pro into a power source.
- Power on the system by turning the power switch to On ( ).
Note: Your replacement S1 Battery Pack will remain and in Sleep mode until your S1 Pro is powered on.
Note: To purchase a spare S1 Battery Pack, please visit www.Bose.com.
 Remove the battery using the pull tabs.

Cleaning Your S1 Pro
Clean the product enclosure using only a soft, dry cloth. If necessary, carefully vacuum the grille of the
loudspeaker.
CAUTION:
Do not use any solvents, chemicals, or cleaning solutions containing alcohol, ammonia, or
abrasives.
CAUTION:
Do not use any sprays near the product or allow liquids to spill into any openings.
Troubleshooting
If you experience problems while using this product, try the following solutions. If you still cannot solve the
problem, seek online help at www.Bose.com/livesound. If you cannot find answers to your questions there,
please call the Bose Product and Technical Support Team directly at (877) 335-2673.
| Problem | What to do |
| No power | Make sure you have power at the AC outlet. Try operating a lamp or other equipment from the same AC outlet or test the outlet using an AC outlet tester. Battery may be in protection mode or discharged. Connect it to AC (mains) power. |
| No sound | Verify your instrument is plugged into the signal input. Confirm the volume control is turned up on your source. Make sure the volume control is turned up on the S1 Pro. Check your Signal/Clip indicator is lit. Plug your instrument into a different amplifier to make sure the source is working. |
| Power LED is red | If flashing red, your battery has less than 10% battery life. If solid red, please call Product and Technical Support at (877) 335-2673. |
| With nothing plugged into the S1 Pro, a slight hum or buzz is heard | Using an AC outlet tester, test the AC outlet the S1 Pro is plugged into for reversed or open (hot, neutral, and/or ground) contacts. If using an extension cord, plug the S1 Pro directly into the outlet. |
| Instrument or audio source sounds distorted | Turn volume down on the source; if your audio source volume cannot be adjusted, “input pads” are available from your preferred instrument retailer. Try a different source or instrument. |
| Microphone is encountering feedback | Turn volume down. Orient the microphone so that it is not pointing directly at the loudspeaker. Try a different microphone. Try a different position for the loudspeaker and/or vocalist on stage. Increase the distance from the loudspeaker to the microphone. If using a vocal effects processor, make sure it is not contributing to the feedback problem. |
| Paired Bluetooth® device will not connect to the speaker | If your device requires a passcode, make sure the one you entered is correct. Make sure Bluetooth functionality is turned on or enabled on your source device. Your Bluetooth device may be out of range; try moving it closer to the speaker. If possible, turn off all other nearby Bluetooth devices or disable their Bluetooth functionality. Clear the speaker memory or pair to new device by pressing and holding the Bluetooth button for ten seconds. Pair the Bluetooth device and the speaker again. Turn the power off and back on; then try re-pairing your device. |
Specifications
| Problem | What to do |
| Excessive hum when daisy-chaining multiple units | Make sure you’re using a ¼” TRS cable; do not use a ¼” TS (guitar) cable. |
| Speaker does not charge | Set the power switch to On or Quick Charge and do not use the speaker while it is charging. Try charging your battery with the power switch set to On instead of Quick Charge. Move your speaker to a cooler location. Leave your speaker in Standby for several hours before trying to charge your battery again. Unplug your speaker, remove the battery, wait until the battery is cool to the touch and replace battery. |
S1 Pro Specifications
| Enclosure | |
| Enclosure Material | Polypropylene plastic |
| Finish | Textured plastic |
| Grille | Steel with black powder-coat |
| Size | |
| Dimensions (H x W x D) – mm | 330 x 241 x 286 |
| Dimensions (H x W x D) – inches | 13 x 9.5 x 11.2 |
| Net Weight | 15.7 lbs (7.1 kg) |
| Battery | |
| Type | Rechargeable lithium-ion battery |
| Charge Time | 5 hours (3 hours in Quick Charge) |
| Play Time | Up to 11 hours |