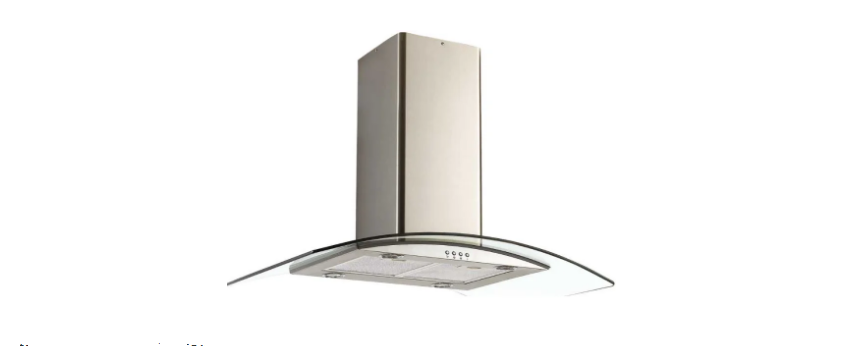

Candy CGI96NX Wall-Mounted Cooker Hood User Manual

SAFETY INSTRUCTIONS
Never to do:
- Do not try to use the cooker hood without the grease filters or if the filters are excessively greasy!
- Do not install above a cooker with a high level grill.
- Do not leave frying pans unattended during use because overheated fats or oils might catch fire.
- Never leave naked flames under the cooker hood.
Always to do:
- Please dispose of the packing material carefully. Children are vulnerable to it.
- Make sure the ducting has no bends sharper than 90 degrees as this will reduce the efficiency of the cooker hood.
INSTALLATION
MOUNTING OF THE V-FLAP
If the cooker hood does not have an assembled V-flap 1, you should mount the half- parts to its body. The images only show an example of how to mount the V-flap,the outlet may be various according to different models and configuration. To mount the V-flap 1 you should:
- Mount two half-parts 2 into the body 6
- repeat all the operations for the 2nd half-part

VENT OUTSIDE
- Before installation, turn the unit off and unplug it from the outlet.
 The cooker hoods should be placed at a distance of 65-75 cm from the cooking surface for best effect. See Pic 1
- The ceiling must can bear at least 40 kgs weight, and the thickness of the ceiling must be ≧30 MM, see pic 2, drill 1*170 mm round hole in the ceiling.
- Let the one side of the expansion pipe go outside through the hole of 170 MM, see pic 3.
- 4pcs ST4*8 big flat screws will be used to connect the inside chimney into the hanging board, then put on the outside chimney, two hooks will be used to put up the outside chimney in order to the next installation, see pic 4.
- 4pcs ST4*8 big flat screws will be used to install the outlet, see pic 5.
- Adjust the 4 glass screws to check whether the glass and the cooker hood body connected well and fixed, see pic 6.
- Hold up the hood, 16 pcs M4*10 big flat screws will be used to connect the hood body into angle iron, see pic 7.
- Put the expansion pipe on the outlet; after ensure all the things ok, put down the hook, take from the outside chimney, all the installation is finished, see pic 9.
 The cooker hoods should be placed at a distance of 65-75 cm from the cooking surface for best effect. See Pic 1


HINTS FOR EXHAUST DUCT INSTALLATION
- Keep expansion pipe short and straight.
- Do not reduce the size or restrict expansion pipe.
- When using expansion pipe always install the pipe pulled taut to minimize pressure loss.
- Failure to observe these basic instructions will reduce the performance and increase noise levels of the cooker hood.

Start Using Your Cooker Hood
Electronic button
- Press the button “Low”, the inner indicator light of switch starts shining, the motor is running at low speed. Press the button again, the motor stop.
- Press the button “Mid”, the inner indicator light of switch starts shining, the motor is running at medium speed. Press the button again, the motor stop.
- Press the button “High” ,the inner indicator light of switch starts shining, the motor is running at high speed. Press the button again, the motor stop.


TROUBLESHOOTING

MAINTENANCE AND CLEANING
STAINLESS STEEL
The stainless steel must be cleaned regularly (e.g.weekly) to ensure long life expectancy.Dry with a clean soft cloth. A specialized stainless steel cleaning fluid may be used.
CONTROL PANEL SURFACE
Use a dry soft cloth to remove any excess moisture left after cleaning.
INSTALLING GREASE MESH FILTERS
- Angle the filter into slots at the back of the hood.
- Push the button on handle of the filter.
- Repeat to install all filters.
CARBON FILTER-not supplied
The installation procedure of activated carbon filter is as below.
- Remove the al filter.
- Insert the carbon filter in the rectangular hole,fitting it over the motor.
- After inserting the front edge of the carbon filter into the slot on the cooker hood.
- Place the Al. filter back to position.
- Apply reverse procedure to uninstall the carbon filter

LED LIGHTS:
- Switch the unit off and pull out the plug first.
- Remove the front part with the aid of screwdriver.
- Pull out the LED light carefully and replace with the same type and rated LED light (2*2W LSD-B1 LED light)
- Replace the front part back to the unit with screwdriver.
- ILCOS D code for this lamp is: DBR-2/65-H-64
- LED modules, self- ballasted: round lamp
- Max wattage: 2 W
- Voltage range: AC 220-240V
- Dimensions


