Cobra Road Scout Camera User Manual

Congratulations on the purchase of your new Cobra Road Scout
The Cobra Road Scout combines the peace of mind of a dash cam with the meaningful alerts of a radar/laser detector. Videos recorded store location, date and time to tell your side of the story.
Automatic speed-based filtering intelligently reduces false alerts.
- Road Scout’s high performance accurately identifies real threats sooner than other detectors, and provides you with location information about these threats.
- Updatable IVT Filter™ automatically reduces false alerts from moving In-Vehicle Technology sources such as collision avoidance systems and adaptive cruise control.
- Road Scout features a customizable display that intuitively displays threat information and device status at a glance.
- Access to the DEFENDER Database, which warns you of verified speed traps, speed cameras, and red light cameras.
- Built in Bluetooth® technology gives you access to iRadar.
This real-time ticket-protection network warns you of upcoming alerts received and reported by other users in the area, and gives you access to local speed limit data for over-speed alerts. - Road Scout records the road ahead in 1080p Full HD and features loop recording and a G-Sensor to ensure you never miss a moment.
Installation
Your new Road Scout comes with our latest EZ Mag Mount™. Simply slide the Road Scout onto the mounting bracket fully and that’s it. To remove the Road Scout from the mount, simply pull the device off the mount.
Mounting Tips:
- Center of windshield between driver and passenger.
- Ensure clear view of road ahead and sky above.
- Avoid windshield wipers and heavily tinted areas.
To mount the Road Scout in your vehicle:
- Remove backing from EZ Mag Mount.
- Firmly press EZ Mag Mount onto windshield and flip locking clamp to secure.
- Tilt the display end of the Road Scout slightly upward and engage with the mounting bracket.
The EZ Mag Mount™ magnet holds the device firmly in place. - To adjust view, loosen thumb wheel and adjust angle of mounting bracket. Tighten thumb wheel to secure.
- To remove the Road Scout, simply lift the display end of the detector upward. The device will release from the mount.
- To remove mount from windshield, release locking clamp and pull tab on top of EZ Mag Mount.
EZ Mag Mount Care Instructions:
To clean your EZ Mag Mount, simply rinse under warm water, gently wipe off any debris and allow to air dry.


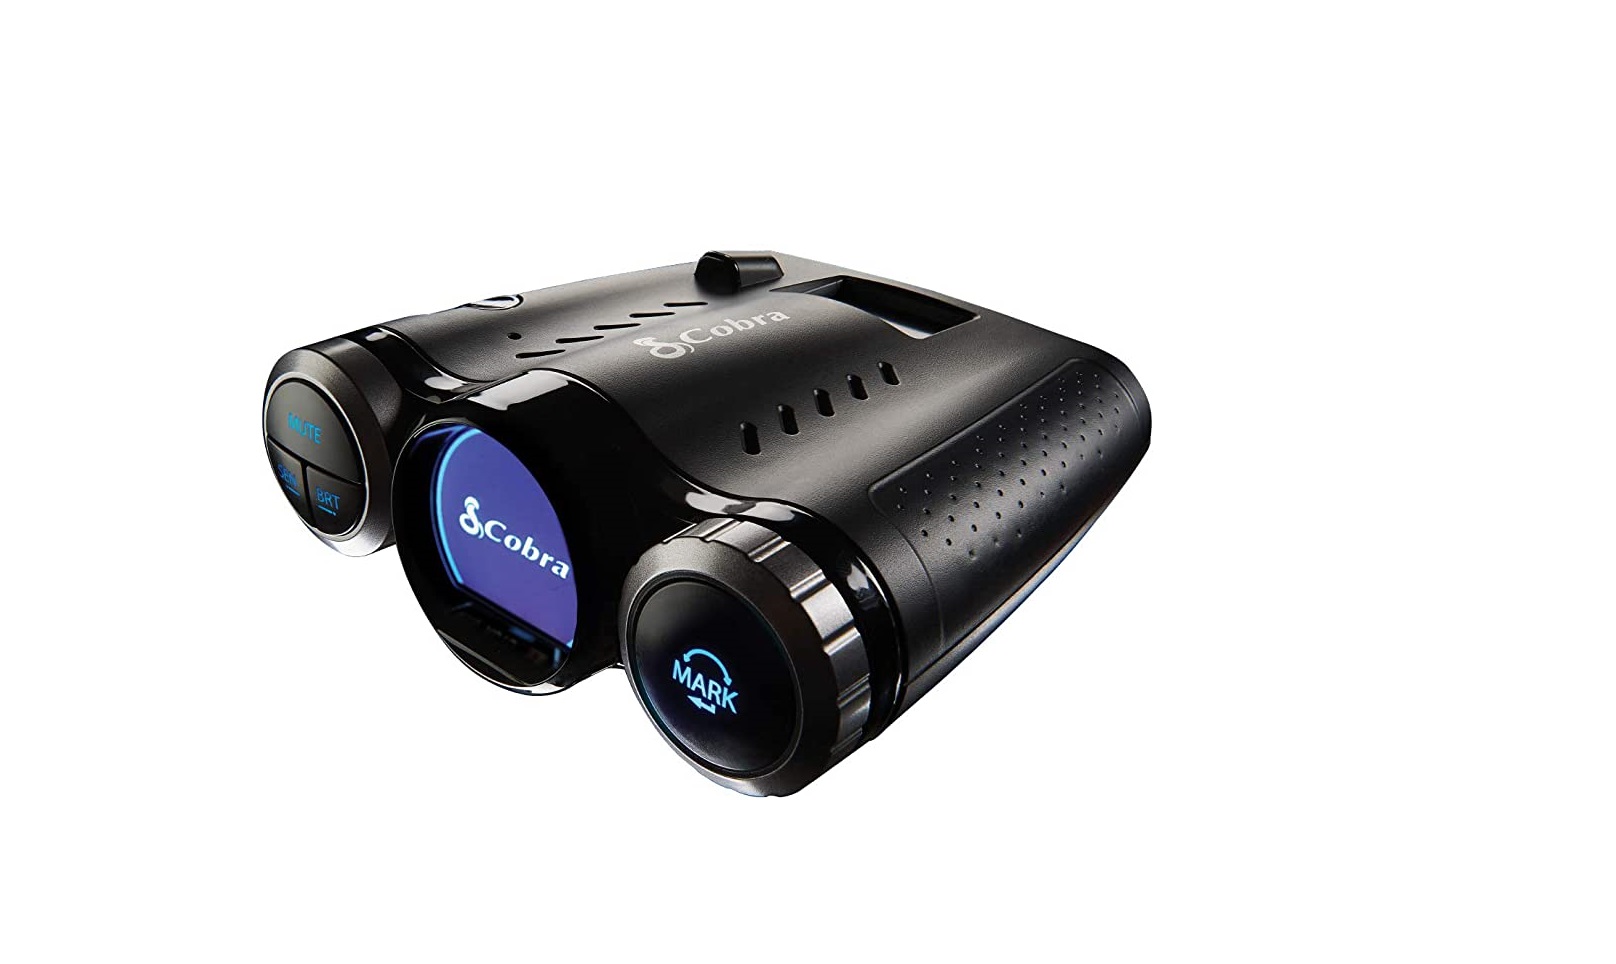
Controls & Features
Using Road Scout
- Plug small end of SmartCord into modular jack on Road Scout and large end of SmartCord into your car’s lighter/accessory socket.
- Road Scout should power on automatically. If not, press the device’s power button.
NOTE: You can easily access and customize all of your Settings and Preferences by pressing and holding the SEN and BRT buttons. See Settings and Preferences for details.

Using SmartCord USB
Mute Button:
- Press to mute the audio for a specific alert.
- Press three times to lock out a false alert.
- Press twice while receiving a locked-out alert to unlock.
- When connected to iRadar press and hold the mute button on unit or cord to manually report to other users a verified X or K-band alert, or a police officer observing traffic.
- Alert Light: Blinks red when receiving a laser alert.
- Power Light: Lights green when device is powered on.
- USB Charging Port: Charge smartphones, tablets and other USB-charged devices.

Controls & Features

Power
Press to power on. Hold for two seconds to power off.
SEN
Press SEN to adjust the X and K band radar detection sensitivity/range. Auto = speed adjusted. The slower you travel, the shorter the X and K band detection range. At 50 mph and above, X and K detectio range is at maximum. Ka band detection range is
always at maximum, regardless of the SEN setting.
MUTE
To silence an alert, press the MUTE button during the alert. Once the radar or laser encounter has passed, the mute will disengage, and the audio will return to your preset level. You can also silence an alert by pressing the Smart Cord MUTE button.
BRT Brightness. Press to adjust the display brightness.
MARK
mark a location for future alerts:
- Press MARK twice
- Rotate the Volume/Selector Ring to select the type of marker
- Press MARK again to confirm
To unmark a location alert, press MARK twice while receiving a marker alert.
To start an emergency recording, hold MARK until Road Scout states “Emergency Recording On”. The emergency recording will automatically return to normal loop recording once the emergency record loop is complete.
Rotary Dial
Rotate to adjust volume. When in the Menu or using MARK, rotate to change the setting.
Display

Display and Menu
Signal Band Indicator
Displays the type alert:
- X Band (commonly false alerts)
- K band (used by police radar and false alerts)
- Ka band (almost always police radar)
- Laser (almost always police)
Signal Strength Meter
Displays the signal strength, or how close, the alert is. The more alert bars displayed, the stronger the signal strength.
Sensitivity Indicator
Displays the selected radar sensitivity mode (see Controls & Features for more information).
Bluetooth® Indicator
Bluetooth icon appears when Road Scout is connected to device via Bluetooth.
Menu
The Menu is used to adjust settings. The menu is divided into Radar and CAM (Camera) categories.
enter the Menu:
- Hold SEN and BRT buttons until MENU is displayed.
navigate the Menu:
- The selected Menu item is displayed in white text.
- Rotate the Volume Ring to change the selected (white) Menu item.
- Press the MARK button to set the selected Menu item.
restore factory default settings:
- Hold the Power, SEN and BRT buttons while powering on the Road Scout.
- Press MARK button when prompted.
Troubleshooting
Road Scout does not seem to detect radar consistently at long ranges
If you are using AUTO sensitivity mode, be aware that AUTO mode changes Road Scout’s X and K radar detection range based on your speed. The slower you are traveling, the shorter the detection range of X and K radar. Select HIGH sensitivity mode to always
detect radar at maximum distances. Because Ka radar is primarily used by police, Road Scout always detects Ka band radar at maximum range.
REFRENCESS LINK
https://www.cobra.com/products/cobra-road-scout


