Emerson Evergrind Disposal

EVERGRIND™ DISPOSER IN-HOME FULL-SERVICE WARRANTY
- E101 – One-Year Warranty
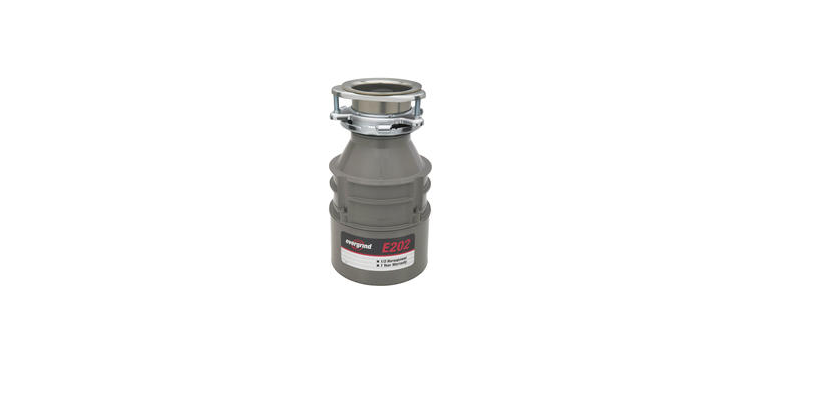
- E202 – One-Year Warranty
- E303 – Three-Year Warranty
- E404 – Four-Year Warranty
This warranty covers all replacement parts and repairs labor to correct defects in disposer material and workmanship for the full warranty period from the date of installation in your home. If warranty service is required during the warranty period, contact an authorized Evergrind™ service center to replace or repair the unit in your home at no cost to you. If you have questions concerning your disposer or determining when service is needed, please call the toll-free AnswerLine® to obtain the name of the authorized service center nearest you. The toll-free number is 1 (800) 558-5700. you may also have other rights which vary from state to state. If the manufacturer determines the unit should be replaced rather than repaired, the warranty on the replacement unit will be limited to the unexpired term of the original warranty. No other express warranty, written or oral, applies.
If your disposer does not operate, follow these steps in order:
- sponsor is connected to the electric power and the fuses or circuit breakers are in working order. Reread the instruction book to ensure that you are operating the disposer correctly.
- Call for information or for the location of the authorized service center nearest you. (The toll-free AnswerLine® number is 1 800 558-5700.)
- Write to us if a satisfactory solution is not reached in steps 1 and 2. Our address is:
Service Department
4700 21st Street
Racine, Wisconsin 53406 USA
When writing or calling, supply the following information: date, your name, your address, and your phone number. Describe the product by model number, serial number, date purchased, place purchased, and service history (including name and address of service agent). Clearly describe the problem and service required.
NOTE:
No separate registration card is enclosed. Warranty is determined by unit serial number and date of installation. Purchase or installation receipt may be required to verify warranty status.

Mounting Assembly
A: Stopper
B: Sink Flange
C: Fiber Gasket
D: Backup Ring
E: Mounting Ring
F: Screws (3)
G: Snap Ring
Disposer
H: Mounting Gasket
I: Lower Mounting Ring
J: Dishwasher Inlet
K: Discharge Outlet
L: Wrenchette
Two-Bolt Discharge
M: Bolts (2)
N: Discharge Tube (1-1/2″ Diam.)
O: Flange P: Gasket
TOOLS, MATERIALS, AND ACCESSORIES YOU MAY NEED:
Phillips Screwdriver, Drain Auger, 3/8″ Electrical Clamp Connector, Wire Nuts (2), Second 1 1/2″ Drain Trap, Hammer, Hacksaw, Water Hose Clamp, Pipe Wrench, Copper Ground Wire, Dishwasher Drain Connection Kit, Air Gap, Electrical On/Off Switch, Drain Tube Extension Read through the entire Installation, Care & Use manual before installing the disposer. Determine which of the tools, materials, and accessories you will need before you begin. Make sure you have all necessary disposer parts before installing the disposer.
INSTRUCTIONS
INSTRUCTIONS PERTAINING TO RISK OF FIRE, ELECTRIC SHOCK, OR INJURY TO PERSONS (SAVE THESE INSTRUCTIONS)
Warning
- Read all instructions before using the appliance.
- To reduce the risk of injury, close supervision is required when an appliance is used near children.
- Turn the power switch to the off position before attempting to clear a jam, remove an object from the disposer, or press the reset button.
- When attempting to loosen a jam in a waste disposer, use the self-service wren chette or a long wooden object such as a wooden spoon or the wooden handle of a broom or mop.
- When attempting to remove objects from a waste disposer use long-handled tongs or pliers. For a disposer that is magnetically actuated, use nonmagnetic tools.
- To reduce the risk of injury by materials that are expellable by a waste disposer, do not put the following into a disposer: clam or oyster shells, caustic drain cleaners or similar products, glass, china, or plastic, large (whole) bones, metal (such as bottle caps, tin cans, or utensils), hot grease or other hot liquids.
- This product is designed to dispose of normal household food waste; inserting materials other than food waste into the disposer could cause personal injury and/or property damage.
- To reduce the risk of injury, do not use the sink containing the disposer for purposes other than food preparation (such as baby bathing or washing hair).
- Do not dispose of the f
- LEAK HAZARD: Regularly inspect disposer and plumbing fittings for leaks, which can cause property damage and could result in personal injury. PELIGRO DE FUGA: Revise periódicamente el triturador y los acoples de plomería para ver si hay fugas que puedan ocasionar daños materiales y puedan provocar lesiones personales. FIRE HAZARD: following in the disposer: paints, solvents, household cleaners tic
- wrap, or whole corn husks. help prevent entry or ejection of material and water.
- items such as rags, paper, or aerosol cans near the disposer. Do not store or use gasoline vicinity of the disposer.
OPERATING INSTRUCTIONS
- Turn on the wall switch to start the disposer.
- Slowly insert food waste into the disposer and position the stopper to minimize possible ejection of material while grinding (see Figure A).
- After grinding is complete, turn the disposer off and run the water for at least a few seconds to flush the drain line.
CHECK INSTALLATION DIMENSIONS A:
Disposer Height B: Distance from the bottom of the sink bowl to the centerline of the discharge outlet. (Add 1/2″ when stainless steel sink is used.) C: Distance from the centerline of the discharge outlet to the end of the discharge tube. D: Disposer Width E: Distance from disposer vertical centerline to centerline of P-trap connection. F: Centerline of disposer discharge to centerline at waste pipe entering the wall. (Dimension “F” must be greater than 1/4″ to prevent standing water in the disposer.)
Reference Link
https://insinkerator.emerson.com/en-us/shop/insinkerator/insinkerator-e202
