Pyle audio PD1000BA Preamplifier User Manual
FOREWORD
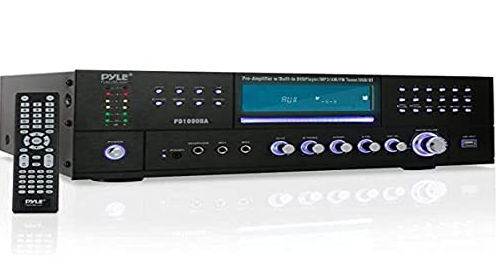
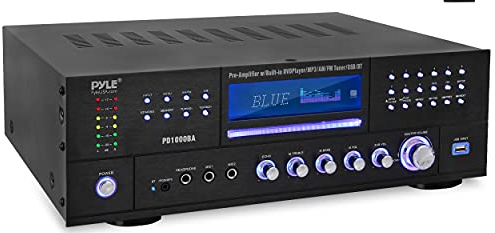
Your New Pyle Amplifier gives you the power and versatility you need in a professional sound system. The amplifier’s wide frequency response makes it suitable for amplifying music or vocal program material. It can be used in meeting halls, houses, restaurants, schools, stores, or for paging systems. Please read this manual thoroughly before you attempt to set up and use the amplifier. It contains a range of installation suggestions as well as instructions to ensure safe usage. Installed properly, you can expect years of trouble-free service from this product.
NOTICES AND DISC PROTECTION
NOTES ON HANDLING
- The top and rear panels of the unit may become warm after a long period of use. This is not a malfunction.
- When the unit is not in use, be sure to remove the disc and turn off the power.
- If you will not use the unit for a long period, the unit may not function properly in the future. Turn it ON and use the unit occasionally.
- Do not place foreign objects on the tray.
LOCATION
Do not locate the unit in places such as:
- Near heating devices or in an enclosed car.
- High temperature (47°C/116.6°F or higher) or high humidity (90% or higher).
- Dirty places.
- Avoid direct exposure to sunlight.
DISTURBANCE
When you place this unit near a TV, radio, or VCR the playback picture may become poor and the sound may be distorted. In this case, place the unit away from the TV, radio, or VCR.
NOTES ON MOISTURE CONDENSATION
The pickup may be condensed with water under the following situation.
- When you bring the unit directly from a cold place to a warm place.
- When you use the unit in a room where you just turned on the heater or a place where the cold air from the air conditioner directly hits the unit.
- During the summer, when you use the unit in a hot and humid place just after you move the unit from an air-conditioned room.
- The room is vaporous or damp.
If condensation exists, the unit will not operate properly. Remove the disc, connect the power cord of the unit to the wall outlet, turn on the unit, and leave it for two or three hours. After two or three hours, the unit will have warmed up and evaporated any moisture. Keep the unit connected to the wall outlet and moisture condensation will seldom occur.
ON STORING DISCS
- Do not store discs in a place subject to direct sunlight or near a heat source.
- Do not store discs in a place subject to moisture and dust such as a bathroom or near a humidifier.
- Store discs vertically in a case. Stacking or placing objects on discs outside or their case may cause warping.
STRUCTURE OF DISC CONTENTS
Normally, DVD discs are divided into titles, and the titles are subdivided into chapters. Audio CD5 is divided into tracks.

Each title, chapter, or track has an assigned number, which is called the title number, chapter number, or track number respectively. There may be discs that do not have these numbers.
PLAYABLE DISCS AND ACCESSORIES
The following discs can be played:

- Discs than those listed above cannot be played.
- Non-standardized discs, even if they may be labeled as above cannot be played.
- The performance of a recorded disc depends on the method and quality of disc burning. In some cases, the disc may not be played.
ATTENTION
Wireless BT Input mode is a priority over all other audio input modes (like MP3 Player, AM/FM Tuner, DVD player, and AUX inputs). All audio inputs will not work if the button is pressed on BT mode status. First, check if Wireless BT is switched ON or OFF. Press BT input mode to switch ON or OFF.
- LIGHT: Light indicates signal intensity
- MEMORY: After a station has been found, you can store the station by pressing the MEMORY button, and the screen will display MEM above a channel number,
- ST/MONO: Stereo and Mono selector.
- INPUT: This is used to select the input sources DVD/CD/USB, TUNER, iPod/MP3 AUX
- MENU CONTROL: This is used to increment and decrement levels for the selected function of Master Volume, Bass, Treble, Balance, and Auto Station seek.
- AM/FM: Press it to select/FM when it is tuning
- A/B SPEAKERS OUTPUT SELECTOR: Three modes: A, B, A+B
- TUNING- / TUNING+: The two keys are used to adjust to the best signal of the stations.
- FUNCTION DISPLAYED FLUORESCENT WINDOW
- REMOTE SENSOR WINDOW
- OPEN/CLOSE CONTROL: Press this key at any play mode will always turn to disc play mode
- PLAY/PAUSE: Play and pause control
- REV, FR: Quick/backward search the set
- NUMBER KEYS: While in radio status, you can choose the music number directly for example choose “28”, press the “10+” key twice, then press “8”, and you can get “28” music or station.
- FWD.FF: It is quick to enter lfonivard search the set
- PREV: Top a song/top a set
- STOP: Stop control
- NEXT, SKPF: Next song/next set
- BT ANTENNA: Wireless BT receiver antenna for better signal.
REAR PANEL FUNCTION

- TUNER ANT: Connect AM and FM antennas.
- R/L OUTPUT
- VIDEO OUTPUT, S-VIDEO OUTPUT, COMPONENT VIDEO OUTPUT: Press the “relevant” key on the remote control to choose the output mode
- . DIGITAL AUDIO OUTPUT: One coaxial one optical, this output can connect the amplifier with Dolby Digital or DTS decoder to play movies with correspondent records
- COOLING FAN
- SUB-WOOFER OUTPUT JACKS 1&2
REMOTE DEVICE FUNCTION

- The remote control should be operated within 6 meters and the scope of 30° in front of the receiver.
- Make sure that there is no big obstacle between the remote control and the machine.
- The remote sensor should be far away from the light. High amounts of light can affect its performance.
Remote Control Operation
- POWER STANDBY button
- . Mode VIDEO button
- Setup button
- UP/DOWN/RIGHT
- Play/Enter button
- Title button
- Stop button
- PLAY/Pause button
- Frequency DOWN button
- Frequency UP button
- AM/FM button
- AUTO button
- Langauge button
- . Channel UR button
- ZOOM button
- . Select the input model button
- . MENU CONTROL button
- . Volume + button
- EJECT Open/Close button
- . PAL/NTSC switch button
- Number button
- Time select button
- Menu button
- PBC MENU button
- PROGRAM button
- Display button
- NEXT/CH + button
- PREV/CH – button
- A/B SPEAKERS OUTPUT SELECT button
- MEMORY button
- USB/DVD button
- Subtitle button
- Repeat button
- A-B Repeat button
- Mute button
- Volume – button
REAR PANEL CONNECTION
Connecting to Amplifier

SAFETY INSTRUCTIONS
- Make sure that all connections are properly connected and the main volume is set to a minimum level before turning ON the unit.
- When more than one pair of speakers are used, (especially the main speaker output) make sure that the speakers used have the same wattage and impedance, otherwise, the unit may be damaged under high power or long-term operation.
- To avoid humming sounds and unwanted noise, make sure that all the wires are properly inserted.
- For speaker cords, strip off the vinyl coating and twist the wire tip. Push down the pink jack or loosen the screw terminal, before inserting the wire tip, then fasten it and tighten the screw. Be careful not to let the wires stick out of the terminal otherwise, this may cause a short circuit when wires of different terminals contact each other.
- After the unit is turned ON, adjust the main volume to the desired level same with the bass and treble volume, etc.
BASIC CONNECTION
Connecting to a TV with an Audio/Video cable

- If the TV has an S-video input, connect the DVD player with an S-video cable. When using an S-video cable, do not connect the yellow video cable.
Note:
The volume adjusting only works when it’s connected to a power amplifier. While it’s connected to a TV set without speakers, the volume cannot be adjusted on this device. You can only adjust the volume on the TV set.
LISTEN TO THE RADIO, LINE INPUT OPERATION
- MP3, AUX EXTERNAL CONNECTION OF AUDIO SIGNAL INPUT Press the INPUT key on the remote control or on the unit’s panel. The unit can input MP3/AUX and AM/FM external connection audio signals, the display shows the status. The audio signal of any equipment can be connected.
- INPUT TRANSFER TO MP3, AUX Press the INPUT key on the remote control or on the unit’s panel. The unit can input MP3/AUX and AM/FM external connection audio signals, the display shows the status. The audio signal of any equipment can be connected.
- LISTEN TO RADIO FM/AM
Press the INPUT key to transfer the radio reception, then press the [FM/AM] key on the machine or in the remote control. The machine will turn into FM/AM mode, and the display shows the frequency and the channel number of the current radio station.
NOTES: The machine will store the radio station into the current channel number when the machine receives one. The effect is much related to the intensity of the signal. If there is no signal or an immethodical signal, you’d better choose a manual scan or frequency selection scan.
FREQUENCY SELECTION SCAN Press the [TIME] key on the remote control, and the display shows the status. Then you can input the frequency of the radio station you want to listen to..
ADVANCED PLAYBACK
TIPS: If the reception is not good or there’s noise and it doesn’t become better even after changing into monophony mode, you should suitably adjust the antenna to a good position until you get the best reception.
USB READER FUNCTION
The machine will play USB the same as disks when there is only a single form of a playable file in the USB disk or in the triple card.
MP3 and WMA files have priority over others to be played after the machine has scanned if the USB disk contains several forms of playable files.
USB/DVD
When the device is playing a DVD, you can press the [USB/DVD] key, then the screen will display READ USB after pressing the [ENTER] key to turn to the USB status. The same when playing USB and you can change to DVD status by following the above operation.
USB COPY SUBTITLE KEY FUNCTION
You can insert USB equipment when the machine is playing MP3, CD, or MPEG4. Documents will be copied into the USB after you press the [SUBTITLE] key on the remote control.
- When playing an MP3 disk, press the [SUBTITLE] key to copy the files into the USB.
- When playing a CD disk, press the [SUB TITLE] key to copy the songs into USB then change them into MP3 files. (select a single file or all files to transfer)
NOTES:
It only works when the USB equipment’s capacity is large enough. Some styles of the machine won’t have the function.
VOLUME AND MUTE
Press “+” at the right of the VOLUME to increase volume, and “-” to decrease volume. The first press is MUTE which will display Mute no voice, and the second press will return to normal.
MENU
This is used to increment and decrement the level for the selected function of Master Volume, Bass, Treble, Balance, and Auto Station seek. By pressing the MENU key you can select the functions above. If you want to adjust bass, press the MENU key to select bass, then press (master volume+) or (master volume-) on the remote control you can increase or decrease bass. If you want to adjust the treble, press the MENU key to select treble, then press (master volume+) or (master volume-) on the remote control you can increase or decrease the treble. Others function above can also be adjusted in the same way.
SPECIAL FUNCTION PLAYBACK
JPEG DISC PLAYBACK
When playing a JPEG disc, a navigation menu will be displayed automatically if the disc is loaded in succession. In the menu, use the UP or DOWN cursor button to select a file, then press “ENTER/PLAY” to be played as a slideshow. Press PREV or NEXT to select the previous or the next picture. Press PAUSE to pause the current picture for viewing, and press ENTER/PLAY, to return to normal playing.
MP3 PLAYBACK
Place the MP3 disc on the disc tray, the DVD player will begin to play once. Simultaneously, a navigation menu will be displayed automatically if the disc is loaded In succession. In the menu, use UP or DOWN cursor button to choose a folder. Press the “ENTER/PLAY” button to confirm. ln the folder, use the UP or DOWN button to select the file, then press “ENTER/PLAY” to play this file. On this page, using the LEFT cursor button will return to the previous menu. Press PREV or NEXT to go back to the previous or next page.

MPEG-4 DISC FUNCTION INTRODUCTION
MPEG-4 is the fourth video and audio encoding standard released by MPEG (The abbreviation of “Moving Pictures Experts Group”). VCD is based on MPEG-1 technology and DVD is based on MPEG-2. MPEG-4 takes advantage of narrow bandwidth, pursuing the best picture quality by compressing and transmitting the data in frame reconstructed technology. The audio data Is compressed by WMA standard. MPEG-4 is the most advanced compression technology standard in the AV field. It has the highest compression rate.
By MPEG-4 technology, we can encode and compress a DVD film into one or two CD-R discs with pretty good picture quality or can burn several films that have the same quality as VCD into one CD-R disc, or burn several films that have a similar quality to DVD into DVD-ROM disc.
TROUBLESHOOTING
Before calling for service, you can perform the checks described in the troubleshooting guide for immediate solutions.


