
![]()
RCA RCPJ100A1 Alarm Clock Time Projector Guide

Warning
Some of the following information may not apply to your particular product; however, as with any electronic product, precautions should be observed during handling and use.
- Read these instructions.
- Keep these instructions.
- Heed all warnings.
- Follow all instructions.
- Do not use this apparatus near water.
- Clean only with a dry cloth.
- Do not block any ventilation openings. Install in accordance with the manufacturer’s instructions.
- Do not install near any heat sources such as radiators, heat registers, stoves, or other apparatus (including amplifiers) that produce heat.
- Do not defeat the safety purpose of the polarized or grounding-type plug. A polarized plug has two blades one wider than the other. A grounding-type plug has two blades and a third grounding prong. The wide blade or the third prong is provided for your safety. If the provided plug does not fit into your outlet, consult an electrician for the replacement of the obsolete outlet.
- Protect the power cord from being walked on or pinched particularly at plugs, convenience receptacles, and the point where they exit from the apparatus.
- Only use attachments/accessories specified by the manufacturer.
- Use only with the cart, stand, tripod, bracket, or table specified by the manufacturer, or sold with the apparatus. When a cart is used, use caution when moving the cart/ apparatus combination to avoid injury from tip-over.
ADDITIONAL SAFETY INFORMATION
- The AC/DC adapter supplied with this product is intended to be correctly oriented in a vertical or floor-mount position.
- Do not use unauthorized chargers or power adapters. Use only chargers or power adapters that came with your product or that are listed in the user’s guide.
- The apparatus shall not be exposed to dripping or splashing and no objects filled with liquids, such as vases, shall be placed on the apparatus.
- Always leave sufficient space around the product for ventilation. Do not place the product in or on a bed, rug, in bookcase, or cabinet that may prevent air flow through vent openings.
- Do not place lighted candles, cigarettes, cigars, etc. on the product.
- Care should be taken so that objects do not fall into the product.
- Do not attempt to disassemble the cabinet. This product does not contain customer-serviceable components.
- The marking information is located at the bottom of the apparatus.
- To completely disconnect the power input, the AC/DC adapter of the apparatus shall be disconnected from the mains.
- AC/DC adapter is a disconnect device. The AC/DC adapter should not be obstructed OR should be easily accessed during intended use.
- The ventilation should not be impeded by covering the ventilation openings with items such as newspapers, tablecloths, curtains, etc.
- No naked flame sources such as lighted candles should be placed on the apparatus.
- Attention should be drawn to the environmental aspects of battery disposal.
- The use of apparatus in moderate climates.
Before you begin
Refer to the Clock section for instructions on properly setting the Clock.
Battery back-up operation
- This clock is equipped with a time backup system that is powered by 2 AAA batteries (not included). The power failure protection circuit will not operate unless batteries are installed.
- When normal household power is interrupted, or the AC line cord is unplugged, the battery backup will power the clock to keep track of time and alarm settings programmed into memory.
- Normal operation will resume after AC power is restored so you will not have to reset the time or the alarm.
Note:
It is recommended to replace the batteries at least once per year even if no power failures have occurred.
To install the batteries:
- Open the battery compartment on the back of the clock by pressing on the tab and removing the cover.

- . Insert 2 AAA batteries (not included). Make sure to match the battery polarity marked in the battery compartment.
- Put the cover back on the compartment and click it into place.

Power failure indicator
If you have not installed batteries in the product, or the batteries run out while AC power is disconnected, the clock and alarm settings will be lost. After AC power is reconnected, the time 12:00 will be shown on the LCD screen to indicate that power was interrupted and you should readjust the time settings.
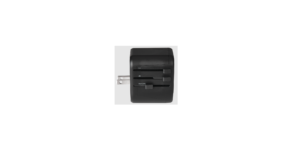
General controls
Front view

SNOOZE/LIGHT – Pauses the alarm for 8 minutes while it’s going off. Turns on the display and projector for 5 seconds when using battery power.
PROJECTOR – Projects the time onto your ceiling or wall TIME/DATE – Shows the current time in 12- or 24-hour mode. Press the MODE button on the back of the clock to display the date.
WEATHER SYMBOL
Shows the clock’s reading of the environmental conditions (humidity). Note that air conditioning or central heating will affect this weather symbol.
 Indicates that an alarm has been set and is active
 Shows the relative humidity (indoors).
 Shows the temperature (indoors).
TEMPERATURE TREND LINE – This shows the variation in temperature (indoor) over the last 12 hours.
Back view

MODE
Switches between time and date display. Press and hold to access time setting, calendar setting, and alarm setting modes.
UP
In time/calendar/alarm set modes, increases the hour, minute, or day by one. In normal time display mode, activates/deactivates the alarm (single press) or switches between 12- and 24-hour display (press and hold).
DOWN
In time/calendar/alarm set modes, decreases the hour, minute, or day by one. In normal time display mode, switches the temperature display between degrees Fahrenheit and Celsius.
MAX/MIN
Shows the maximum (press once) and minimum (press twice) humidity and temperature registered by the clock in the past 12 hours. SNZ – Pauses the alarm for 8 minutes while it’s going off.
Clock
Setting the clock manually
- In clock mode, press and hold Set time until the clock flashes to enter the clock setting mode.
- Press Hour + and Minute + to set the time.
- Press and hold to decrease or increase the time value quickly.
- The clock is in a 12-hour format. The PM indicator appears to show PM time.
- Press Set time to confirm and exit clock setting mode.
NOTE: By default, the time is displayed in 12-hour mode (AM/PM). If you’d like to switch to 24-hour mode, press and hold the UP button on the back of the clock until the time display switches.
Setting the calendar
- In normal time display mode, press the MODE button on the back of the clock once to enter calendar setting mode.
- Press and hold the MODE button on the back of the clock until the year digits flash on the display.
- Press the UP and DOWN buttons to adjust the year.
- Press the MODE button to confirm. The month’s digits flash.
- Press the UP and DOWN buttons to adjust the month.
- Press the MODE button to confirm. The date digits flash.
- Press the UP and DOWN buttons to adjust the date.
- To save and exit the calendar setting mode, press MODE.
Alarm function
Set alarm time
- In normal time display mode, press the MODE button twice to enter alarm set mode.
- Press and hold the MODE button until the hour digits start to flash.
- Press the UP and DOWN buttons to set the hour you want for the alarm. NOTE: If you’re using a 12-hour mode time display, make sure you choose the correct AM/PM setting when you set the hour!
- Press MODE to confirm. The minute’s digits start to flash.
- Press the UP and DOWN buttons to set the minutes you want for the alarm. 6. Press MODE to confirm and return to the normal time display.
NOTE:
If you go more than 10 seconds without pressing a button while setting the alarm, the clock returns to normal time display.
Turning the alarm on/off
- Press the UP button on the back of the clock to turn the alarm on or off. The alarm icon ( ) appears on the display when the alarm is active.
- While the alarm is sounding, you can press any button on the back of the clock (except for SNZ) to deactivate the alarm
Temperature and humidity
Showing maximum and minimum humidity/ temperature
- Press the MAX/MIN button on the back of the clock once to display the clock’s maximum humidity and temperature readings on its display.
- Press the MAX/MIN button a second time to display the clock’s minimum humidity and temperature readings on its display.
- Press the MAX/MIN button a third time to return to the current temperature and humidity readings.
Changing between Fahrenheit and Celsius By default, this clock displays its temperature readings in degrees Fahrenheit
- To switch to degrees Celsius, press the DOWN button on the back of the clock.
- To switch back to degrees Fahrenheit, press the DOWN button on the back of the clock again.
Clock projector

A time projector is located on the right side of the unit. Clock time can be projected onto ceilings or walls in a darkened environment for easy reference. The distance between the projector and the projected surface should be within 3 to 9 feet. To use the projector: Aim the projector arm at the surface you want to project onto. Rotate the FOCUS WHEEL to adjust the focus of the projected image. Note: These directions are for using the projector while the clock is plugged in. To use the projector and display on battery power, press the SNOOZE/LIGHT button on top of the clock. The display and projector will illuminate for 5 seconds.
Warranty information
To obtain repair or replacement within the terms of the warranty, the product is to be delivered with proof of warranty coverage (e.g. dated bill of sale), specification of defect(s), and transportation prepaid, to an approved warranty station. For the location of the nearest warranty station to you, call toll-free to our control office: 1-800- 645-4994. This Warranty is not transferable and does not cover products purchased, serviced, or used outside the United States or Canada.
The warranty does not extend to the elimination of externally generated static or noise, or to costs incurred for the installation, removal, or reinstallation of the product. The warranty does not apply to any product or part thereof which, in the opinion of the company, has suffered or been damaged through alteration, improper installation, mishandling, misuse, neglect, accident, or exposure to moisture.
REFERENCE LINK
https://www.rcaaudiovideo.com/clock-radios/?sku=RCPJ100A1


 Afrikaans
 Albanian
 Amharic
 Arabic
 Armenian
 Azerbaijani
 Basque
 Belarusian
 Bengali
 Bosnian
 Bulgarian
 Catalan
 Cebuano
 Chichewa
 Chinese (Simplified)
 Chinese (Traditional)
 Corsican
 Croatian
 Czech
Czech Danish
 Dutch
Dutch English
 Esperanto
 Estonian
 Filipino
 Finnish
 French
 Frisian
 Galician
 Georgian
 German
 Greek
Greek Gujarati
 Haitian Creole
 Hausa
Hausa Hawaiian
 Hebrew
 Hindi
Hindi Hmong
Hmong Hungarian
 Icelandic
 Igbo
Igbo Indonesian
 Irish
Irish Italian
 Japanese
 Javanese
 Kannada
 Kazakh
 Khmer
Khmer Korean
 Kurdish (Kurmanji)
 Kyrgyz
 Lao
Lao Latin
Latin Latvian
 Lithuanian
 Luxembourgish
 Macedonian
 Malagasy
 Malay
Malay Malayalam
 Maltese
 Maori
Maori Marathi
 Mongolian
 Myanmar (Burmese)
 Nepali
 Norwegian
 Pashto
 Persian
 Polish
 Portuguese
 Punjabi
 Romanian
 Russian
 Samoan
 Scottish Gaelic
 Serbian
 Sesotho
 Shona
Shona Sindhi
 Sinhala
 Slovak
 Slovenian
 Somali
 Spanish
 Sundanese
 Swahili
 Swedish
 Tajik
Tajik Tamil
Tamil Telugu
 Thai
Thai Turkish
 Ukrainian
 Urdu
Urdu Uzbek
Uzbek Vietnamese
 Welsh
Welsh Xhosa
Xhosa Yiddish
 Yoruba
 Zulu
Zulu