Bose T4S/T8S Tone Match Mixer Owner’s Guide
Product Overview
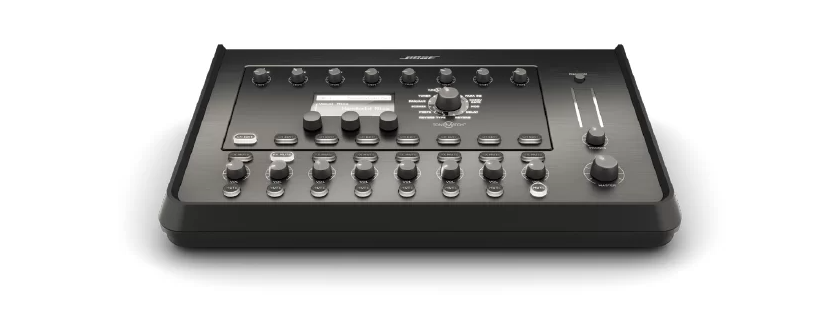
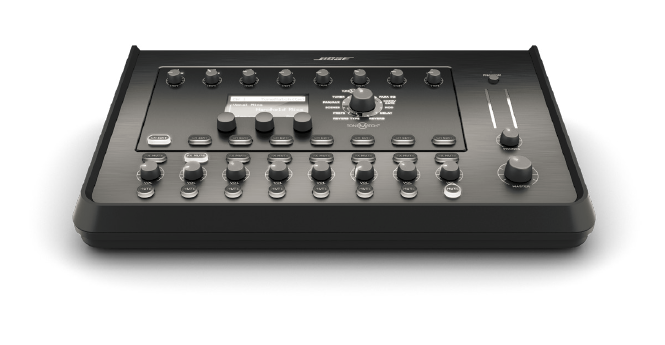
Take control of your music with T4S and T8S Tone Match® mixers, compact 4 and 8-channel interfaces designed for performers. Engineered with powerful DSP engines and intuitive user controls, they offer studio-quality EQ, dynamics, and effects processing. Sound great with integrated Bose® Tone Match® processing and zEQ, especially when connected to a Bose L1 or F1 system for full end-to-end tonal control. Play confidently on stage with these rugged Tone Match mixers using tactile controls,easy-to-read LED displays, and scene recall. Tone Match mixers, are the ultimate on-stage companions for performing artists.
Product Features
Powerful Audio Processing
- Updated, studio-quality effects with advanced digital audio processing
- Effects include compressor, limiter, de-esser, noise gate,chorus, flanger, phaser, tremolo, delay, and reverb
- Bose® Tone Match® processing for natural-sounding vocals and instruments
- zEQ focuses the sound of Tone Match presets for effective adjustments on the fly
- Independent Tone Match, EQ, dynamics and effects per channel
- Dedicated reverb for Aux sends, and a global shared reverb for use across all channels
- Master output EQ helps compensate for venue acoustics
- Full end-to-end tonal optimization when used with Bose L1 and F1 systems.
Seamless Live Control
- Tactile controls and indicators designed for live on-stage use by musicians and DJs
- Fast-learning user interface
- Built-in tap tempo delay, chromatic tuner, and recallable scenes
- LED display and illuminated controls are easy to read and use, even on dimly-lit stages High-Density Connectivity
- Unprecedented connectivity and control in a small digital stereo mixer
- Four (T4S) or eight (T8S) high-quality audio preamps with XLR-combo jacks for microphones or instruments, and switchable phantom power
- Two Aux inputs for additional sources two (T4S) or four (T8S) Aux sends
- USB-A and -B for USB drive playback or PC/Mac interfacing
- Tone Match outputs for digital audio and power (T4S only)
- Balanced ¼” TRS and XLR (T8S only) stereo outputs
- Independent headphone output Convenient Gig-Ready Features
- Rugged enclosure with a protective magnetic cover to protect controls and connectors
- Includes a Tone Match cable for connecting to a Bose L1 Model II or L1 Model 1S system for digital audio and power (T4S), or includes a universal power supply (T8S)
- The bottom insert allows you to use standard camera mounting accessories to keep your Tone Match mixer within reach.
Unpacking
See the following table for what your mixer carton will include:

Control and Connection Panels

- INPUT SIGNAL/CLIP LEDs (1-4) – Displays the input signal status in color:
Green: Indicates the presence of an input signal
Red: Indicates input source clipping - TRIM CONTROLS (1-4) – Adjusts the input sensitivity for the respective channel.
- DISPLAY – Provides function menus and system information.
- EDITING CONTROLS – These three rotary/push-button controls allow you to select or adjust items/values
appearing on the display. - CH EDIT BUTTONS (1-4) – Select the channel you want to modify.
- FX MUTE BUTTONS (1-4) – Bypasses the Mod, Delay, and Reverb effects on the selected channel.
- VOLUME CONTROLS (1-4) – Adjusts the volume level for the respective channel.
- MUTE BUTTONS (1-4) – Silences the audio output for the respective channel.
- MASTER VOLUME CONTROL – Adjusts the overall output level.
- HEADPHONE VOLUME CONTROL – Adjusts the volume level of the headphone output.
- ROTARY SELECTOR – Allows access to both global and channel-related parameters, which are adjusted
using the editing controls. - PHANTOM POWER SWITCH – Applies +48V power to input channels 1-4. A red LED indicates that the phantom power is on.
- HEADPHONE JACK – For use with headphones only, with a minimum impedance of 24Ω.
System Setup
Mounting Options
The T4S/T8S comes with a 1/4″ (6 mm) mounting screw insert. This enables it to be mounted onto a number
of available products that include a 1/4″ (6 mm) mounting screw, including a camera tripod stand.
Mounting the T4S/T8S on a Camera Tripod Stand
- Extend the camera tripod legs and secure them at the desired height.
- Remove the bracket from the top of the camera tripod stand and secure the bracket to the bottom of the
T4S/T8S with the screw. Make sure the small indentation on the T4S/T8S and the bump on the bracket are aligned. - Secure the bracket with the T4S/T8S back onto the camera tripod stand.

WARNING: Do not use the ToneMatch® T4S/T8S mixer with a tripod/stand that is unstable. The mixer is only designed for use on a 1/4″ screw (6 mm), and the tripod/stand must be capable of supporting a device with a minimum weight of 1.9 kg (4.1 lbs) and an overall size of 214 x 311 x 83 mm (8.4 x 12.25 x 3.25 inches). Using a tripod/stand that is not designed to support the size and mass of the T4S/T8S mixer may lead to an unstable and hazardous condition that could result in injury.
Connecting the T4S via Digital Connection
- Make sure the L1 Model 1S/II and T4S are powered off and the T4S Master volume control is set to a minimum.
- Plug one end of the ToneMatch® cable into the Power port/Digital Main Output R on the T4S. Plug the other end of the ToneMatch cable into the ToneMatch port on the power stand.
Note: To connect the T4S to two L1 Model 1S/II power stands, connect a second power stand to the Digital
Main Output L port on the T4S using a ToneMatch cable. - Turn on the mixer and then turn on the L1 Model 1S/II power stand.
- Connect your instruments and adjust levels. Refer to “Optimizing Input Gain and Output Volume”

Note: The T8S cannot be connected digitally and cannot be powered by the L1 Model 1S/II.
Operation
Reading the T4S/T8S Display
The display provides you with an interface for operating the mixer. Figure 14 shows a sample of display information and the basic operating conventions. The content of the display depends on the rotary selector position.

Using the Master Volume Control
The Master volume control adjusts the overall output level of the T4S/T8S ToneMatch® output and analog Master output. During normal operation, it is recommended to keep the Master control set at the 12 o’clock position. Once you have set volume levels for all channels, you can adjust the Master volume up or down from this position.
Muting a Channel
The Mute buttons silence the audio for the respective channel.
- To mute a channel, press the Mute button once. The Mute button glows white to indicate that the channel is
muted. “CH MUTE” will appear on the display for the respective channel.

- Press the Mute button again to unmute the channel. The Mute button dims to indicate that the channel is not
muted.
Muting Channel Effects
The FX Mute buttons mute only the Mod, Delay, and Reverb effects on the respective channel. Muting effects does not bypass ToneMatch presets, zEQ, Para EQ, and Comp/Gate settings.
- To mute effects on a channel, press the FX Mute button once. The FX Mute button glows white to indicate
that the channel effects are muted. “FX MUTE” will appear on the display for the respective channel.  Press the FX Mute button again to unmute the channel effects. The FX Mute button dims to indicate that the channel effects are not muted.
 Press the FX Mute button again to unmute the channel effects. The FX Mute button dims to indicate that the channel effects are not muted.
Using Global Functions
The Global functions allow access to settings that affect the overall operation of the mixer and all of its channels.
Selecting a Reverb Type
The Reverb Type function allows you to select the type of reverb that is applied to all input channels. The decay time (Time) and balance (Bal) are adjustable. Balance controls the ratio of early-to-late reflections.
Note: To mute the Reverb, press the Type control. Press it again to unmute.

- Select Reverb Type with the rotary selector.
- Press or rotate the Menu control and select which output to send the reverb too. You can send a different reverb type to either the Main or Aux sends.
- Rotate the Type control to display the list of reverbs:
A. Plate – Creates the ambiance of a typical studio plate reverb. Features adjustable time and balance (ratio of early/later reflections) parameters.
B. Small – Creates the ambiance of a small-sized space. Features adjustable time and balance (ratio of early/later reflections) parameters.
C. Medium – Creates the ambiance of a medium-sized space. Features adjustable time and balance (ratio of early/later reflections) parameters.
D. Large – Creates the ambiance of a large-sized space. Features adjustable time and balance (ratio of
early/later reflections) parameters.
E. Cavern – Creates the ambiance of an extremely large space. Features adjustable time and balance (ratio of early/later reflections) parameters. A unique and interesting reverb effect. - Rotate the Type control to scroll through the reverb list and highlight the desired reverb type.
- Press the Type control to select.
- Press the Time control to switch to Bal. Rotate the Bal. control to adjust the early-to-late reflection ratio (0% = all early reflections, 100% = all late reflections).
REFERENCE
DOWNLOAD PDF
AM801203_00_EN_viewable_compressed